Shutdown & Cleaning - After Direct Immersion Method Applications
Cleaning Roller
1.Relieve Pressure, page 7.
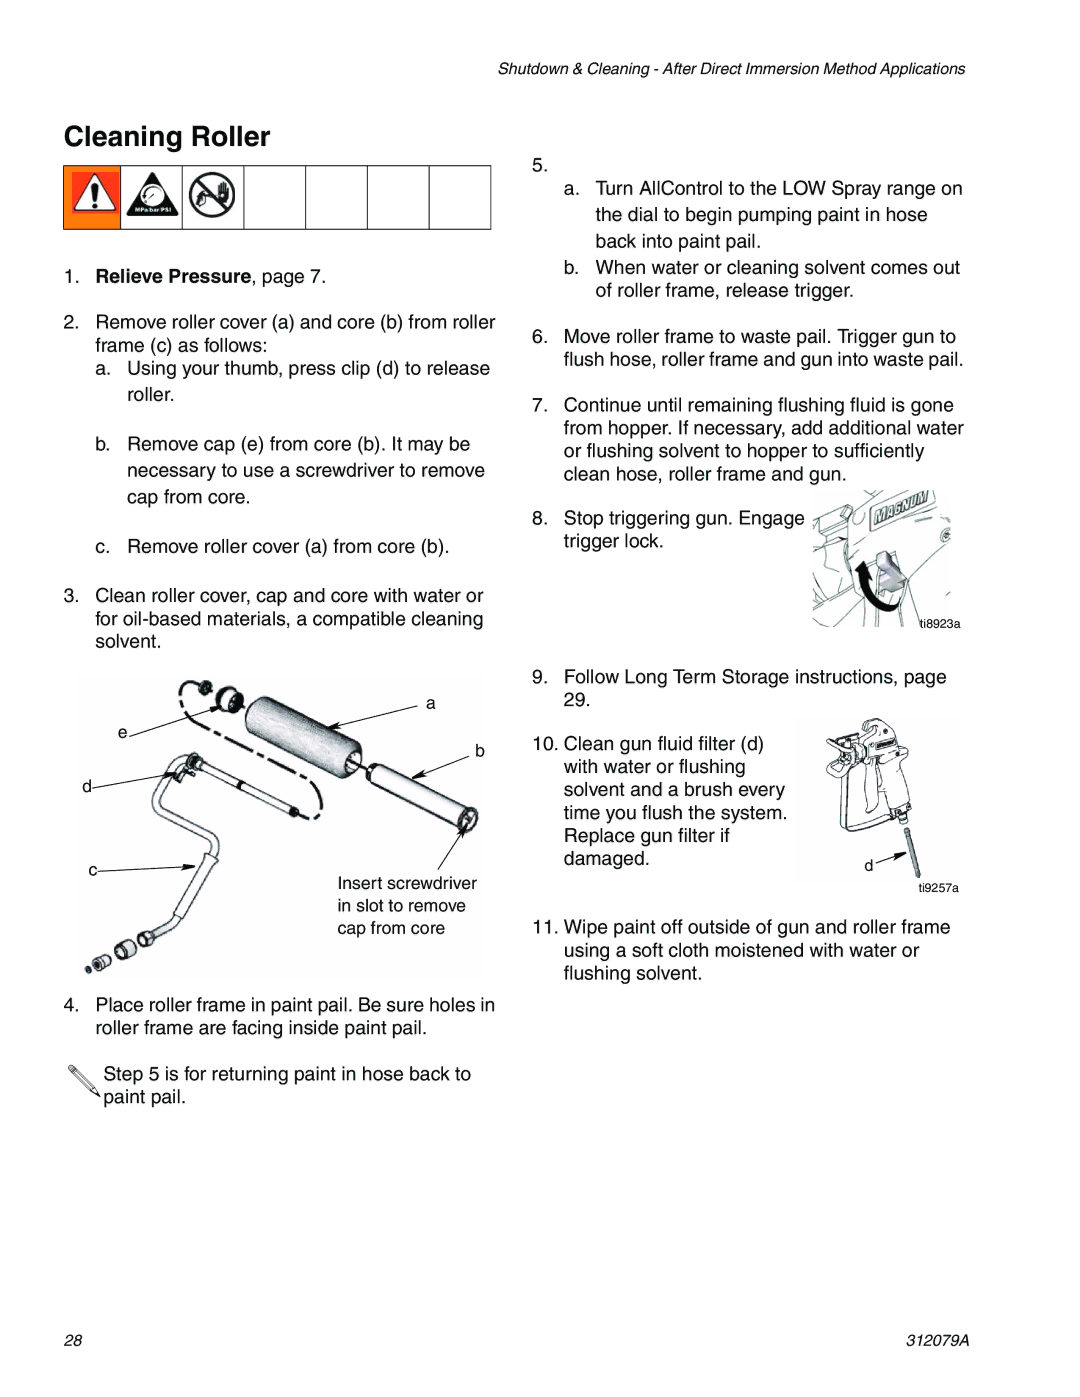
2.Remove roller cover (a) and core (b) from roller frame (c) as follows:
a.Using your thumb, press clip (d) to release roller.
b.Remove cap (e) from core (b). It may be necessary to use a screwdriver to remove cap from core.
c.Remove roller cover (a) from core (b).
3.Clean roller cover, cap and core with water or for
a
5.
a.Turn AllControl to the LOW Spray range on the dial to begin pumping paint in hose back into paint pail.
b.When water or cleaning solvent comes out of roller frame, release trigger.
6.Move roller frame to waste pail. Trigger gun to flush hose, roller frame and gun into waste pail.
7.Continue until remaining flushing fluid is gone from hopper. If necessary, add additional water or flushing solvent to hopper to sufficiently clean hose, roller frame and gun.
8.Stop triggering gun. Engage trigger lock.
ti8923a
9.Follow Long Term Storage instructions, page 29.
e ![]()
b
d![]()
c![]()
![]()
![]() Insert screwdriver
Insert screwdriver
in slot to remove
10.Clean gun fluid filter (d) with water or flushing solvent and a brush every time you flush the system. Replace gun filter if damaged.
d ![]()
ti9257a
cap from core
11.Wipe paint off outside of gun and roller frame using a soft cloth moistened with water or flushing solvent.
4.Place roller frame in paint pail. Be sure holes in roller frame are facing inside paint pail.
![]()
![]() Step 5 is for returning paint in hose back to
Step 5 is for returning paint in hose back to ![]() paint pail.
paint pail.
28 | 312079A |
