Inlet Valve Removal/Service
Move sprayer to a
1.Engage trigger lock and pull prime/pressure relief valve UP to release pressure.
ti16699a | ti16700a |
| |
ti14994a | ti14999a |
2. Remove material cup, suction tube, and battery.
ti16746a
ti16745a
3.Hold sprayer
ti16747a
NOTE: Make sure the spring also comes out. Use
4.Clean as much excess material from inlet cavity as possible. Make sure you also clean spring (a), inlet valve (b),
Inlet Valve Removal/Service
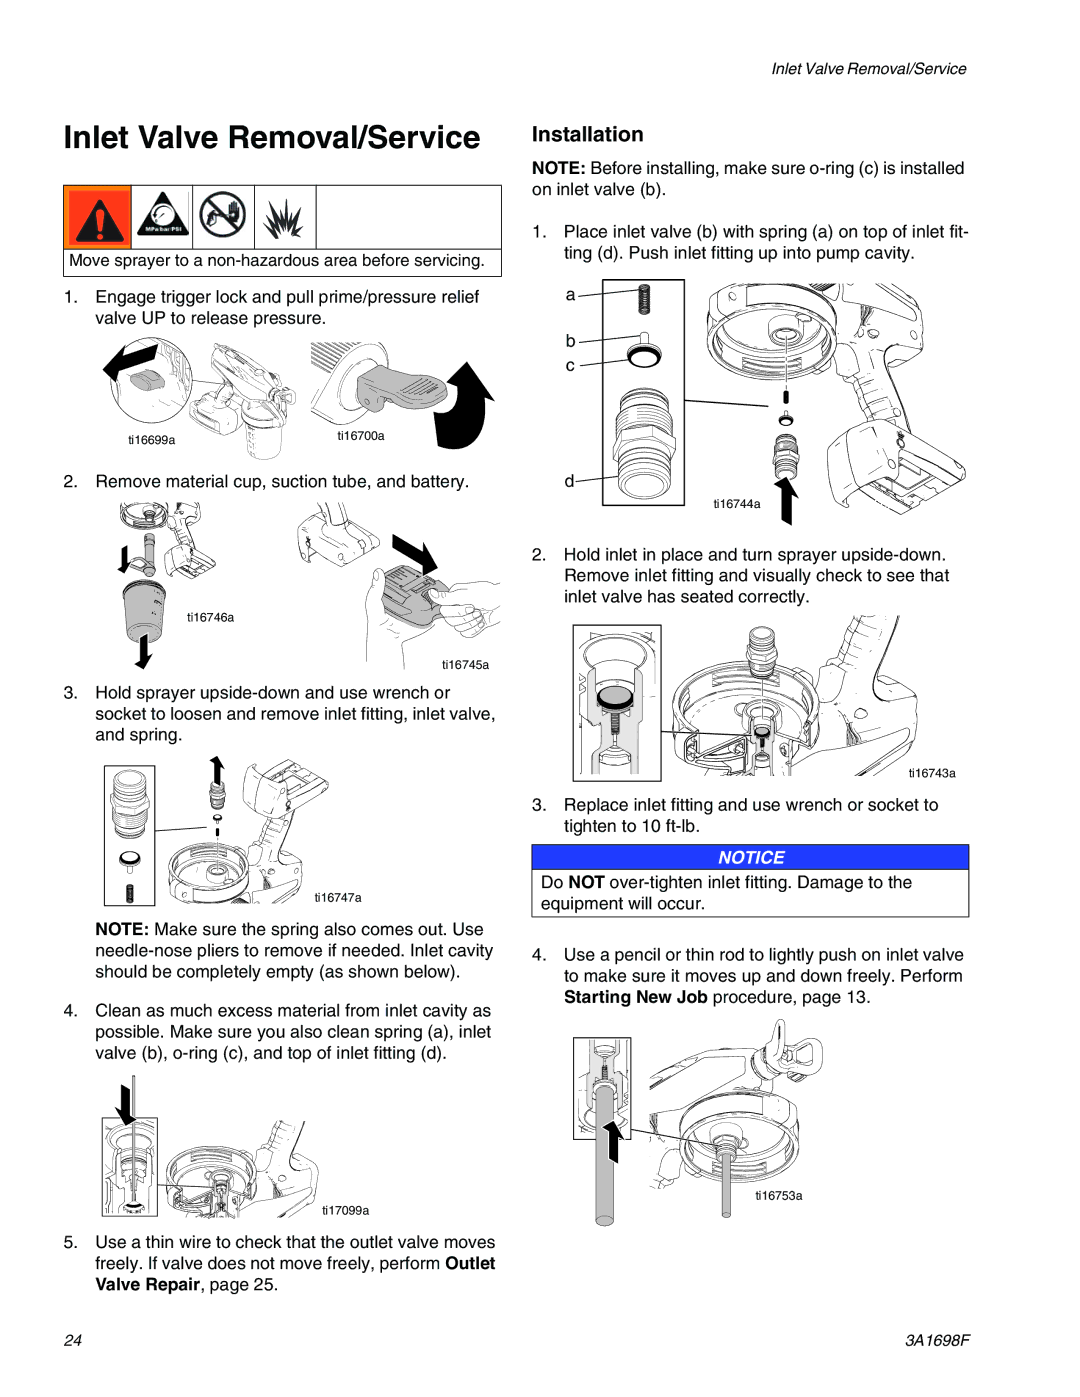
Installation
NOTE: Before installing, make sure
1.Place inlet valve (b) with spring (a) on top of inlet fit- ting (d). Push inlet fitting up into pump cavity.
a |
|
b |
|
c |
|
d |
|
ti16744a | ti15502a |
2.Hold inlet in place and turn sprayer
ti16743a
3.Replace inlet fitting and use wrench or socket to tighten to 10
NOTICE
Do NOT
4.Use a pencil or thin rod to lightly push on inlet valve to make sure it moves up and down freely. Perform Starting New Job procedure, page 13.

![]()
![]()
![]()
![]()
![]()
![]() ti16753a
ti16753a ![]()
![]() ti17099a
ti17099a
5.Use a thin wire to check that the outlet valve moves freely. If valve does not move freely, perform Outlet Valve Repair, page 25.
24 | 3A1698F |