Sprayer Setup
This sprayer arrives from the factory with a small amount of test material in the system. It is important that you flush this material from the sprayer before using it for the first time:
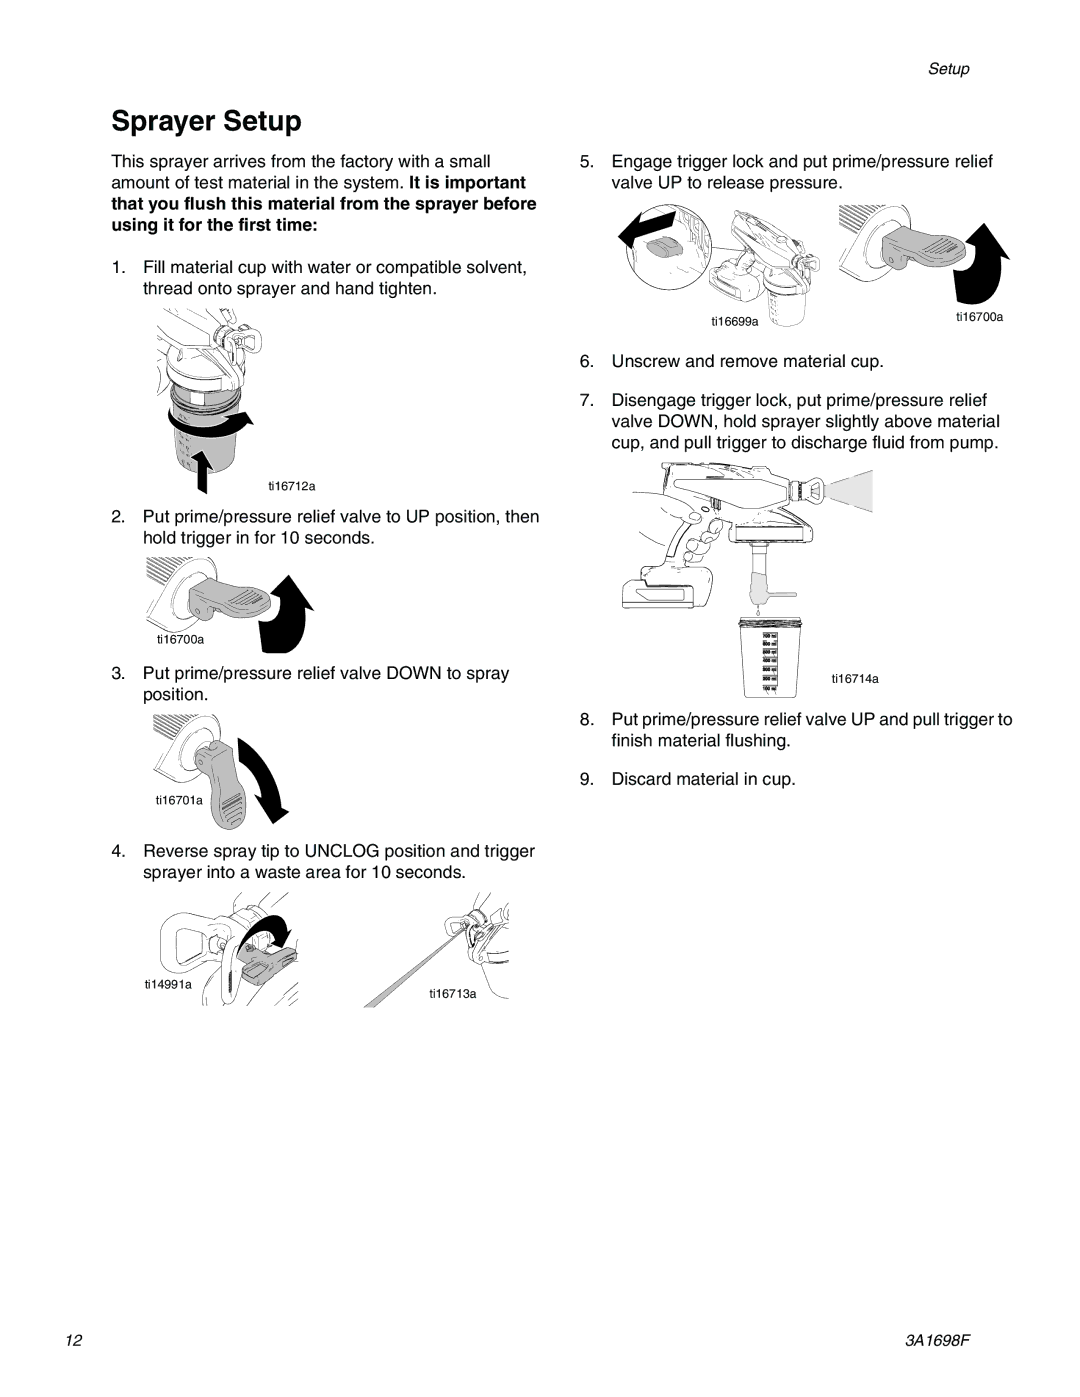
1.Fill material cup with water or compatible solvent, thread onto sprayer and hand tighten.
ti16712a
2.Put prime/pressure relief valve to UP position, then hold trigger in for 10 seconds.
ti16700a
3.Put prime/pressure relief valve DOWN to spray position.
ti16701a
4.Reverse spray tip to UNCLOG position and trigger sprayer into a waste area for 10 seconds.
ti14991a
ti16713a
Setup
5.Engage trigger lock and put prime/pressure relief valve UP to release pressure.
ti16699a | ti16700a |
|
6.Unscrew and remove material cup.
7.Disengage trigger lock, put prime/pressure relief valve DOWN, hold sprayer slightly above material cup, and pull trigger to discharge fluid from pump.
ti16714a
8.Put prime/pressure relief valve UP and pull trigger to finish material flushing.
9.Discard material in cup.
12 | 3A1698F |