Troubleshooting
240 VAC and 110 VAC Motor Control Board
Removal | Installation |
Perform Pressure Relief Procedure; page 8. Wait 5 minutes before servicing.
1.Remove Motor Shroud (for units equipped with Hose Reel only):
a.Remove bolts from motor shroud.
b.Remove pressure tube from sprayer.
c.Remove bottom screw from toolbox.
d.Loosen (but do not remove) four nuts on shelf. Carefully slide shelf forward.
e.Remove shroud.
f.Slide shelf back and tighten four nuts on shelf.
2.Remove all four screws (38) and cover (96).
3.Disconnect display connector (A) from motor control board (52).
4.Remove bottom two screws (39). disconnect poten- tiometer connector (C) from motor control board (52). Disconnect power cord connectors (D) and fil- ter board connectors (J) from ON/OFF switch (33) and remove control panel (68).
5.Disconnect WatchDog switch connector (X) and reed switch connector (L) from motor control board.
6.Disconnect motor control board power connectors
(K) from filter board (146).
7.Remove top two screws (39) and control box (61).
8.Disconnect transducer connector (E) from motor control board.
9.Disconnect motor connectors (F, G and H).
10.Remove six screws (27), two screws (102) and con- trol board.
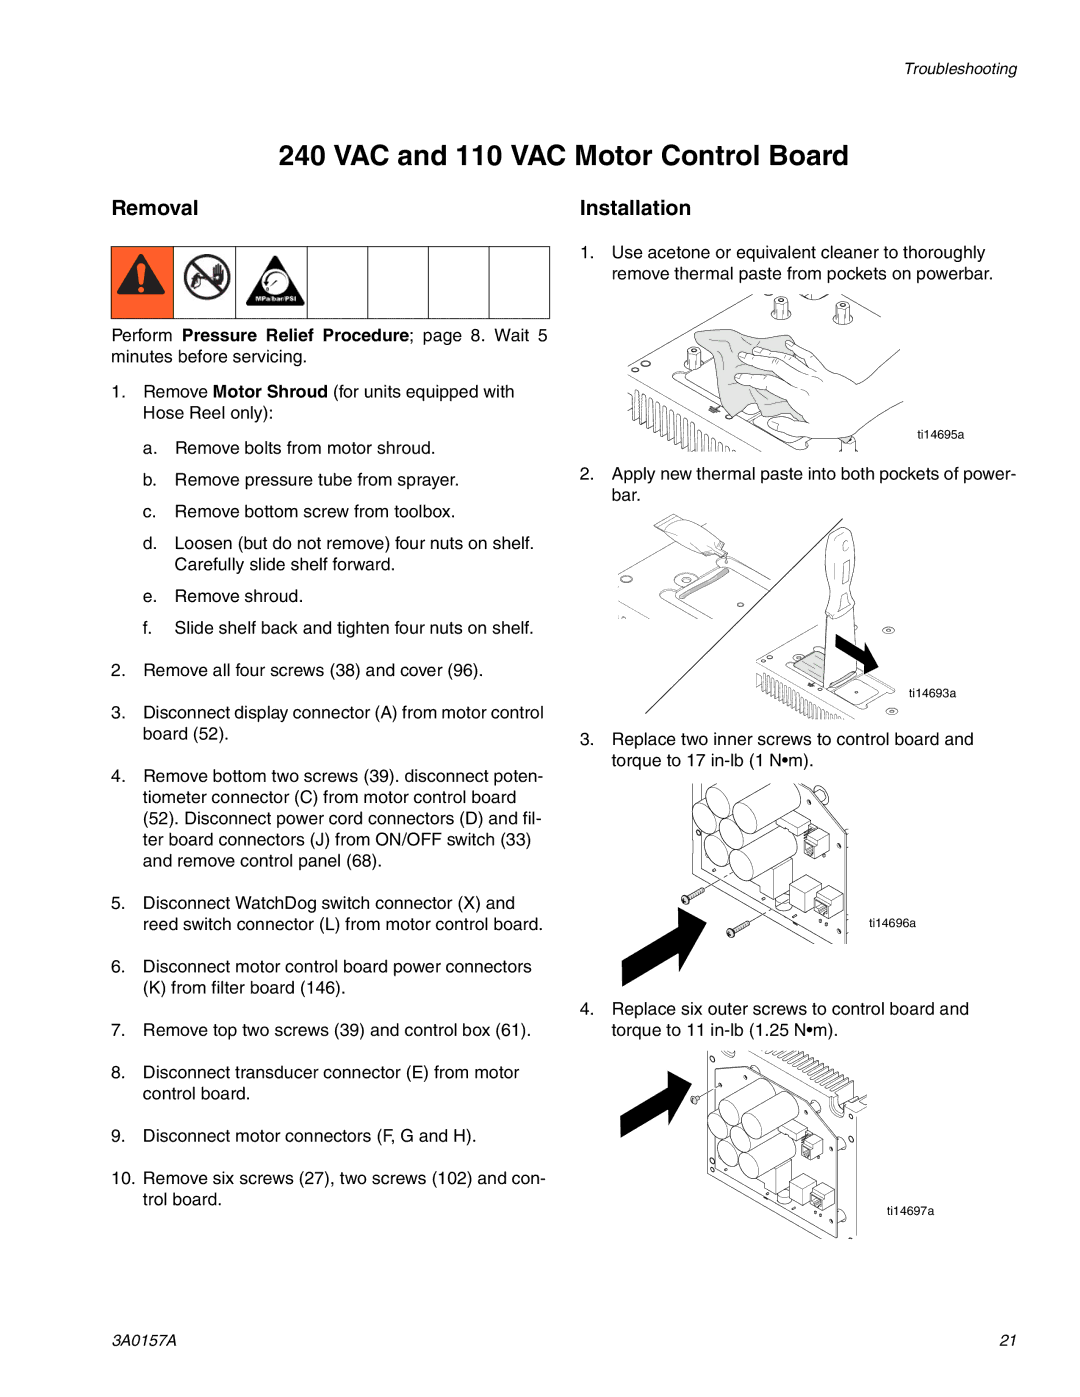
1.Use acetone or equivalent cleaner to thoroughly remove thermal paste from pockets on powerbar.
ti14695a
2.Apply new thermal paste into both pockets of power- bar.
ti14693a
3.Replace two inner screws to control board and torque to 17
ti14696a
4.Replace six outer screws to control board and torque to 11
ti14697a
3A0157A | 21 |