Troubleshooting
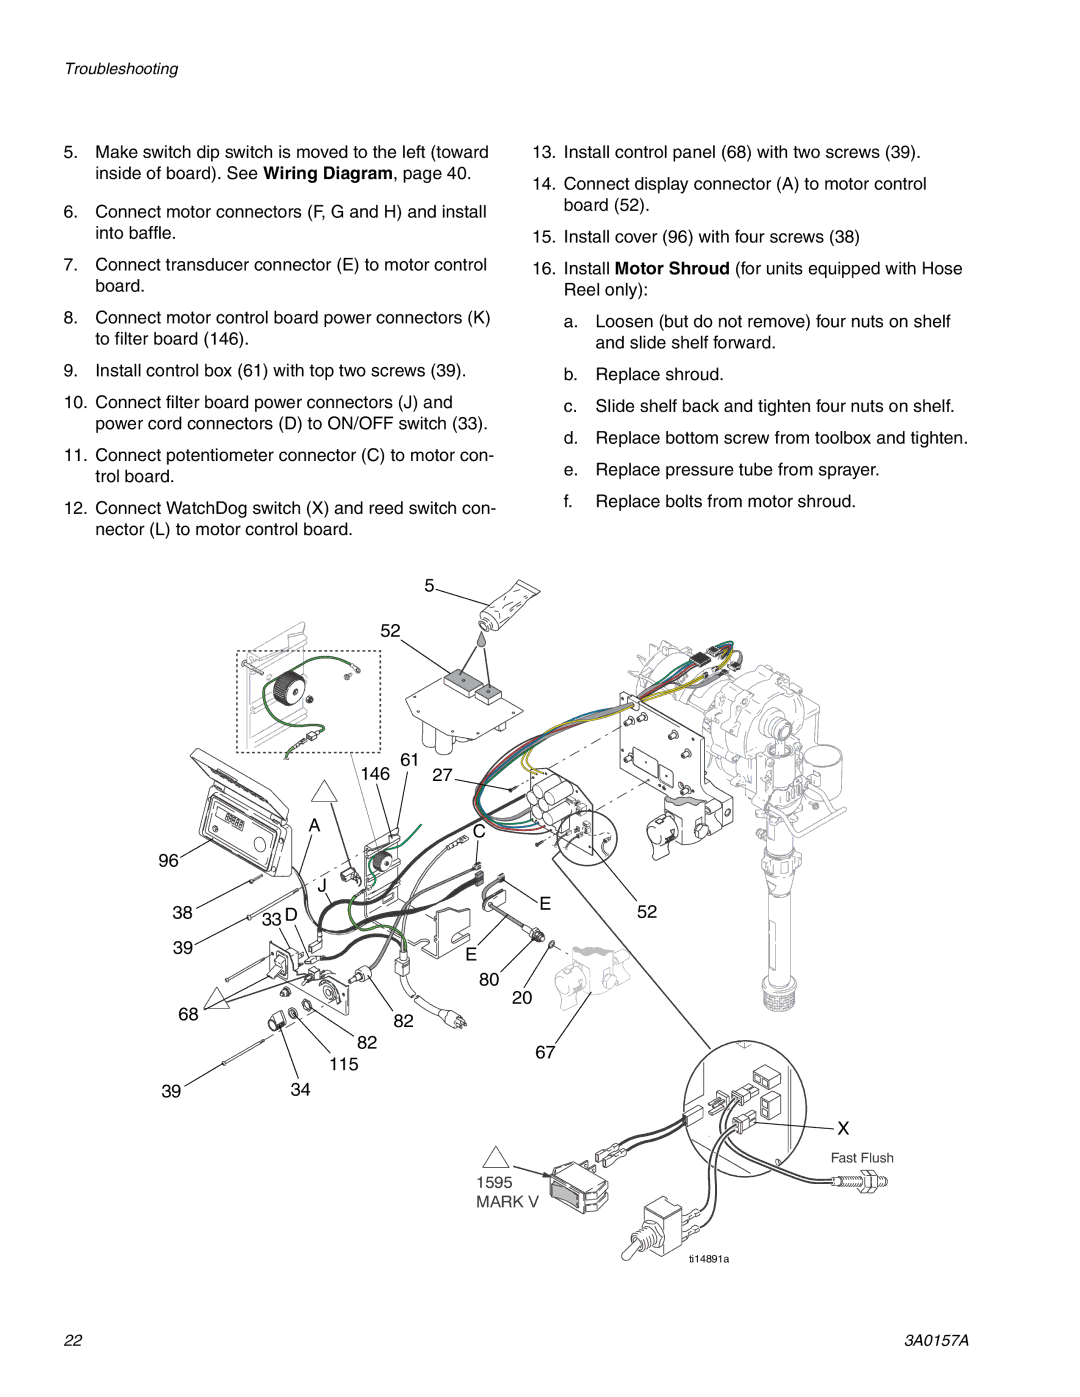
5.Make switch dip switch is moved to the left (toward inside of board). See Wiring Diagram, page 40.
6.Connect motor connectors (F, G and H) and install into baffle.
7.Connect transducer connector (E) to motor control board.
8.Connect motor control board power connectors (K) to filter board (146).
9.Install control box (61) with top two screws (39).
10.Connect filter board power connectors (J) and power cord connectors (D) to ON/OFF switch (33).
11.Connect potentiometer connector (C) to motor con- trol board.
12.Connect WatchDog switch (X) and reed switch con- nector (L) to motor control board.
5
52
| 146 | 61 |
| 27 | |
| A | C |
|
| |
96 |
|
|
| J |
|
38 | 33 D |
|
39 |
| E |
|
| |
|
| 80 |
68 |
| 82 |
|
| |
| 82 |
|
| 115 |
|
39 | 34 |
|
13.Install control panel (68) with two screws (39).
14.Connect display connector (A) to motor control board (52).
15.Install cover (96) with four screws (38)
16.Install Motor Shroud (for units equipped with Hose Reel only):
a.Loosen (but do not remove) four nuts on shelf and slide shelf forward.
b.Replace shroud.
c.Slide shelf back and tighten four nuts on shelf.
d.Replace bottom screw from toolbox and tighten.
e.Replace pressure tube from sprayer.
f.Replace bolts from motor shroud.
E 52
20
67
![]() X
X
Fast Flush
1595 MARK V
ti14891a
22 | 3A0157A |