18.Use the tilt bracket knob to secure the table tilt bracket to the bandsaw body, as shown in Figure 13. Tighten the hex nut on the tilt bracket knob against the tilt bracket to secure it in place.
Figure 13. Knob securing table tilt bracket.
19.Thread the handle into the handwheel, then tighten the hex nut against the handwheel to secure it in place.
20.Install the 6" handwheel, as shown in Figure 14, by placing it on the shaft and tightening the set screw in the handwheel.
Set Screw
Figure 14. 6" Handwheel installed.
21.Slide the fence against the blade.
22.Use a sharp pencil to mark the fence rail where the fence scale indicator is pointing. This mark will indicate where to align the 0" mark when you install the scale.
23.Remove the fence from the front rail.
24.Carefully install the scale on the front fence rail, as shown in Figure 15, so the 0" mark on the scale lines up with the pencil mark made in Step 22.
Figure 15. Scale installed on front fence rail.
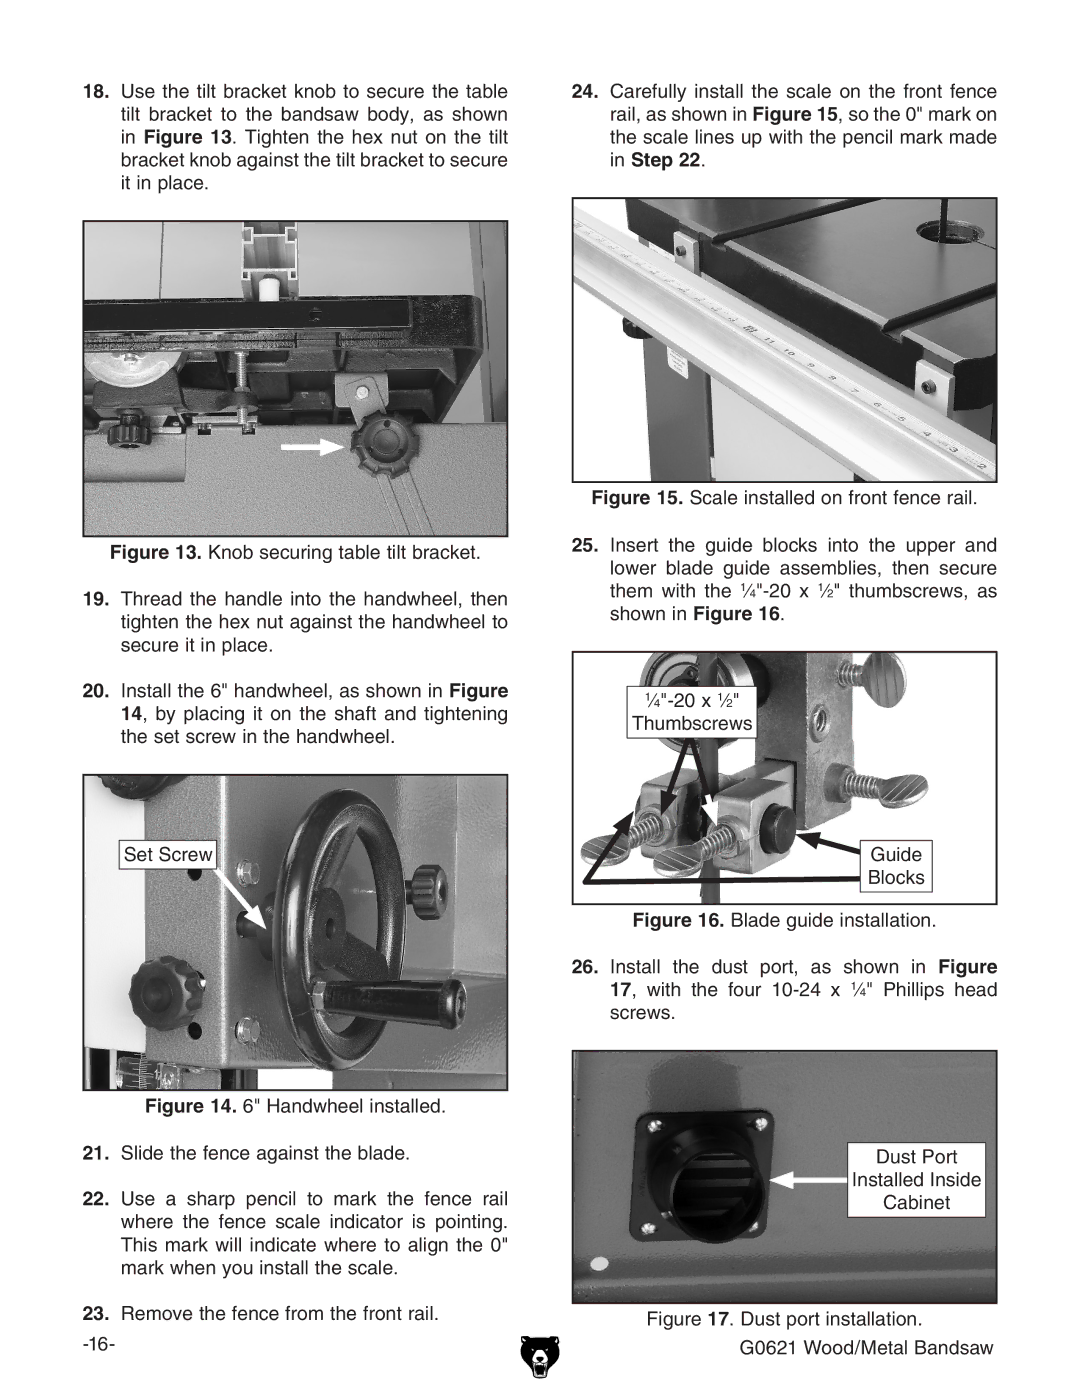
25.Insert the guide blocks into the upper and lower blade guide assemblies, then secure them with the 1⁄4"-20 x 1⁄2" thumbscrews, as shown in Figure 16.
|
Thumbscrews |
Guide |
Blocks |
