System Configuration
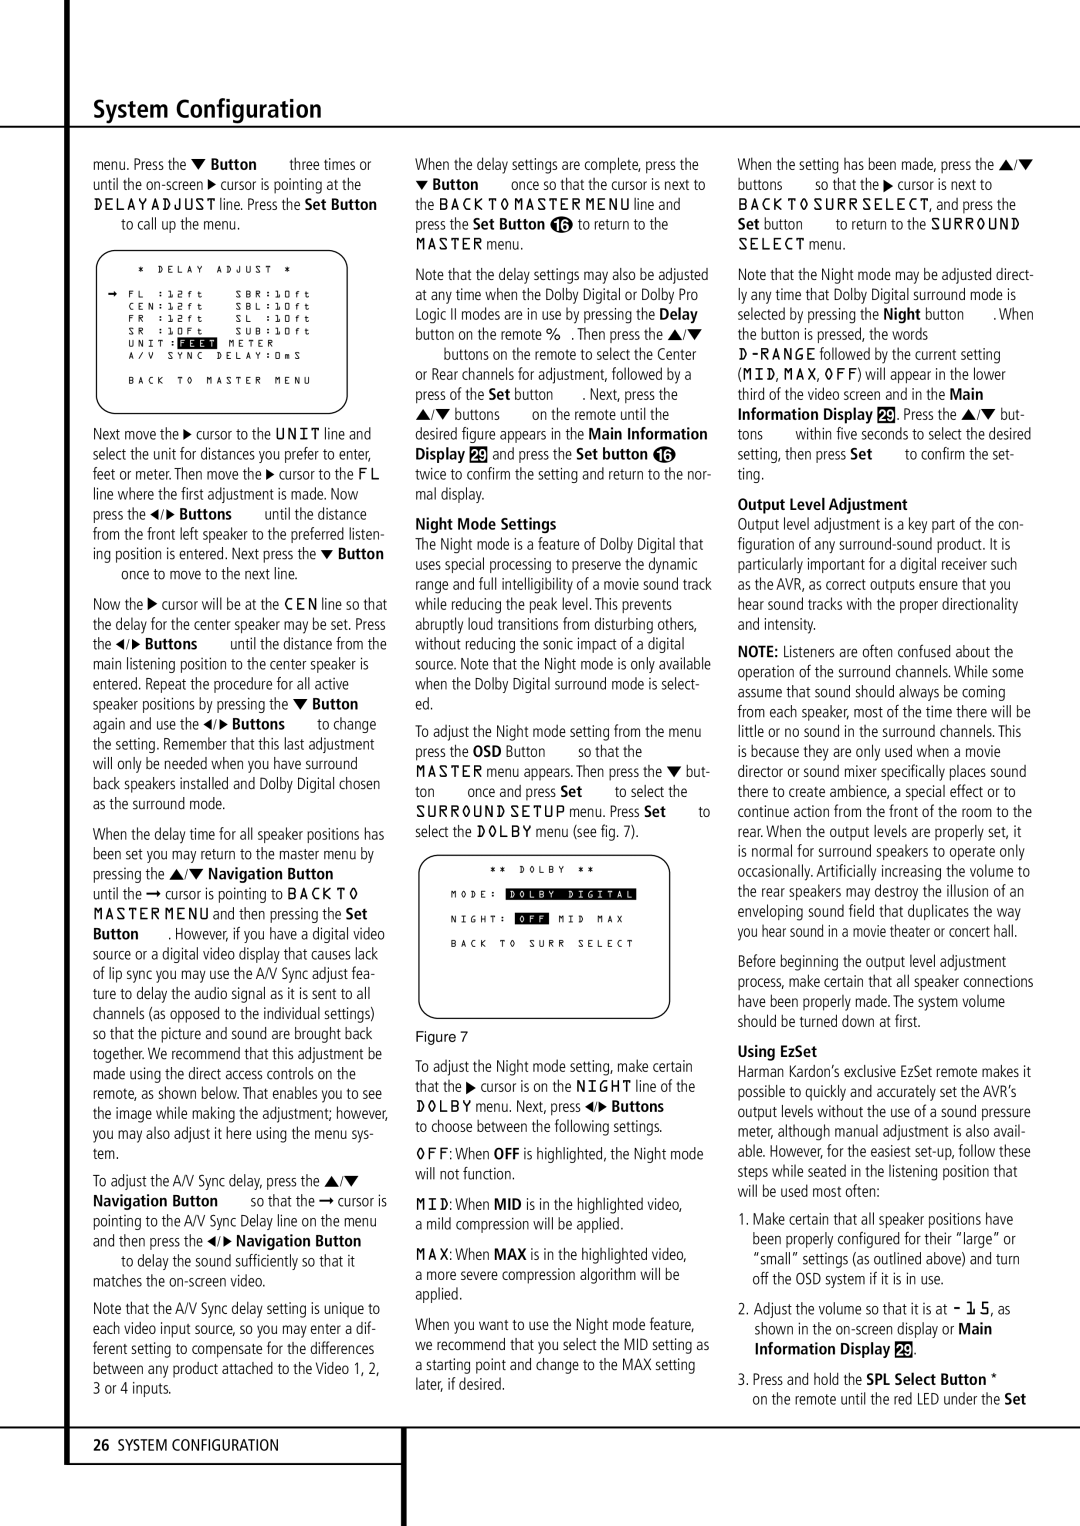
menu. Press the ¤ Button Ethree times or until the on-screen › cursor is pointing at the DELAYADJUST line. Press the Set Button
Fto call up the menu.
| | | |
* | D E L A Y | A D J U S T * |
F L | : 1 2 f t | S B R : 1 0 f t |
C E N : 1 2 f t | S B L : 1 0 f t |
F R | : 1 2 f t | S L : 1 0 f t |
S R | : 1 0 F t | S U B : 1 0 f t |
U N I T : | F E E T | M E T E R |
A / V S Y N C | D E L A Y : 0 m S |
B A C K T O M A S T E R M E N U
Next move the › cursor to the UNIT line and select the unit for distances you prefer to enter, feet or meter. Then move the › cursor to the FL line where the first adjustment is made. Now press the ‹/ › Buttons Euntil the distance from the front left speaker to the preferred listen- ing position is entered. Next press the ¤ Button
Eonce to move to the next line.
Now the › cursor will be at the CEN line so that the delay for the center speaker may be set. Press the ‹/ › Buttons Euntil the distance from the main listening position to the center speaker is entered. Repeat the procedure for all active speaker positions by pressing the ¤ Button E again and use the ‹/ › Buttons Eto change the setting. Remember that this last adjustment will only be needed when you have surround back speakers installed and Dolby Digital chosen as the surround mode.
When the delay time for all speaker positions has been set you may return to the master menu by pressing the ⁄/¤ Navigation Button E until the ➞ cursor is pointing to BACK TO MASTER MENU and then pressing the Set Button F. However, if you have a digital video source or a digital video display that causes lack of lip sync you may use the A/V Sync adjust fea- ture to delay the audio signal as it is sent to all channels (as opposed to the individual settings) so that the picture and sound are brought back together. We recommend that this adjustment be made using the direct access controls on the remote, as shown below. That enables you to see the image while making the adjustment; however, you may also adjust it here using the menu sys- tem.
To adjust the A/V Sync delay, press the ⁄/¤ Navigation Button Eso that the ➞ cursor is pointing to the A/V Sync Delay line on the menu and then press the ‹/ › Navigation Button
Eto delay the sound sufficiently so that it matches the on-screen video.
Note that the A/V Sync delay setting is unique to each video input source, so you may enter a dif- ferent setting to compensate for the differences between any product attached to the Video 1, 2, 3 or 4 inputs.
When the delay settings are complete, press the
¤Button Eonce so that the cursor is next to the BACK TO MASTER MENU line and press the Set Button p to return to the
MASTER menu.
Note that the delay settings may also be adjusted at any time when the Dolby Digital or Dolby Pro Logic II modes are in use by pressing the Delay
button on the remote | . Then press the ⁄/¤ |
Ebuttons on the remote to select the Center or Rear channels for adjustment, followed by a press of the Set button F. Next, press the ⁄/¤ buttons Eon the remote until the desired figure appears in the Main Information Display ˜ and press the Set button p twice to confirm the setting and return to the nor- mal display.
Night Mode Settings
The Night mode is a feature of Dolby Digital that uses special processing to preserve the dynamic range and full intelligibility of a movie sound track while reducing the peak level. This prevents abruptly loud transitions from disturbing others, without reducing the sonic impact of a digital source. Note that the Night mode is only available when the Dolby Digital surround mode is select- ed.
To adjust the Night mode setting from the menu press the OSD Button Lso that the MASTER menu appears. Then press the ¤ but- ton Eonce and press Set Fto select the SURROUND SETUP menu. Press Set Fto select the DOLBY menu (see fig. 7).
* | * | | D O L | B | Y | * | * | |
|
M O D E : | D O L B Y D I G I T A L | |
| | | | | | | | |
N I G H T : | O F F | M I D M A X |
B A C K T O S U R R | S E L E C T |
| | | | | | | | |
Figure 7
To adjust the Night mode setting, make certain that the › cursor is on the NIGHT line of the DOLBY menu. Next, press ‹/› Buttons E to choose between the following settings.
OFF: When OFF is highlighted, the Night mode will not function.
MID: When MID is in the highlighted video, a mild compression will be applied.
MAX: When MAX is in the highlighted video, a more severe compression algorithm will be applied.
When you want to use the Night mode feature, we recommend that you select the MID setting as a starting point and change to the MAX setting later, if desired.
When the setting has been made, press the ⁄/¤ buttons Eso that the › cursor is next to BACK TO SURR SELECT, and press the Set button Fto return to the SURROUND SELECT menu.
Note that the Night mode may be adjusted direct- ly any time that Dolby Digital surround mode is selected by pressing the Night button B. When the button is pressed, the words
D-RANGEfollowed by the current setting (MID, MAX, OFF) will appear in the lower third of the video screen and in the Main Information Display ˜. Press the ⁄/¤ but- tons Ewithin five seconds to select the desired setting, then press Set Fto confirm the set- ting.
Output Level Adjustment
Output level adjustment is a key part of the con- figuration of any surround-sound product. It is particularly important for a digital receiver such as the AVR, as correct outputs ensure that you hear sound tracks with the proper directionality and intensity.
NOTE: Listeners are often confused about the operation of the surround channels. While some assume that sound should always be coming from each speaker, most of the time there will be little or no sound in the surround channels. This is because they are only used when a movie director or sound mixer specifically places sound there to create ambience, a special effect or to continue action from the front of the room to the rear. When the output levels are properly set, it is normal for surround speakers to operate only occasionally. Artificially increasing the volume to the rear speakers may destroy the illusion of an enveloping sound field that duplicates the way you hear sound in a movie theater or concert hall.
Before beginning the output level adjustment process, make certain that all speaker connections have been properly made. The system volume should be turned down at first.
Using EzSet
Harman Kardon’s exclusive EzSet remote makes it possible to quickly and accurately set the AVR’s output levels without the use of a sound pressure meter, although manual adjustment is also avail- able. However, for the easiest set-up, follow these steps while seated in the listening position that will be used most often:
1.Make certain that all speaker positions have been properly configured for their “large” or “small” settings (as outlined above) and turn off the OSD system if it is in use.
2.Adjust the volume so that it is at -15, as shown in the on-screen display or Main Information Display ˜.
3.Press and hold the SPL Select Button
on the remote until the red LED under the Set