G. Install Metal Roof Flashing
Note: Skip to Section I if using the
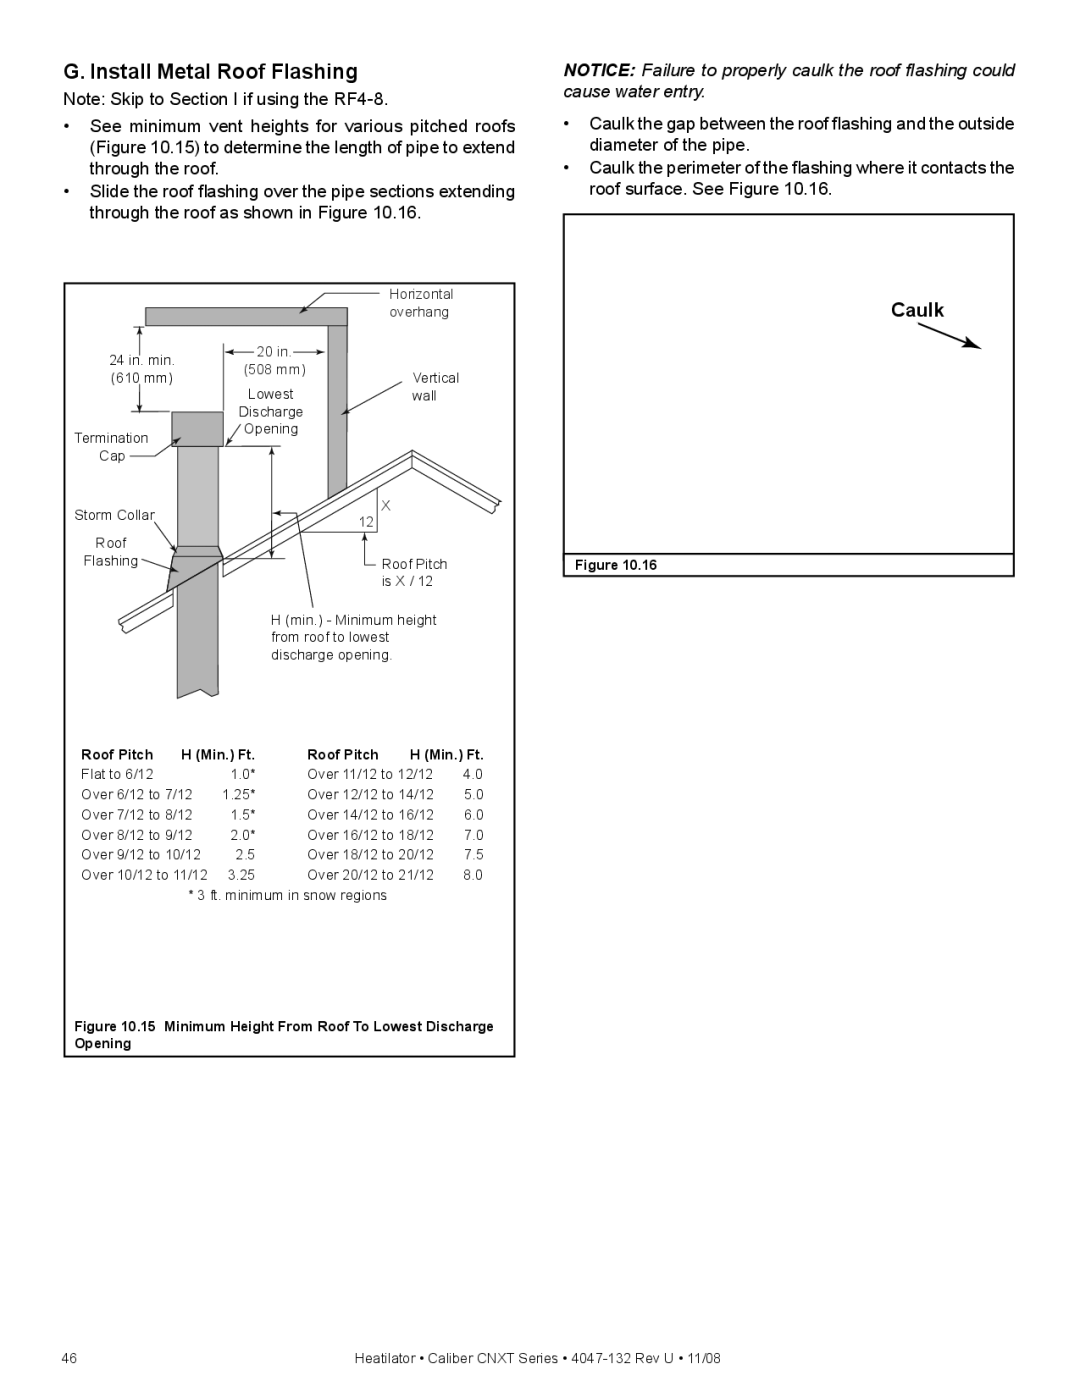
•See minimum vent heights for various pitched roofs (Figure 10.15) to determine the length of pipe to extend through the roof.
•Slide the roof flashing over the pipe sections extending through the roof as shown in Figure 10.16.
|
| Horizontal | |
|
| overhang | |
24 in. min. | 20 in. |
| |
(508 mm) |
| ||
(610 mm) | Vertical | ||
Lowest | |||
| wall | ||
| Discharge |
| |
Termination | Opening |
| |
|
| ||
Cap |
|
| |
Storm Collar |
| X | |
| 12 | ||
|
| ||
Roof |
|
| |
Flashing |
| Roof Pitch | |
|
| is X / 12 |
H (min.) - Minimum height from roof to lowest discharge opening.
Roof Pitch | H (Min.) Ft. | Roof Pitch | H (Min.) Ft. | ||
Flat to 6/12 |
| 1.0* | Over 11/12 to 12/12 | 4.0 | |
Over 6/12 to 7/12 | 1.25* | Over 12/12 to 14/12 | 5.0 | ||
Over 7/12 to 8/12 | 1.5* | Over 14/12 to 16/12 | 6.0 | ||
Over 8/12 to 9/12 | 2.0* | Over 16/12 to 18/12 | 7.0 | ||
Over 9/12 to 10/12 | 2.5 | Over 18/12 to 20/12 | 7.5 | ||
Over 10/12 to 11/12 | 3.25 | Over 20/12 to 21/12 | 8.0 | ||
| * 3 ft. minimum in snow regions |
|
| ||
Figure 10.15 Minimum Height From Roof To Lowest Discharge Opening
NOTICE: Failure to properly caulk the roof flashing could cause water entry.
•Caulk the gap between the roof flashing and the outside diameter of the pipe.
•Caulk the perimeter of the flashing where it contacts the roof surface. See Figure 10.16.
Pipe
Caulk
Flashing
Figure 10.16
46 | Heatilator • Caliber CNXT Series • |
