Placing and Securing Appliance
Place the appliance into position. Make sure flashing edges on the outdoor surround fit up tight to the framing.
The diagram shows how to properly position, level, and secure the appliance (see Figure 5.13). Nailing tabs are pro- vided to secure the appliance to the framing members.
• | Caulk behind flanges before securing to framing. |
• | Place the appliance into position. |
• | Level the appliance from side to side and front to |
| back. |
Í• | Shim the appliance as necessary. It is acceptable to |
| use wood shims. |
• | Keep nailing tabs flush with the framing. |
• | Secure the appliance to the framing by using nails or |
| screws through the nailing tabs. |
SECURE TO
FRAMING
SECURE TO FRAMING | APPLIANCE | |
IN A MINIMUM 3 | ||
EXTERIOR | ||
PLACES PER SIDE | ||
|
NOTE: Caulk behind all flanges before securing to the exterior.
Figure 5.13 Proper Positioning, Leveling and
Securing of a Appliance
CAUTION
Do NOT notch into the framing around the appliance spacers.
Placing Flashing and Sheathing
Apply high temperature silicone sealant to corner edges Í of fireplace flange (see Figure 5.14).
APPLY HIGH |
TEMPERATURE |
SILICONE SEALANT |
TO CORNER EDGES |
FIREPLACE |
FLANGE |
BEND IN |
FLANGE |
Figure 5.14 |
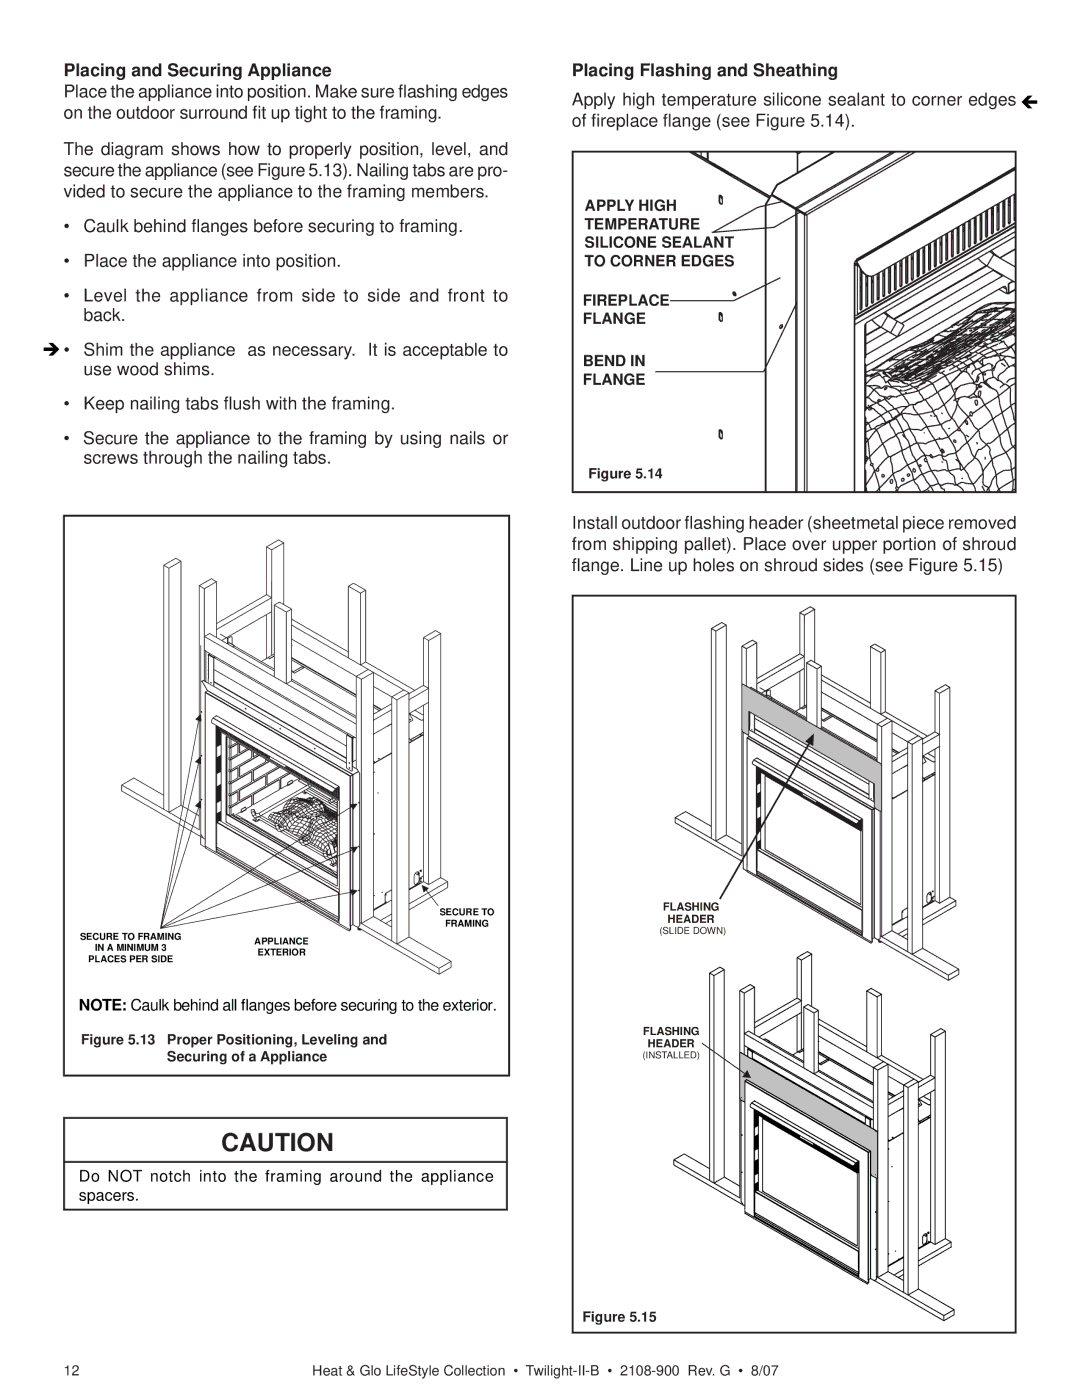
Install outdoor flashing header (sheetmetal piece removed from shipping pallet). Place over upper portion of shroud flange. Line up holes on shroud sides (see Figure 5.15)
FLASHING |
HEADER |
(SLIDE DOWN) |
FLASHING |
HEADER |
(INSTALLED) |
Figure 5.15 |
12 | Heat & Glo LifeStyle Collection • |