Model
2-5. POWER SWITCH (Continued)
4.With control panel removed, and the wires off the switch, push in on tabs on the switch to remove from panel. Figure
5.Replace with new switch, and reconnect wires to switch.
6.Replace the control panel.
Figure
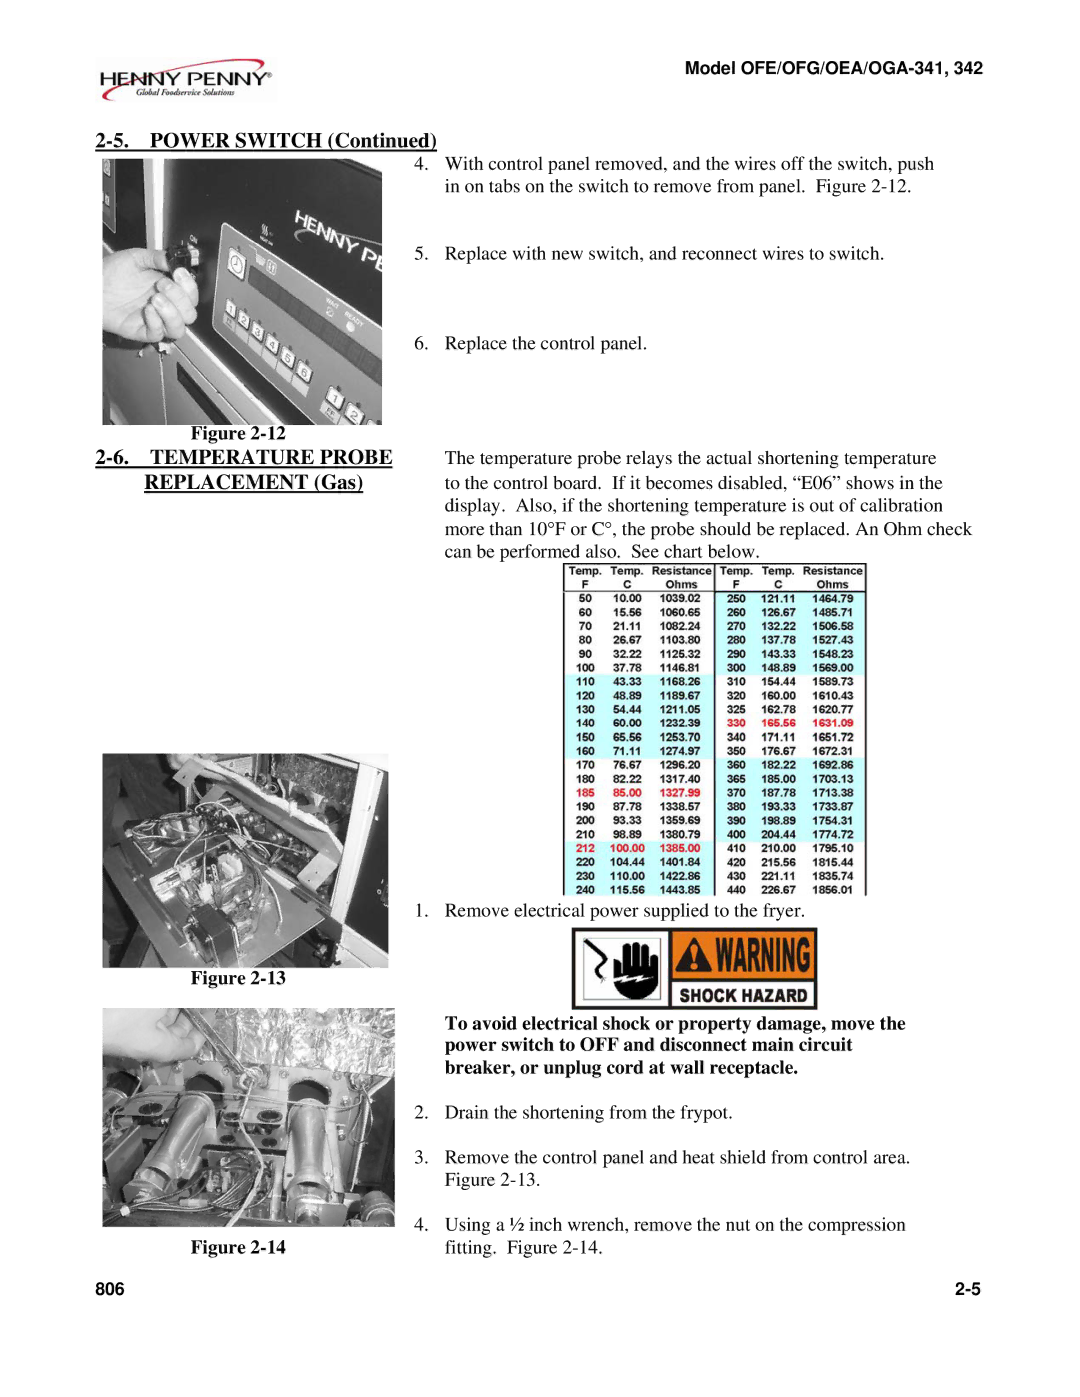
REPLACEMENT (Gas) to the control board. If it becomes disabled, “E06” shows in the display. Also, if the shortening temperature is out of calibration more than 10°F or C°, the probe should be replaced. An Ohm check can be performed also. See chart below.
1. Remove electrical power supplied to the fryer.
Figure
To avoid electrical shock or property damage, move the power switch to OFF and disconnect main circuit breaker, or unplug cord at wall receptacle.
2.Drain the shortening from the frypot.
3.Remove the control panel and heat shield from control area. Figure
4.Using a ½ inch wrench, remove the nut on the compression
Figure | fitting. Figure |
806 |