Setting up
Inserting an SD Card and USB Memory
When using the projector with a wireless LAN please insert the included Wireless Network Card.
When using a commercial SD Memory card in order to view images insert the SD Memory card in the same manner.
And when using a commercial USB MEMORY in order to view images insert the USB MEMORY to the AUX I/O port. (13)
See User's Manual - Network Function for information on using either type of card.
1. Make sure the projector’s power switch is OFF.
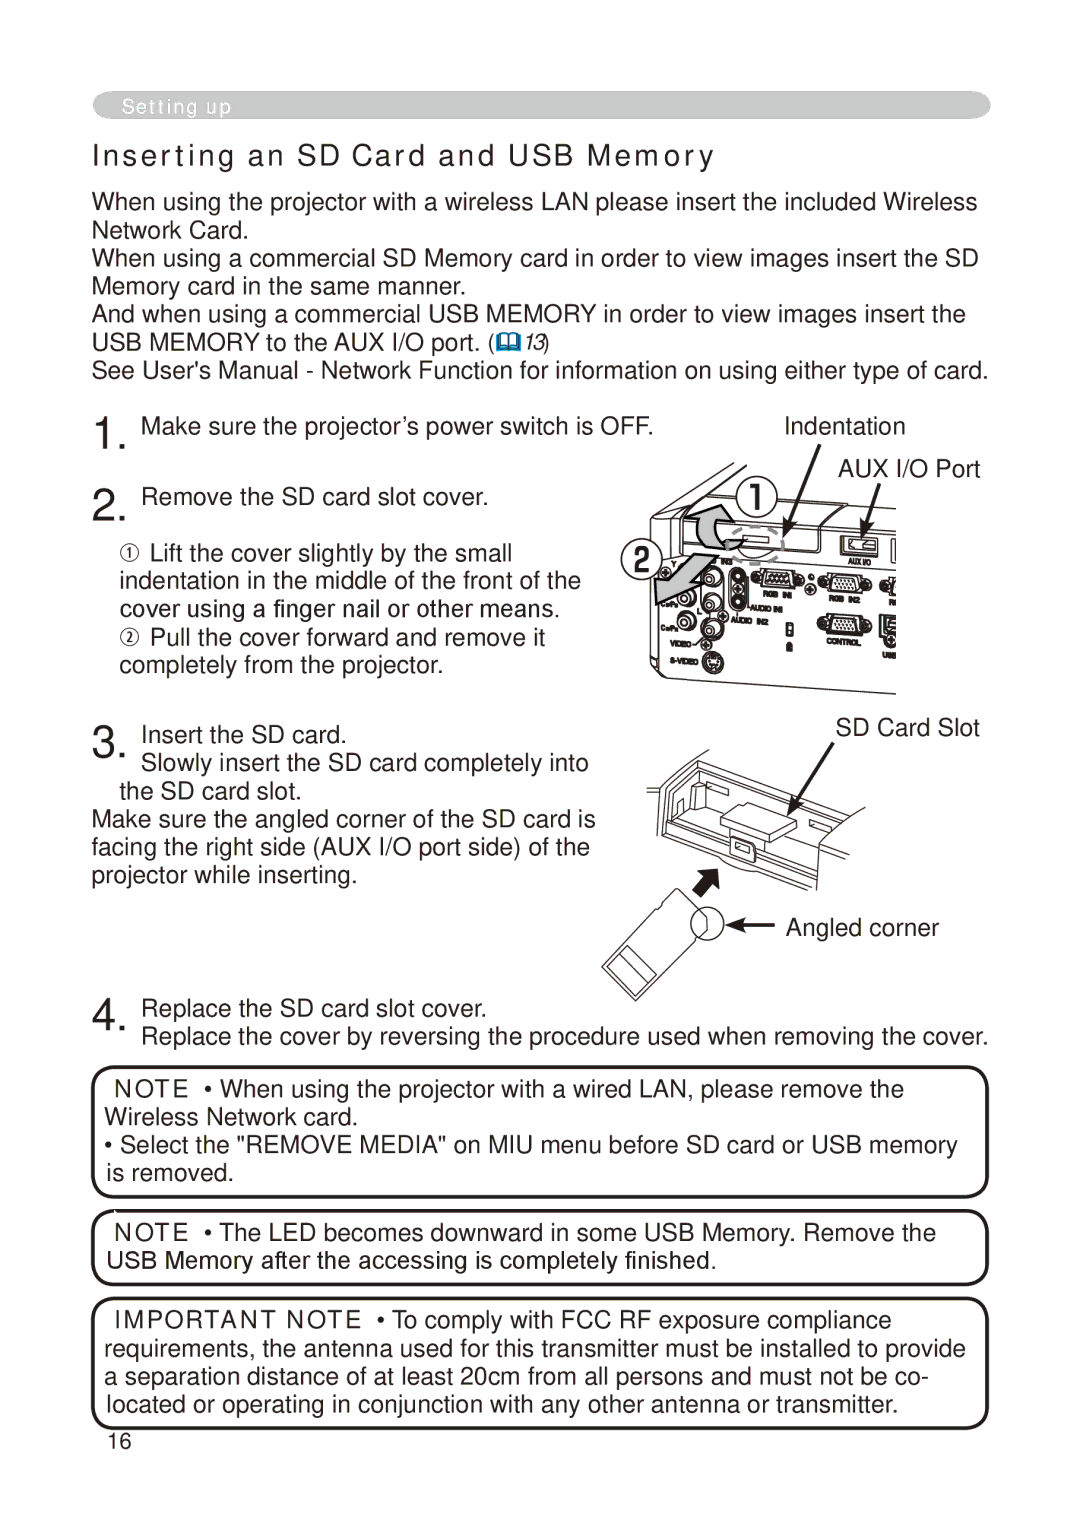
2. Remove the SD card slot cover.
Lift the cover slightly by the small indentation in the middle of the front of the cover using a finger nail or other means.
Pull the cover forward and remove it completely from the projector.
3.Insert the SD card.
Slowly insert the SD card completely into
the SD card slot.
Make sure the angled corner of the SD card is facing the right side (AUX I/O port side) of the projector while inserting.
Indentation
AUX I/O Port
SD Card Slot
![]()
![]() Angled corner
Angled corner
4. Replace the SD card slot cover.
Replace the cover by reversing the procedure used when removing the cover.
NOTE • When using the projector with a wired LAN, please remove the Wireless Network card.
•Select the "REMOVE MEDIA" on MIU menu before SD card or USB memory is removed.
NOTE • The LED becomes downward in some USB Memory. Remove the USB Memory after the accessing is completely finished.
IMPORTANT NOTE • To comply with FCC RF exposure compliance requirements, the antenna used for this transmitter must be installed to provide a separation distance of at least 20cm from all persons and must not be co- located or operating in conjunction with any other antenna or transmitter.
16