CREATING DVD-VIDEO USING IMAGES RECORDED ON DISC
You can use the images recorded on the DVD video camera/recorder to create a disc that can be viewed on DVD recorders/players.
*A
English
1 Insert a disc with the recorded images to be saved into the DVD video camera/recorder, and connect the DVD video camera/recorder to a USB port of PC.
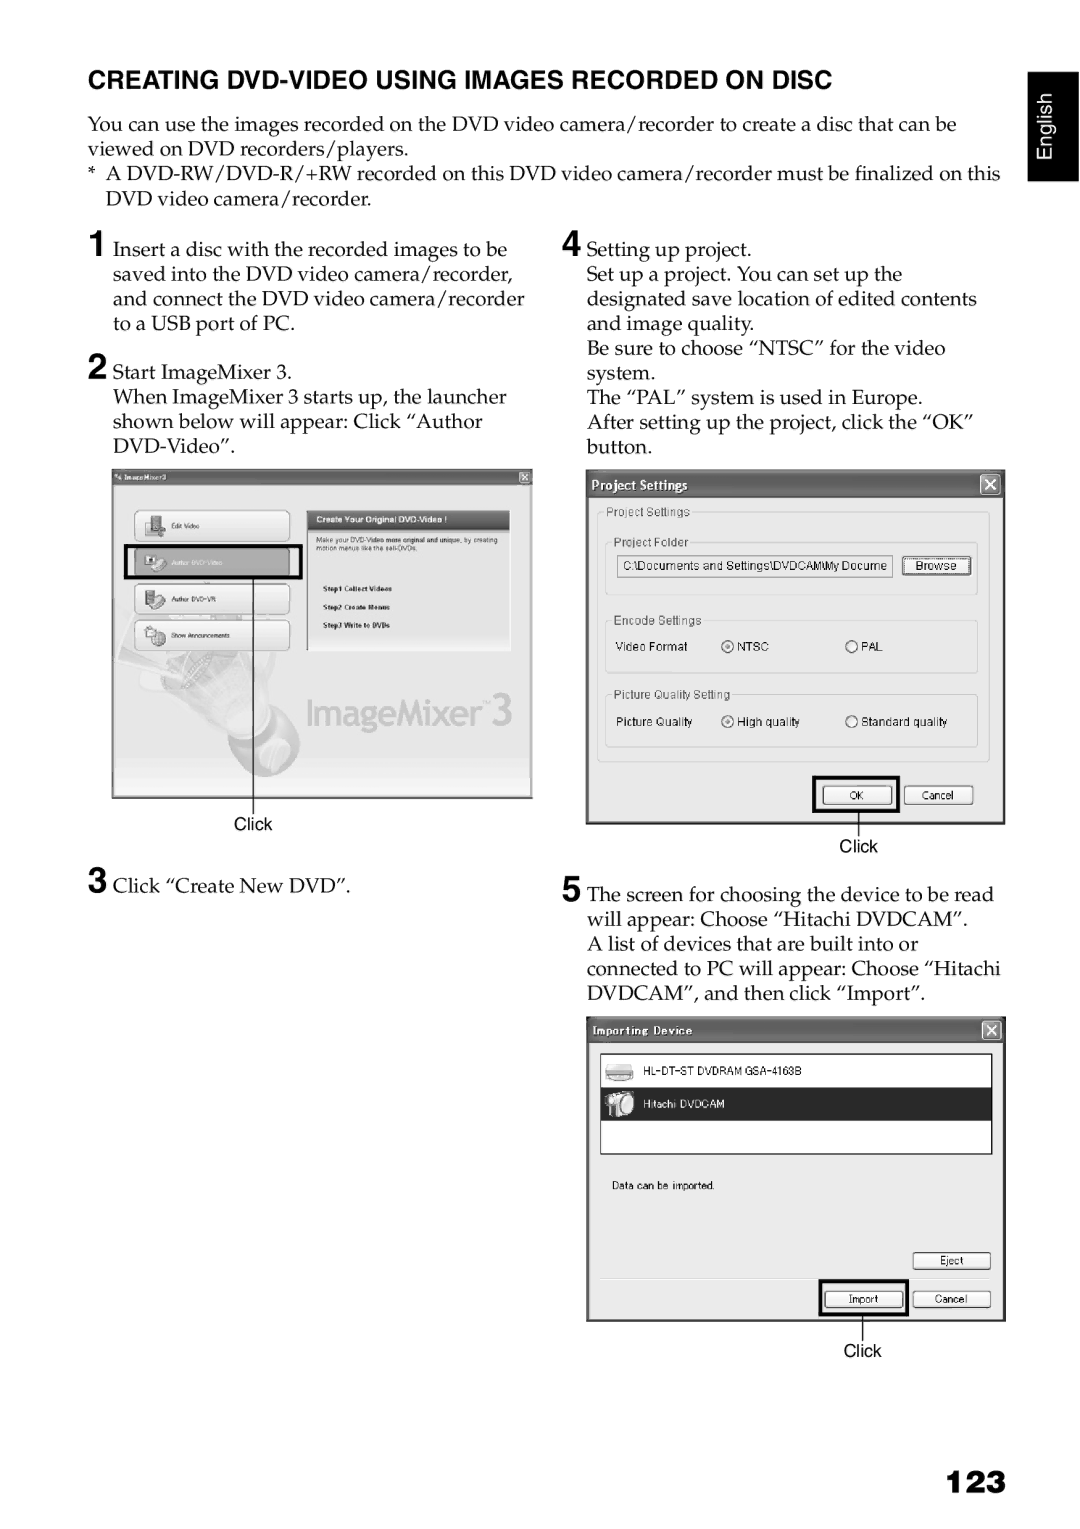
2 Start ImageMixer 3.
When ImageMixer 3 starts up, the launcher
shown below will appear: Click “Author
4 Setting up project.
Set up a project. You can set up the designated save location of edited contents and image quality.
Be sure to choose “NTSC” for the video system.
The “PAL” system is used in Europe. After setting up the project, click the “OK” button.
Click
3 Click “Create New DVD”.
Click
5 The screen for choosing the device to be read
will appear: Choose “Hitachi DVDCAM”. A list of devices that are built into or connected to PC will appear: Choose “Hitachi DVDCAM”, and then click “Import”.
Click
