English
Installing Software
[When using Windows]
1 Turn the PC on.
If you have been using the PC, terminate all running software programs.
2 Insert the provided
The installer will automatically start, and the “Choose setting language” screen will automatically appear.
If the “Choose setting language” screen does not appear, use Windows My Computer or Explorer to open the drive in which the CD- ROM is located, and then
3 Choose the language to be installed. Choose the language used with ImageMixer 3, and then click “Next”.
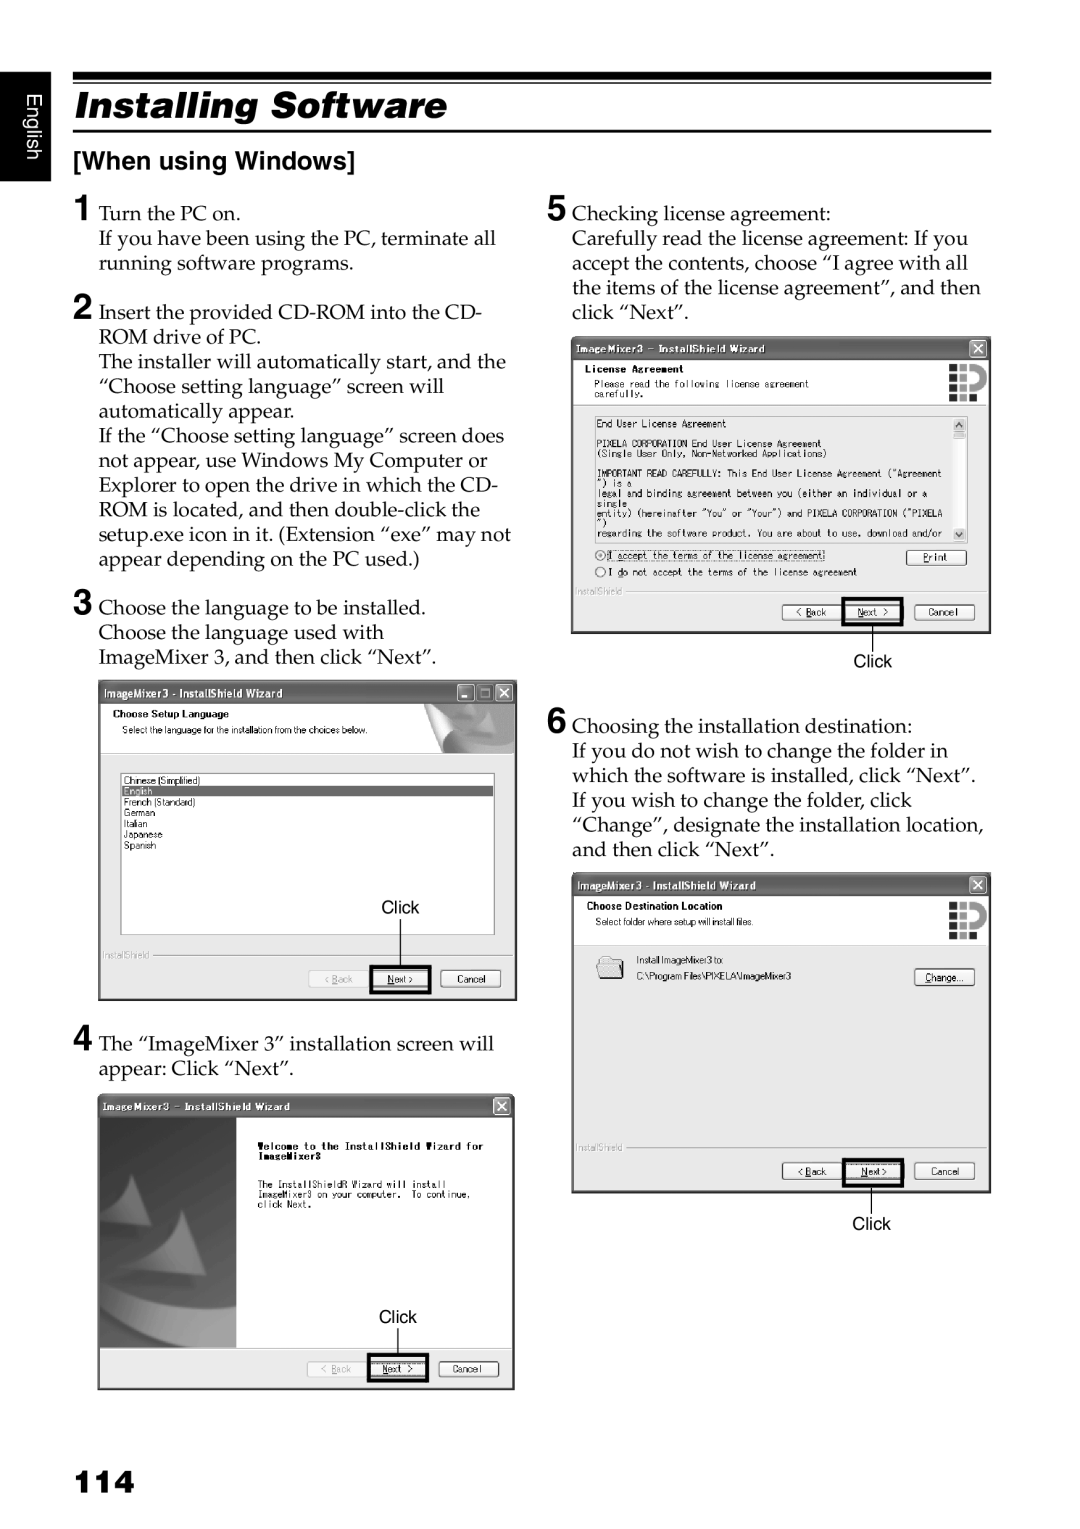
5 Checking license agreement:
Carefully read the license agreement: If you accept the contents, choose “I agree with all the items of the license agreement”, and then click “Next”.
Click
6 Choosing the installation destination:
If you do not wish to change the folder in which the software is installed, click “Next”. If you wish to change the folder, click “Change”, designate the installation location, and then click “Next”.
Click
4 The “ImageMixer 3” installation screen will appear: Click “Next”.
Click
Click