1 |
A |
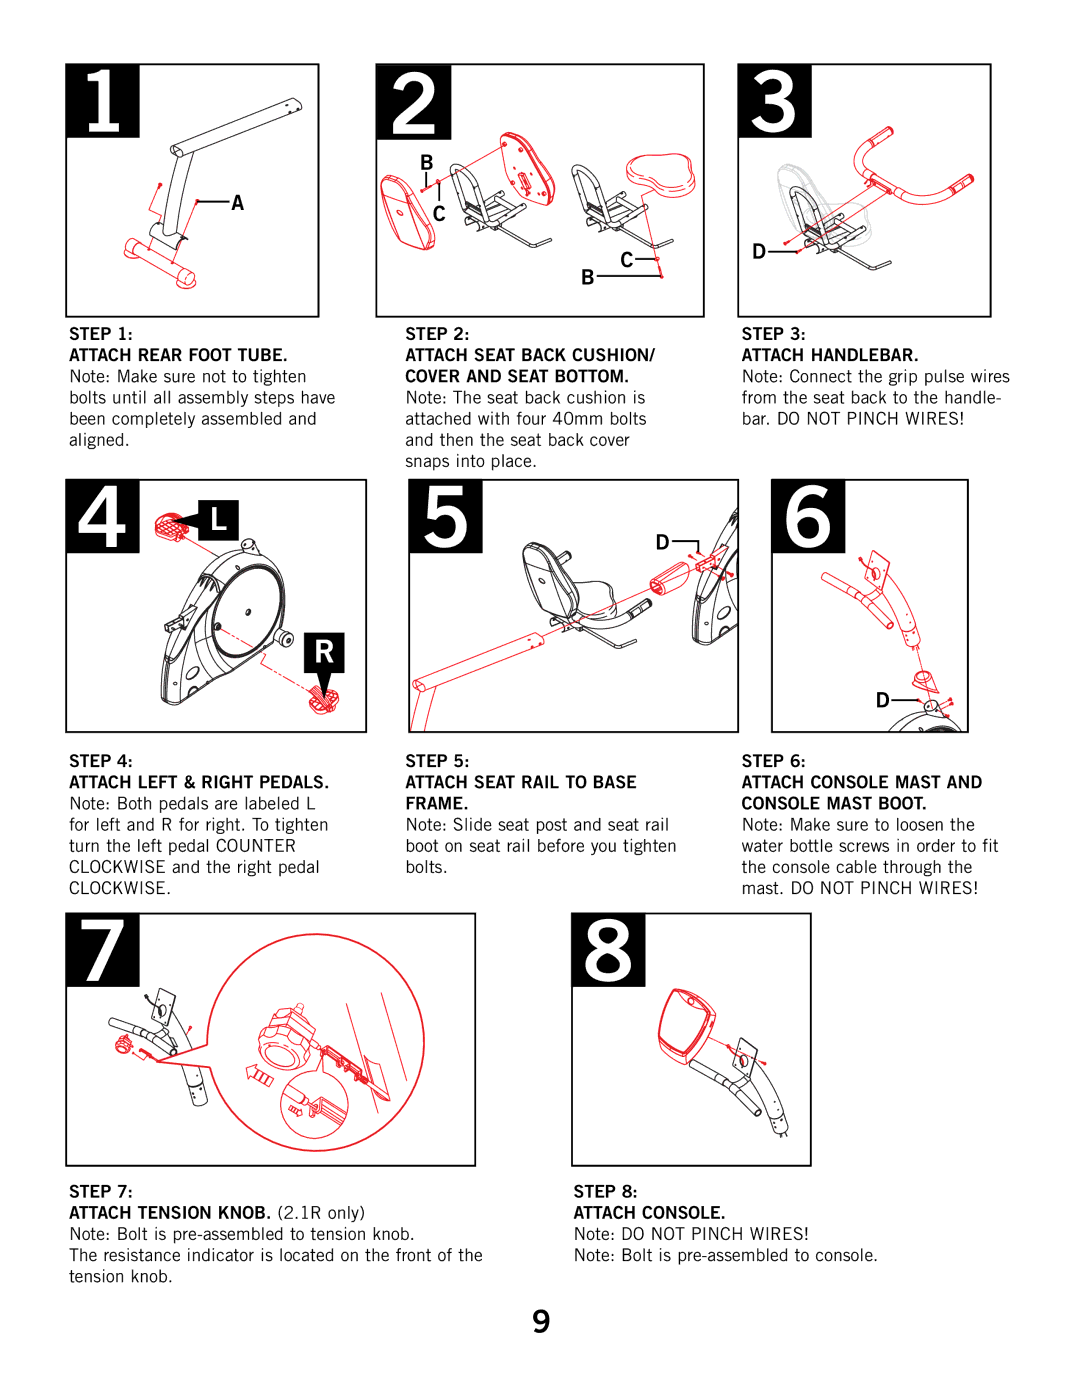
STEP 1:
ATTACH REAR FOOT TUBE. Note: Make sure not to tighten bolts until all assembly steps have been completely assembled and aligned.
2 |
B |
C |
C |
B |
STEP 2:
ATTACH SEAT BACK CUSHION/ COVER AND SEAT BOTTOM. Note: The seat back cushion is attached with four 40mm bolts and then the seat back cover snaps into place.
3 |
D |
STEP 3:
ATTACH HANDLEBAR.
Note: Connect the grip pulse wires from the seat back to the handle- bar. DO NOT PINCH WIRES!
4 | L |
| R |
5 | D | 6 |
|
| D |
STEP 4:
ATTACH LEFT & RIGHT PEDALS. Note: Both pedals are labeled L for left and R for right. To tighten turn the left pedal COUNTER CLOCKWISE and the right pedal
CLOCKWISE.
STEP 5:
ATTACH SEAT RAIL TO BASE FRAME.
Note: Slide seat post and seat rail boot on seat rail before you tighten bolts.
STEP 6:
ATTACH CONSOLE MAST AND CONSOLE MAST BOOT.
Note: Make sure to loosen the water bottle screws in order to fit the console cable through the mast. DO NOT PINCH WIRES!
7 |
STEP 7:
ATTACH TENSION KNOB. (2.1R only) Note: Bolt is
The resistance indicator is located on the front of the tension knob.
8
STEP 8:
ATTACH CONSOLE.
Note: DO NOT PINCH WIRES!
Note: Bolt is
9
