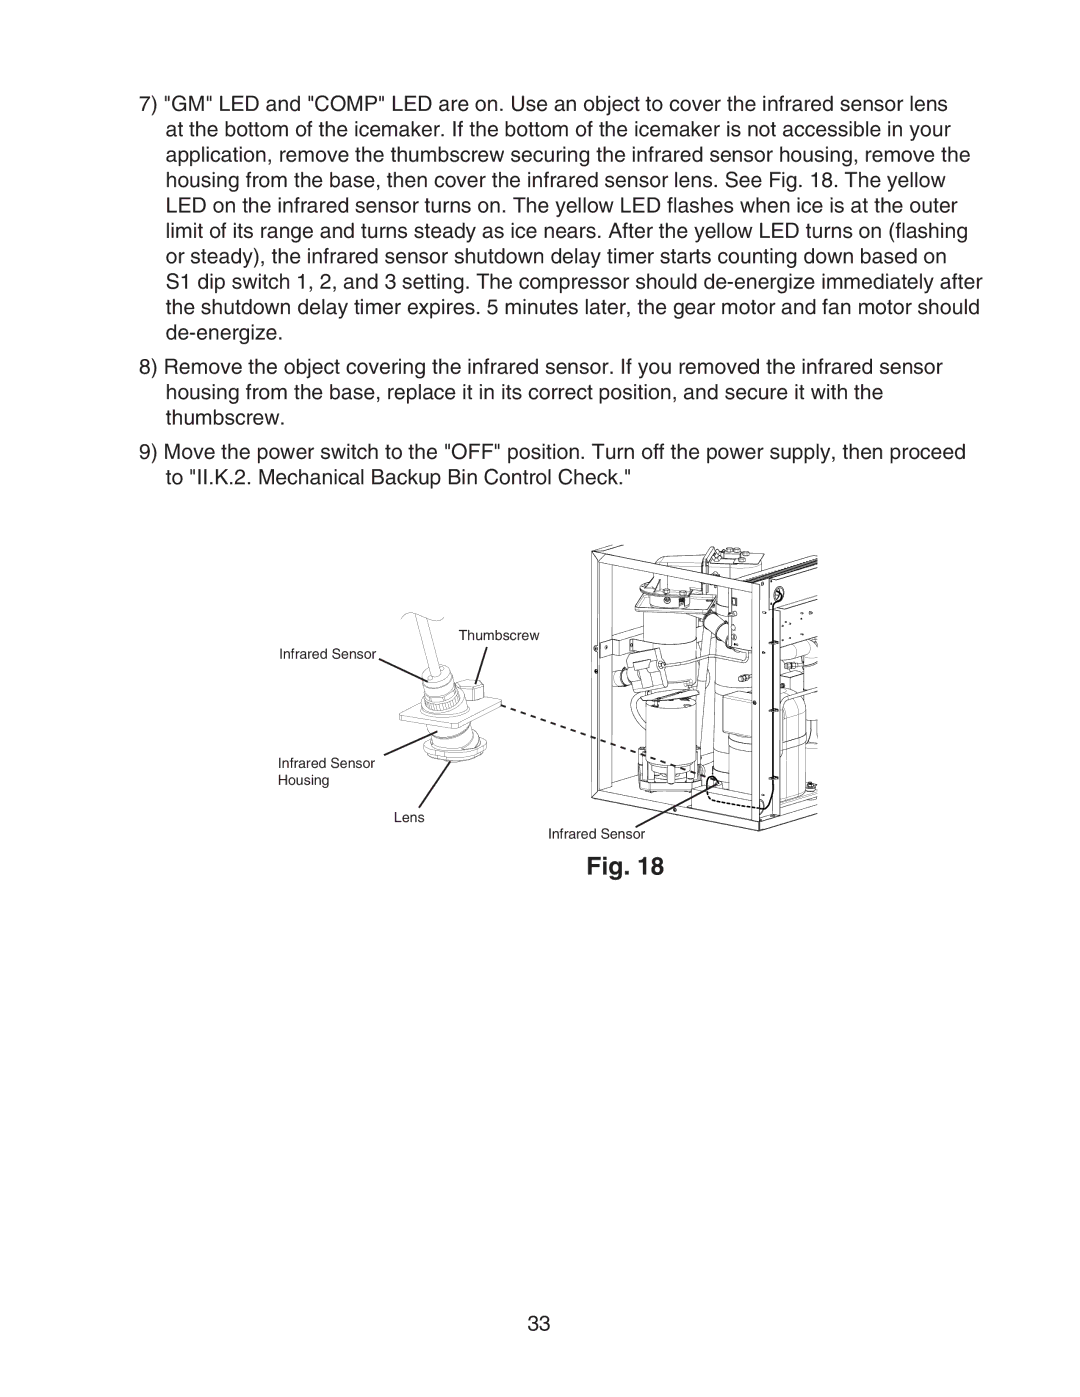
7)"GM" LED and "COMP" LED are on. Use an object to cover the infrared sensor lens at the bottom of the icemaker. If the bottom of the icemaker is not accessible in your application, remove the thumbscrew securing the infrared sensor housing, remove the housing from the base, then cover the infrared sensor lens. See Fig. 18. The yellow LED on the infrared sensor turns on. The yellow LED flashes when ice is at the outer limit of its range and turns steady as ice nears. After the yellow LED turns on (flashing or steady), the infrared sensor shutdown delay timer starts counting down based on
S1 dip switch 1, 2, and 3 setting. The compressor should
8)Remove the object covering the infrared sensor. If you removed the infrared sensor housing from the base, replace it in its correct position, and secure it with the thumbscrew.
9)Move the power switch to the "OFF" position. Turn off the power supply, then proceed to "II.K.2. Mechanical Backup Bin Control Check."
Thumbscrew
Infrared Sensor
Infrared Sensor
Housing
Lens
Infrared Sensor
Fig. 18
33