D. Settings and Diagnostics
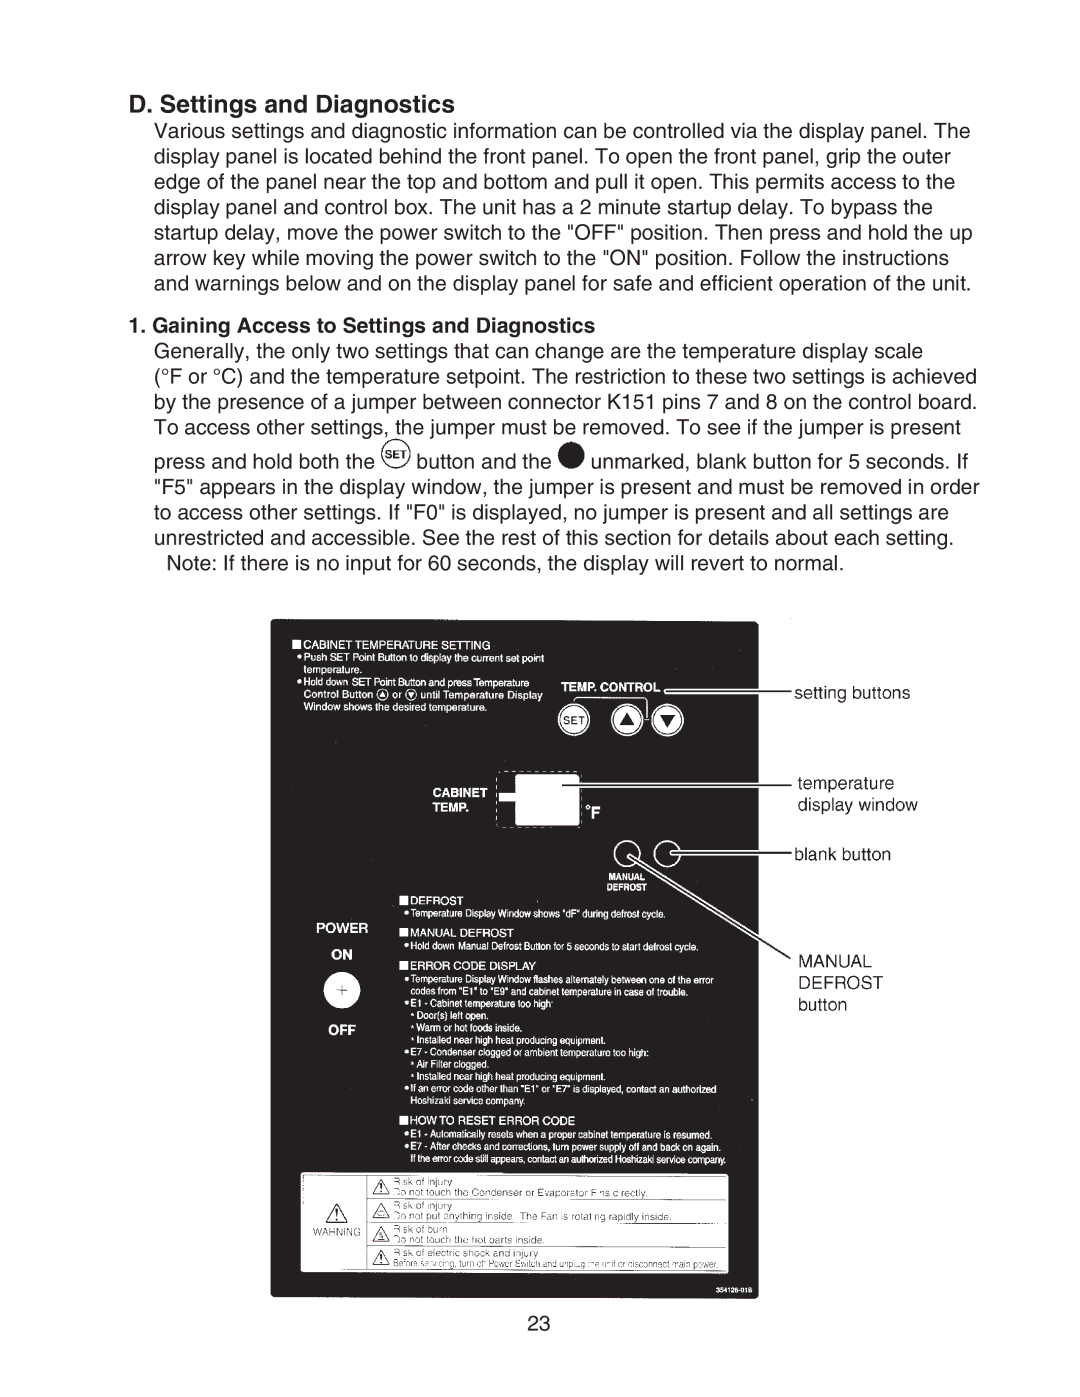
Various settings and diagnostic information can be controlled via the display panel. The display panel is located behind the front panel. To open the front panel, grip the outer edge of the panel near the top and bottom and pull it open. This permits access to the display panel and control box. The unit has a 2 minute startup delay. To bypass the startup delay, move the power switch to the "OFF" position. Then press and hold the up arrow key while moving the power switch to the "ON" position. Follow the instructions and warnings below and on the display panel for safe and efficient operation of the unit.
1. Gaining Access to Settings and Diagnostics
Generally, the only two settings that can change are the temperature display scale
(°F or °C) and the temperature setpoint. The restriction to these two settings is achieved by the presence of a jumper between connector K151 pins 7 and 8 on the control board. To access other settings, the jumper must be removed. To see if the jumper is present
press and hold both the ![]() button and the
button and the ![]() unmarked, blank button for 5 seconds. If "F5" appears in the display window, the jumper is present and must be removed in order to access other settings. If "F0" is displayed, no jumper is present and all settings are unrestricted and accessible. See the rest of this section for details about each setting.
unmarked, blank button for 5 seconds. If "F5" appears in the display window, the jumper is present and must be removed in order to access other settings. If "F0" is displayed, no jumper is present and all settings are unrestricted and accessible. See the rest of this section for details about each setting.
Note: If there is no input for 60 seconds, the display will revert to normal.
23