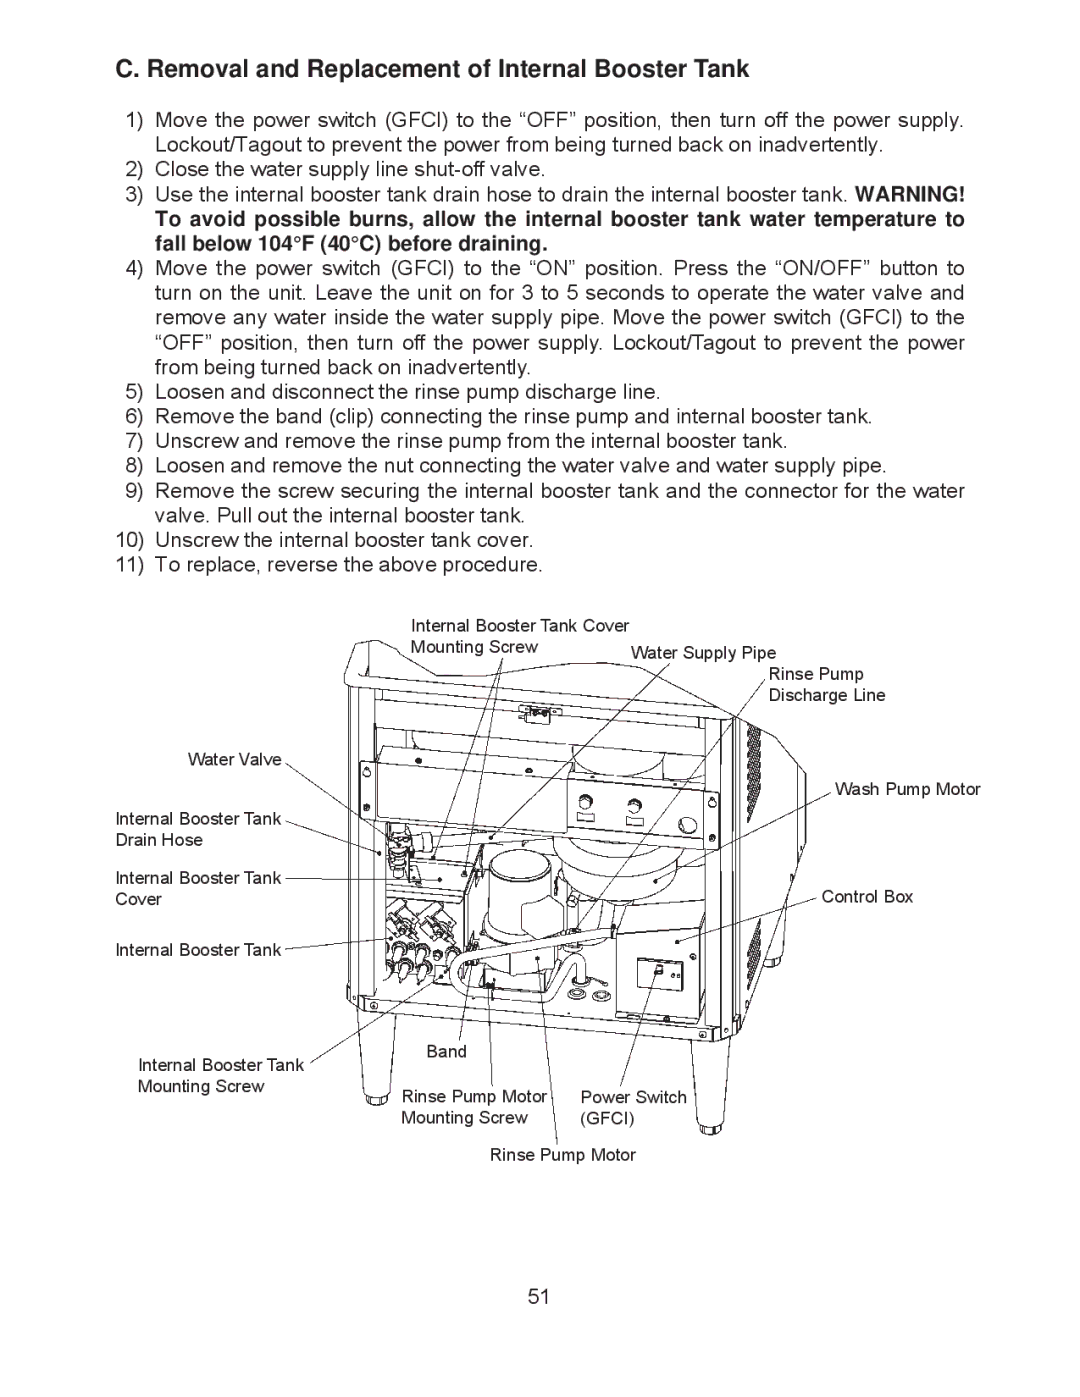
C. Removal and Replacement of Internal Booster Tank
1)Move the power switch (GFCI) to the “OFF” position, then turn off the power supply. Lockout/Tagout to prevent the power from being turned back on inadvertently.
2)Close the water supply line
3)Use the internal booster tank drain hose to drain the internal booster tank. WARNING!
To avoid possible burns, allow the internal booster tank water temperature to fall below 104°F (40°C) before draining.
4)Move the power switch (GFCI) to the “ON” position. Press the “ON/OFF” button to turn on the unit. Leave the unit on for 3 to 5 seconds to operate the water valve and remove any water inside the water supply pipe. Move the power switch (GFCI) to the “OFF” position, then turn off the power supply. Lockout/Tagout to prevent the power from being turned back on inadvertently.
5)Loosen and disconnect the rinse pump discharge line.
6)Remove the band (clip) connecting the rinse pump and internal booster tank.
7)Unscrew and remove the rinse pump from the internal booster tank.
8)Loosen and remove the nut connecting the water valve and water supply pipe.
9)Remove the screw securing the internal booster tank and the connector for the water valve. Pull out the internal booster tank.
10)Unscrew the internal booster tank cover.
11)To replace, reverse the above procedure.
Internal Booster Tank Cover |
|
Mounting Screw | Water Supply Pipe |
| Rinse Pump |
| Discharge Line |
Water Valve |
|
| Wash Pump Motor |
Internal Booster Tank |
|
Drain Hose |
|
Internal Booster Tank | Control Box |
Cover | |
Internal Booster Tank |
|
Internal Booster Tank Mounting Screw
Band
Rinse Pump Motor Power Switch
Mounting Screw (GFCI)
Rinse Pump Motor
51
