NOTE: This procedure is specifically for the removal of the Type 1 flow meter.
1.Power down the MCS unit ("Powering down the MCS unit" on page 24).
2.Shut off the water flowing into the MCS unit ("Shutting off the water" on page 25).
3.Remove the bottom fan unit ("Removing the bottom fan unit" on page 44).
4.Relocate the power inlet box ("Relocating the power inlet box" on page 93).
5.Remove the condensation pump and sensors ("Removing the condensation pump and sensors" on page 47).
6.Remove the bottom heat exchanger unit ("Removing the heat exchanger unit with couplers" on page 59).
7.Remove the magnetic solenoid valve ("Removing the magnetic solenoid valve" on page 82).
8.Remove the AC transfer switch ("Removing the AC transfer switch" on page 26).
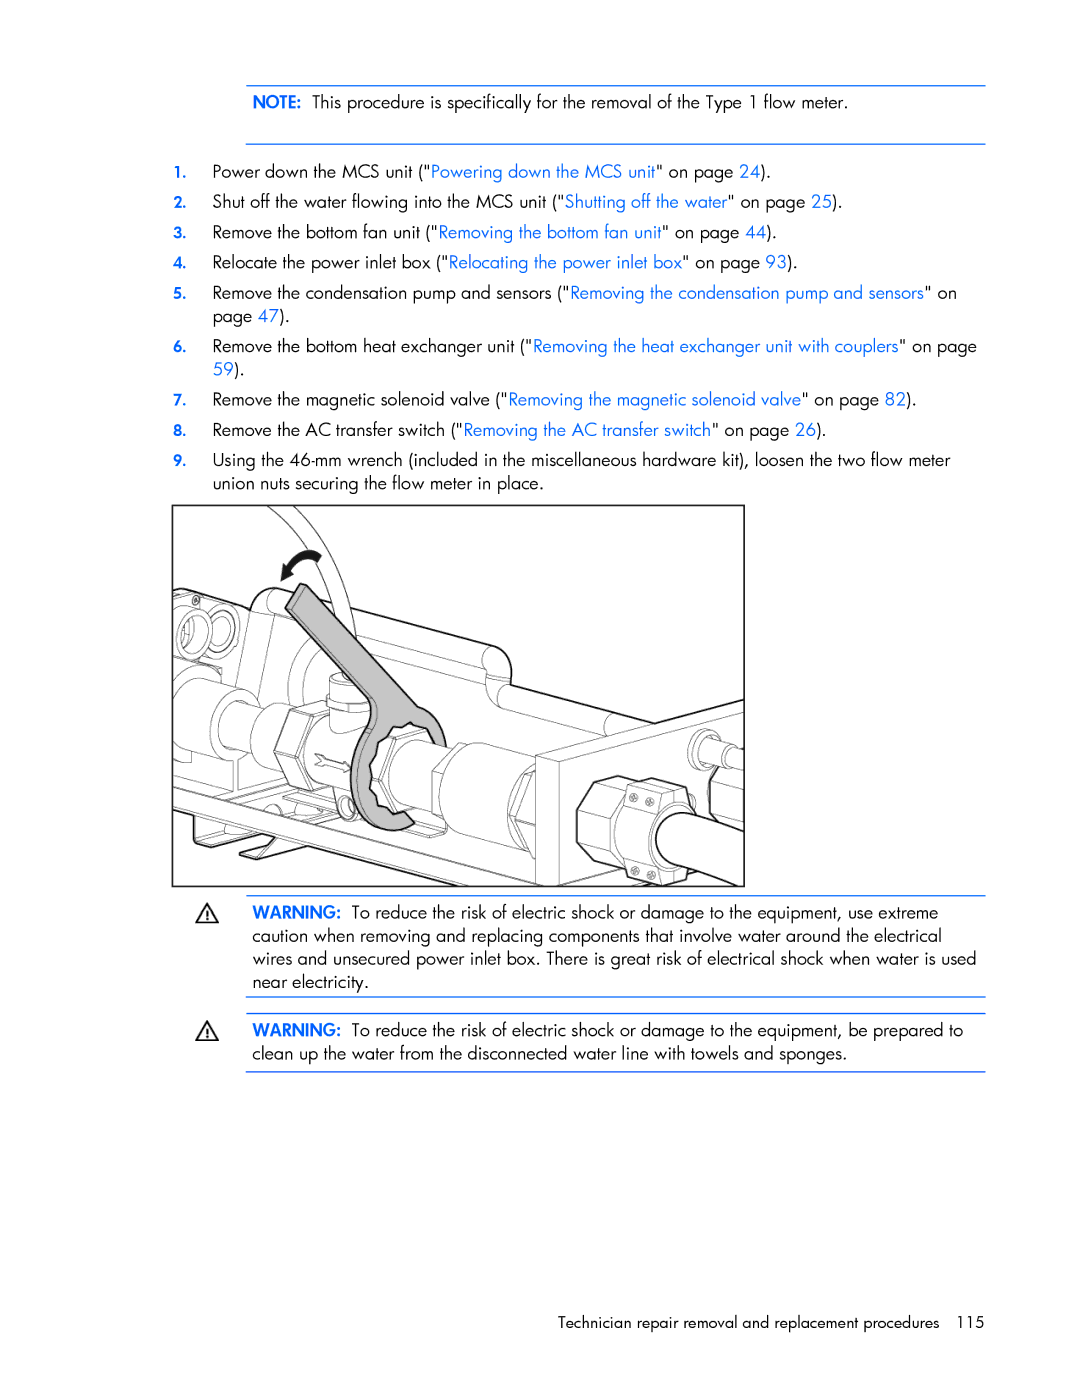
9.Using the
WARNING: To reduce the risk of electric shock or damage to the equipment, use extreme caution when removing and replacing components that involve water around the electrical wires and unsecured power inlet box. There is great risk of electrical shock when water is used near electricity.
WARNING: To reduce the risk of electric shock or damage to the equipment, be prepared to clean up the water from the disconnected water line with towels and sponges.
