4.Make sure the tray is not overfilled. If it is, remove the entire stack of paper from the tray, straighten the stack, and then return some of the paper to the tray.
5.Make sure the paper guides in the tray are adjusted correctly for the size of paper. Adjust the guides so they are touching the paper stack without bending it.
6.Make sure that the tray is fully inserted in the product.
7.If you are printing on heavy, embossed, or perforated paper, use the manual feed feature and feed sheets one at a time.
Clear jams
Jam locations
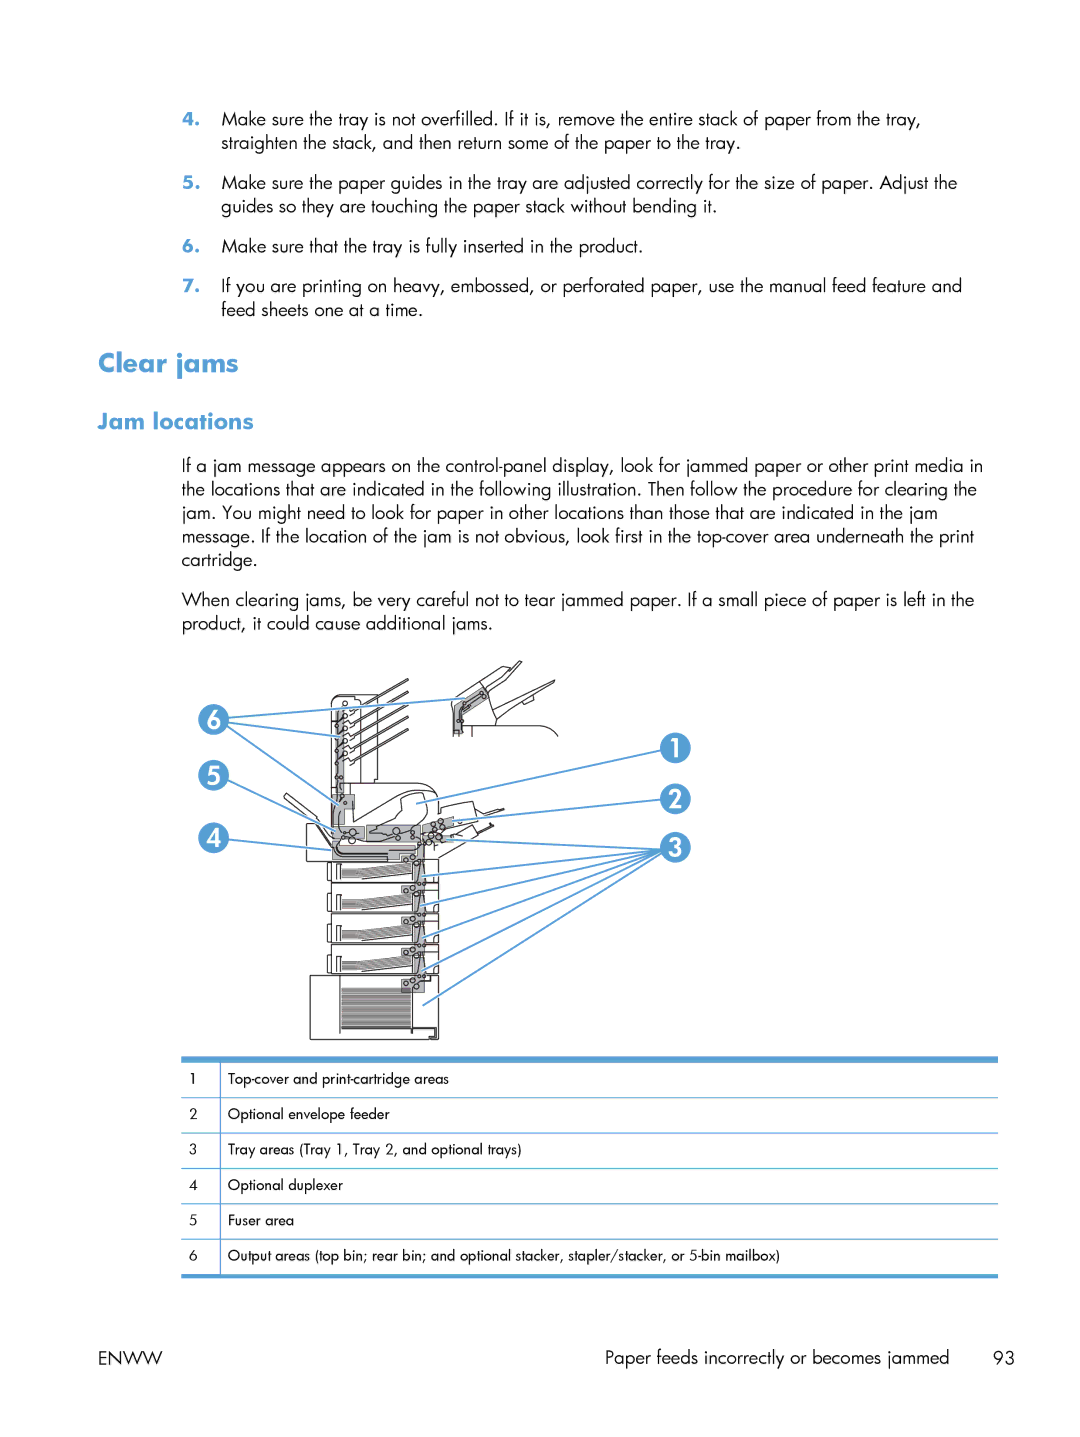
If a jam message appears on the
When clearing jams, be very careful not to tear jammed paper. If a small piece of paper is left in the product, it could cause additional jams.
6 | 1 | |
5 | ||
2 | ||
| ||
4 | 3 | |
|
1
2Optional envelope feeder
3Tray areas (Tray 1, Tray 2, and optional trays)
4Optional duplexer
5Fuser area
6Output areas (top bin; rear bin; and optional stacker, stapler/stacker, or
ENWW | Paper feeds incorrectly or becomes jammed | 93 |
