USER GUIDE FOR HP 6 COLOR PLUGIN
3.6 Enabling plugins in the Harlequin RIP
After installing the plugin files into your RIP, you must enable them in the Configure RIP Extras dialog before they can be used. To do this you will need your hp6 color plugin password, as supplied to you, as well as pass- words for color management and screening plugins which may be required.
To enable the HP DesignJet 6 color plugin, color management and screening plugins in the RIP, do the follow- ing:
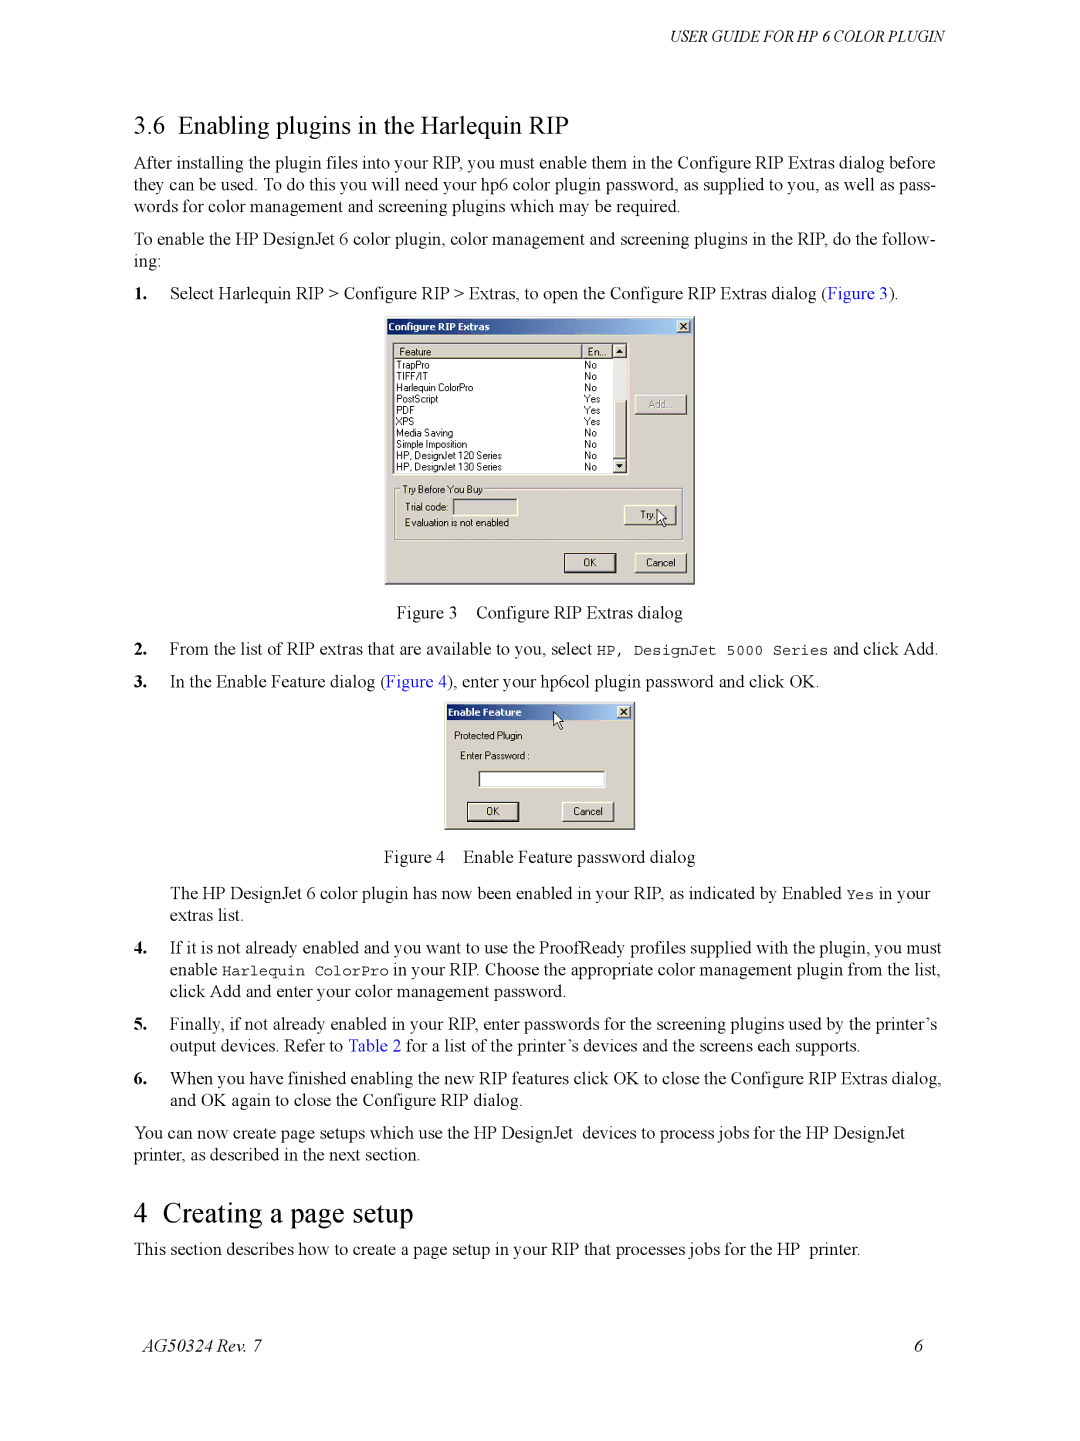
1.Select Harlequin RIP > Configure RIP > Extras, to open the Configure RIP Extras dialog (Figure 3).
Figure 3 Configure RIP Extras dialog
2.From the list of RIP extras that are available to you, select HP, DesignJet 5000 Series and click Add.
3.In the Enable Feature dialog (Figure 4), enter your hp6col plugin password and click OK.
Figure 4 Enable Feature password dialog
The HP DesignJet 6 color plugin has now been enabled in your RIP, as indicated by Enabled Yes in your extras list.
4.If it is not already enabled and you want to use the ProofReady profiles supplied with the plugin, you must enable Harlequin ColorPro in your RIP. Choose the appropriate color management plugin from the list, click Add and enter your color management password.
5.Finally, if not already enabled in your RIP, enter passwords for the screening plugins used by the printer’s output devices. Refer to Table 2 for a list of the printer’s devices and the screens each supports.
6.When you have finished enabling the new RIP features click OK to close the Configure RIP Extras dialog, and OK again to close the Configure RIP dialog.
You can now create page setups which use the HP DesignJet devices to process jobs for the HP DesignJet printer, as described in the next section.
4 Creating a page setup
This section describes how to create a page setup in your RIP that processes jobs for the HP printer.
AG50324 Rev. 7 | 6 |