Display assembly
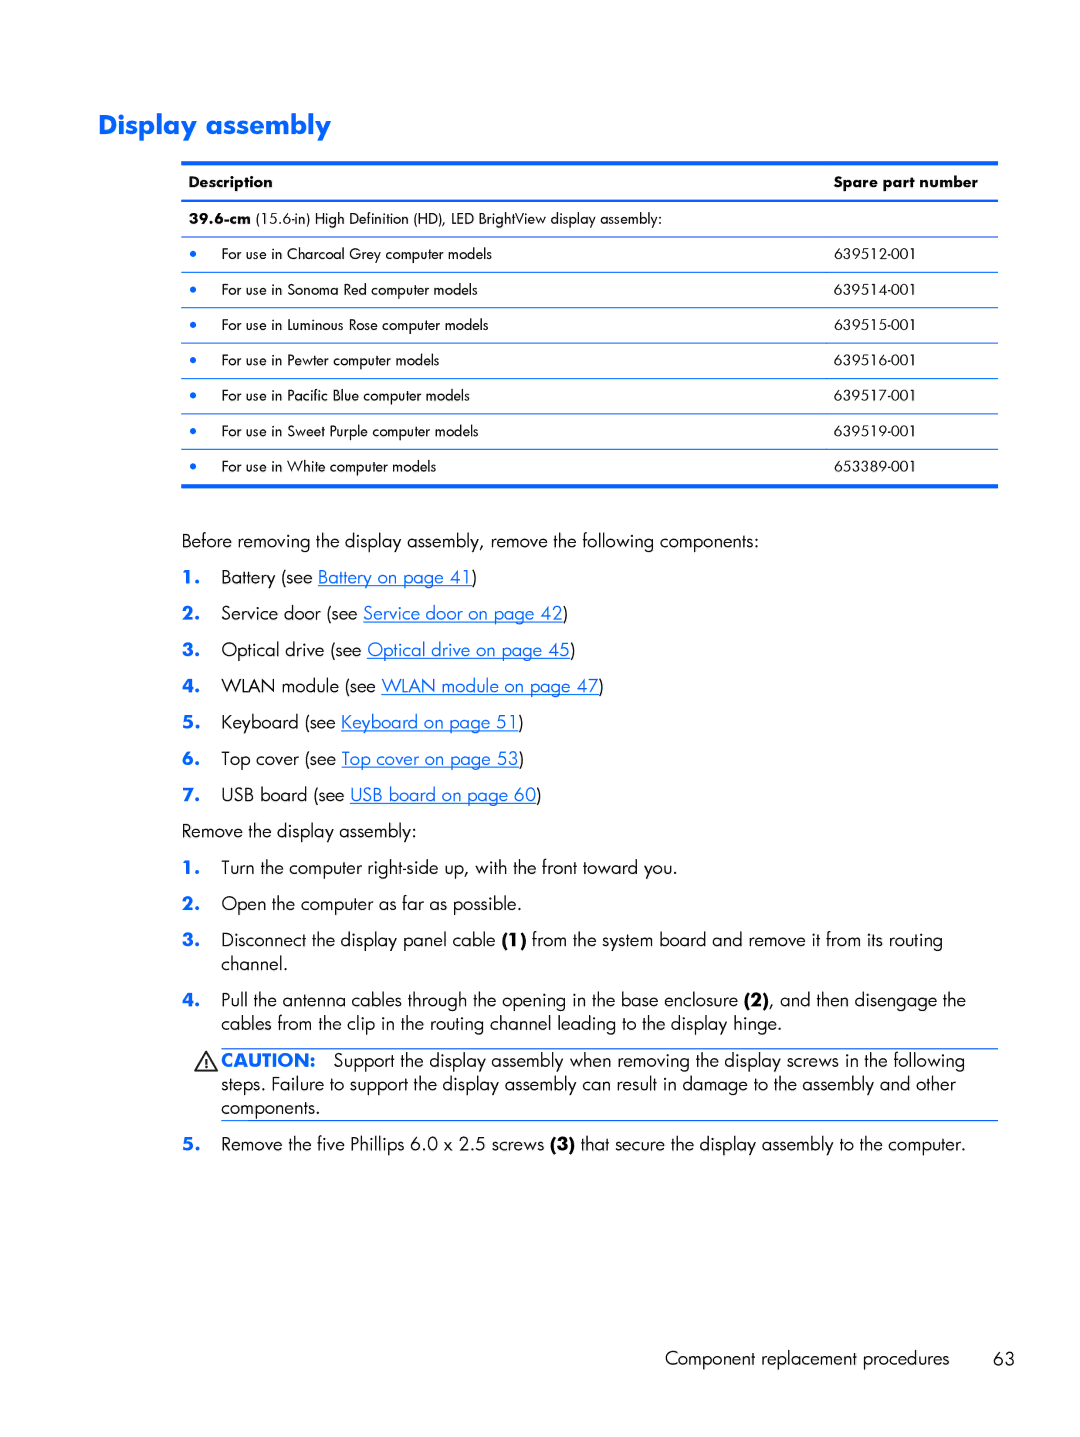
Description | Spare part number |
|
|
| |
|
|
● For use in Charcoal Grey computer models | |
|
|
● For use in Sonoma Red computer models | |
|
|
● For use in Luminous Rose computer models | |
|
|
● For use in Pewter computer models | |
|
|
● For use in Pacific Blue computer models | |
|
|
● For use in Sweet Purple computer models | |
|
|
● For use in White computer models | |
|
|
Before removing the display assembly, remove the following components:
1.Battery (see Battery on page 41)
2.Service door (see Service door on page 42)
3.Optical drive (see Optical drive on page 45)
4.WLAN module (see WLAN module on page 47)
5.Keyboard (see Keyboard on page 51)
6.Top cover (see Top cover on page 53)
7.USB board (see USB board on page 60) Remove the display assembly:
1.Turn the computer
2.Open the computer as far as possible.
3.Disconnect the display panel cable (1) from the system board and remove it from its routing channel.
4.Pull the antenna cables through the opening in the base enclosure (2), and then disengage the cables from the clip in the routing channel leading to the display hinge.
![]() CAUTION: Support the display assembly when removing the display screws in the following steps. Failure to support the display assembly can result in damage to the assembly and other components.
CAUTION: Support the display assembly when removing the display screws in the following steps. Failure to support the display assembly can result in damage to the assembly and other components.
5.Remove the five Phillips 6.0 x 2.5 screws (3) that secure the display assembly to the computer.
Component replacement procedures | 63 |
