Installing a Secondary Hard Drive into the 3.5-inch Drive Bay
The 3.5-inch secondary hard drive bay is located underneath the 5.25-inch optical drive. To install a secondary hard drive:
1.Follow the procedure in Removing an Optical Drive from the 5.25-inch Drive Bay on page 42 to remove the 5.25-inch optical drive and access the 3.5-inch secondary hard drive bay.
 CAUTION: Ensure that the computer is turned off and that the power cord is disconnected from the electrical outlet before proceeding.
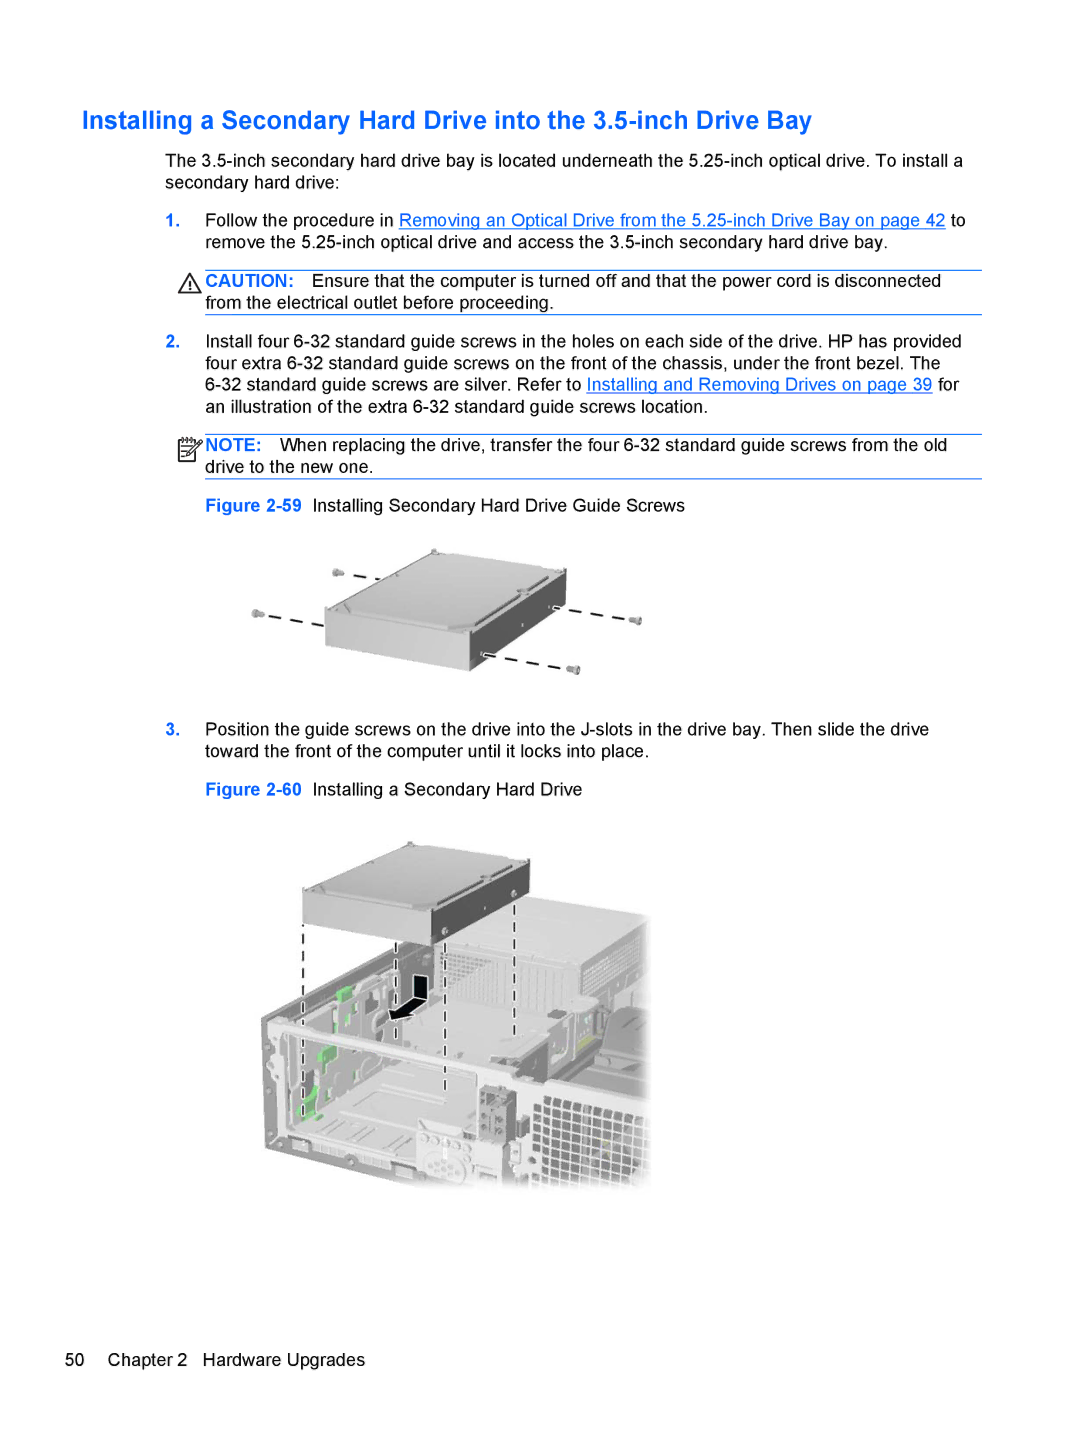
2.Install four 6-32 standard guide screws in the holes on each side of the drive. HP has provided four extra 6-32 standard guide screws on the front of the chassis, under the front bezel. The
6-32 standard guide screws are silver. Refer to Installing and Removing Drives on page 39 for an illustration of the extra 6-32 standard guide screws location.


 NOTE: When replacing the drive, transfer the four 6-32 standard guide screws from the old drive to the new one.
Figure 2-59Installing Secondary Hard Drive Guide Screws
3.Position the guide screws on the drive into the J-slots in the drive bay. Then slide the drive toward the front of the computer until it locks into place.
Figure 2-60Installing a Secondary Hard Drive
50 Chapter 2 Hardware Upgrades