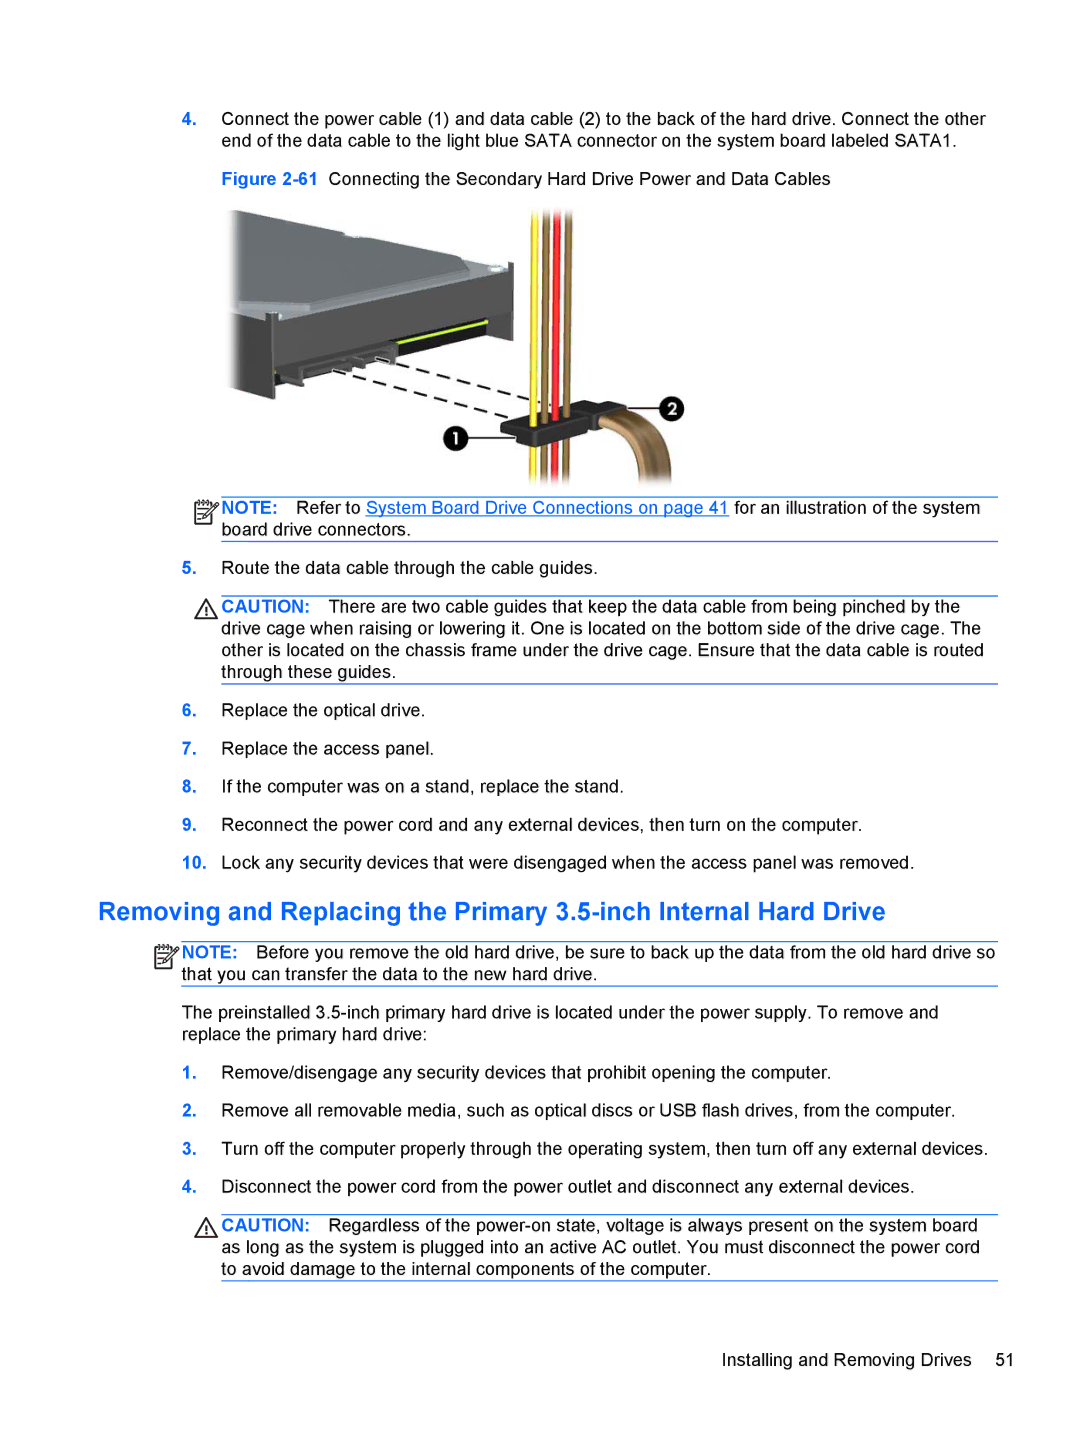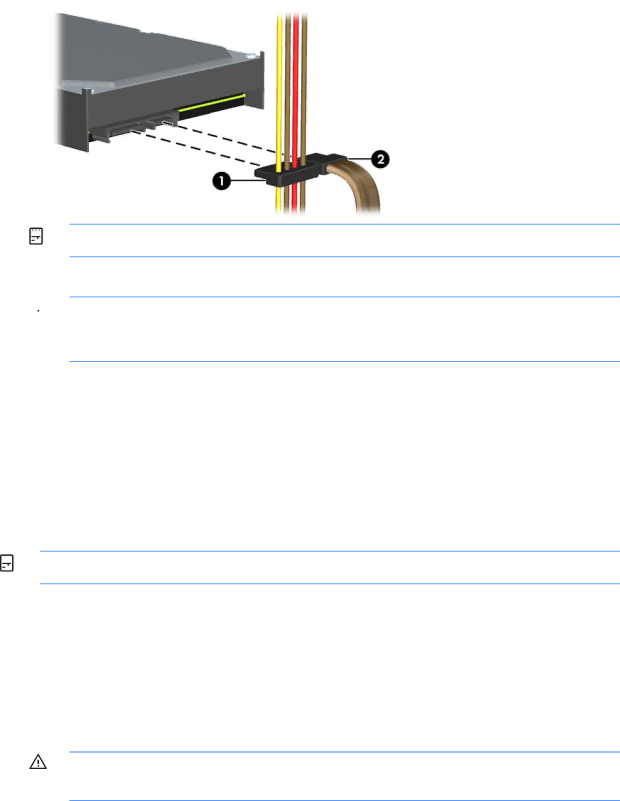
4.Connect the power cable (1) and data cable (2) to the back of the hard drive. Connect the other end of the data cable to the light blue SATA connector on the system board labeled SATA1.
Figure 2-61 Connecting the Secondary Hard Drive Power and Data Cables
![]()
![]()
![]()
![]() NOTE: Refer to System Board Drive Connections on page 41 for an illustration of the system board drive connectors.
NOTE: Refer to System Board Drive Connections on page 41 for an illustration of the system board drive connectors.
5.Route the data cable through the cable guides.
![]() CAUTION: There are two cable guides that keep the data cable from being pinched by the drive cage when raising or lowering it. One is located on the bottom side of the drive cage. The other is located on the chassis frame under the drive cage. Ensure that the data cable is routed through these guides.
CAUTION: There are two cable guides that keep the data cable from being pinched by the drive cage when raising or lowering it. One is located on the bottom side of the drive cage. The other is located on the chassis frame under the drive cage. Ensure that the data cable is routed through these guides.
6.Replace the optical drive.
7.Replace the access panel.
8.If the computer was on a stand, replace the stand.
9.Reconnect the power cord and any external devices, then turn on the computer.
10.Lock any security devices that were disengaged when the access panel was removed.
Removing and Replacing the Primary
![]()
![]()
![]()
![]() NOTE: Before you remove the old hard drive, be sure to back up the data from the old hard drive so that you can transfer the data to the new hard drive.
NOTE: Before you remove the old hard drive, be sure to back up the data from the old hard drive so that you can transfer the data to the new hard drive.
The preinstalled
1.Remove/disengage any security devices that prohibit opening the computer.
2.Remove all removable media, such as optical discs or USB flash drives, from the computer.
3.Turn off the computer properly through the operating system, then turn off any external devices.
4.Disconnect the power cord from the power outlet and disconnect any external devices.
CAUTION: Regardless of the
Installing and Removing Drives 51