UPS MAINTENANCE
New Batteries
5
3
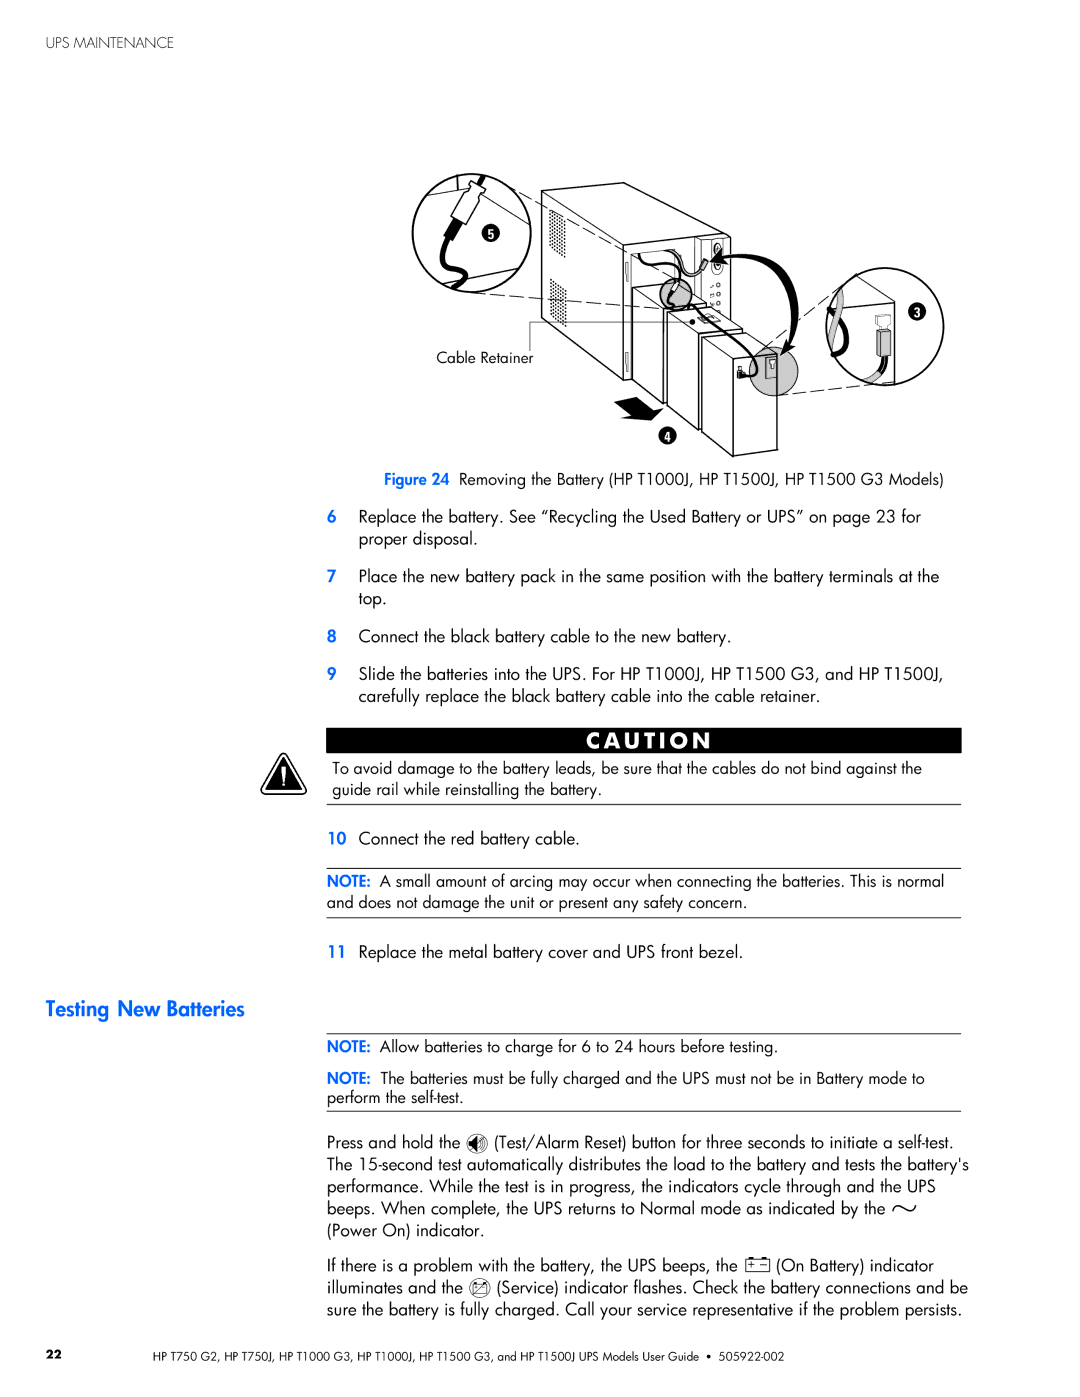
Cable Retainer
4
Figure 24 Removing the Battery (HP T1000J, HP T1500J, HP T1500 G3 Models)
6Replace the battery. See “Recycling the Used Battery or UPS” on page 23 for proper disposal.
7Place the new battery pack in the same position with the battery terminals at the top.
8Connect the black battery cable to the new battery.
9Slide the batteries into the UPS. For HP T1000J, HP T1500 G3, and HP T1500J, carefully replace the black battery cable into the cable retainer.
C A U T I O N
To avoid damage to the battery leads, be sure that the cables do not bind against the guide rail while reinstalling the battery.
10Connect the red battery cable.
NOTE: A small amount of arcing may occur when connecting the batteries. This is normal and does not damage the unit or present any safety concern.
11Replace the metal battery cover and UPS front bezel.
NOTE: Allow batteries to charge for 6 to 24 hours before testing.
NOTE: The batteries must be fully charged and the UPS must not be in Battery mode to perform the self‐test.
Press and hold the ![]()
![]() (Test/Alarm Reset) button for three seconds to initiate a
(Test/Alarm Reset) button for three seconds to initiate a
If there is a problem with the battery, the UPS beeps, the + - (On Battery) indicator illuminates and the ![]()
![]()
![]()
![]() (Service) indicator flashes. Check the battery connections and be sure the battery is fully charged. Call your service representative if the problem persists.
(Service) indicator flashes. Check the battery connections and be sure the battery is fully charged. Call your service representative if the problem persists.
22 | HP T750 G2, HP T750J, HP T1000 G3, HP T1000J, HP T1500 G3, and HP T1500J UPS Models User Guide S |