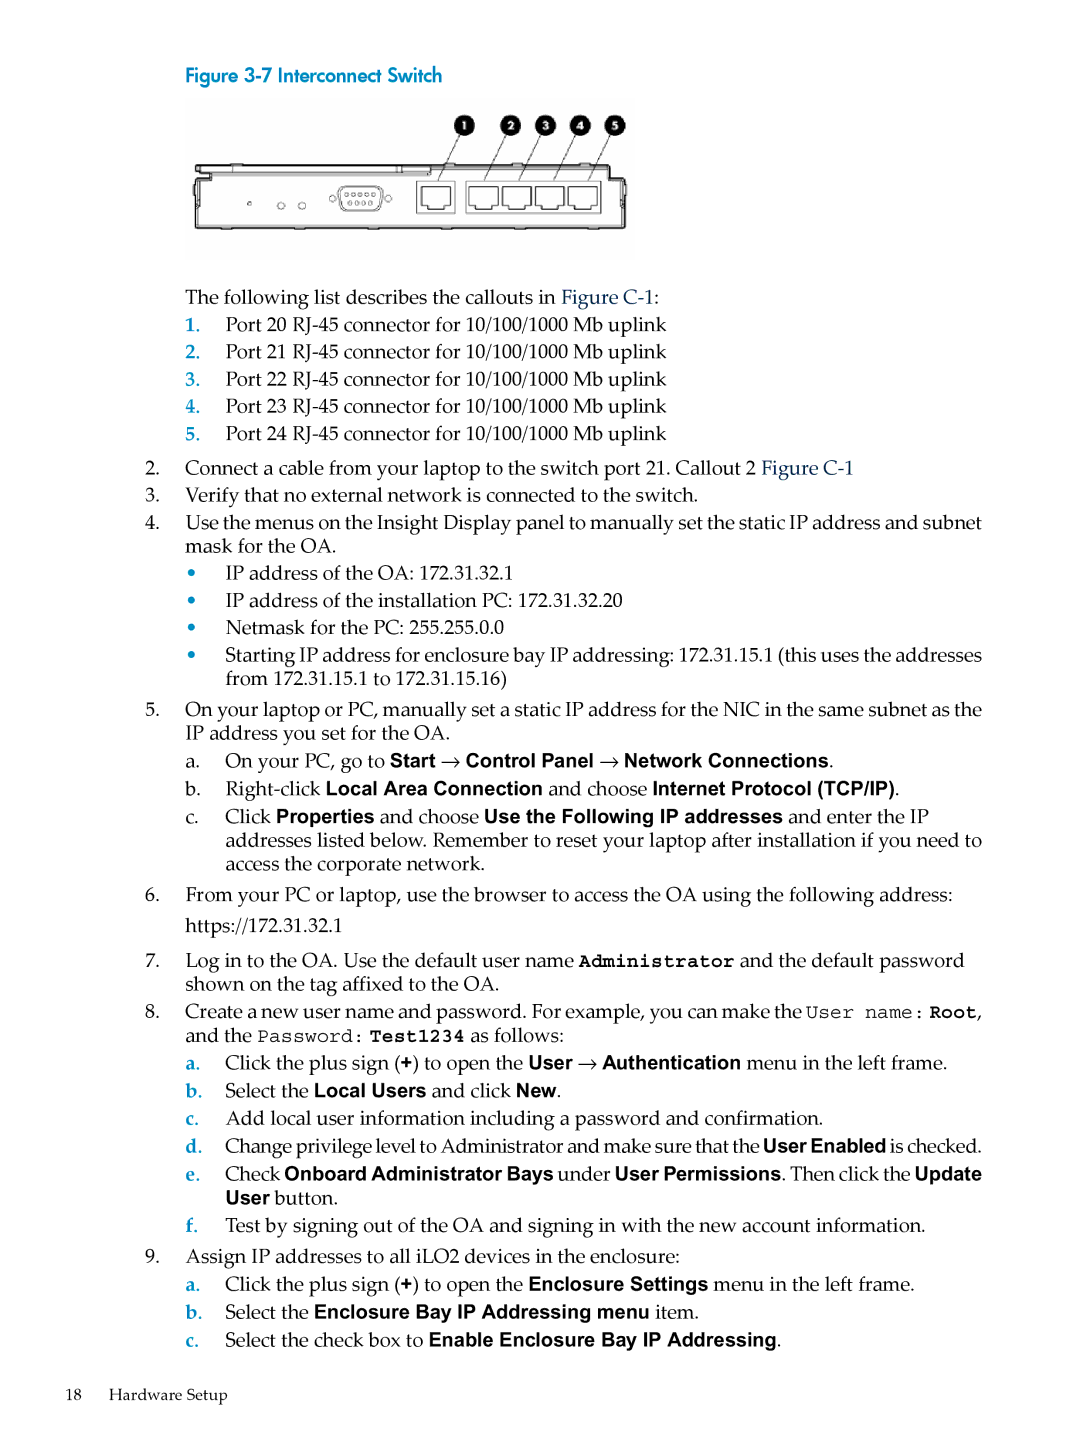
Figure 3-7 Interconnect Switch
The following list describes the callouts in Figure
1.Port 20
2.Port 21
3.Port 22
4.Port 23
5.Port 24
2.Connect a cable from your laptop to the switch port 21. Callout 2 Figure
3.Verify that no external network is connected to the switch.
4.Use the menus on the Insight Display panel to manually set the static IP address and subnet mask for the OA.
• IP address of the OA: 172.31.32.1
• IP address of the installation PC: 172.31.32.20
• Netmask for the PC: 255.255.0.0
• Starting IP address for enclosure bay IP addressing: 172.31.15.1 (this uses the addresses from 172.31.15.1 to 172.31.15.16)
5.On your laptop or PC, manually set a static IP address for the NIC in the same subnet as the IP address you set for the OA.
a.On your PC, go to Start → Control Panel → Network Connections.
b.
c.Click Properties and choose Use the Following IP addresses and enter the IP addresses listed below. Remember to reset your laptop after installation if you need to access the corporate network.
6.From your PC or laptop, use the browser to access the OA using the following address: https://172.31.32.1
7.Log in to the OA. Use the default user name Administrator and the default password shown on the tag affixed to the OA.
8.Create a new user name and password. For example, you can make the User name: Root,
and the Password: Test1234 as follows:
a.Click the plus sign (+) to open the User → Authentication menu in the left frame.
b.Select the Local Users and click New.
c.Add local user information including a password and confirmation.
d.Change privilege level to Administrator and make sure that the User Enabled is checked.
e.Check Onboard Administrator Bays under User Permissions. Then click the Update User button.
f.Test by signing out of the OA and signing in with the new account information.
9.Assign IP addresses to all iLO2 devices in the enclosure:
a.Click the plus sign (+) to open the Enclosure Settings menu in the left frame.
b.Select the Enclosure Bay IP Addressing menu item.
c.Select the check box to Enable Enclosure Bay IP Addressing.
18 Hardware Setup