6. MENU FUNCTIONS
6.5 Installation (3)
From this option in the main menu you access the driving settings.
•Exit angles (3-1)
to set how far Automower® should reverse out of the charging station before it turns and in what direction the mower should leave the charging station.
•Follow loop (3-2)
to guide the mower to easily reach a remote area of the garden, to make it easier to find the charging station and to determine at what distance the mower shall follow the loop.
•Installation shape
to tell Automower® which type of garden you have.
•Advanced (3-4)
to check that the loop is intact or exactly where in the lawn the wire is buried and to adjust the distance over the boundary wire that Automower® shall run.
For examples of garden settings, see 7. Garden example on page 61.
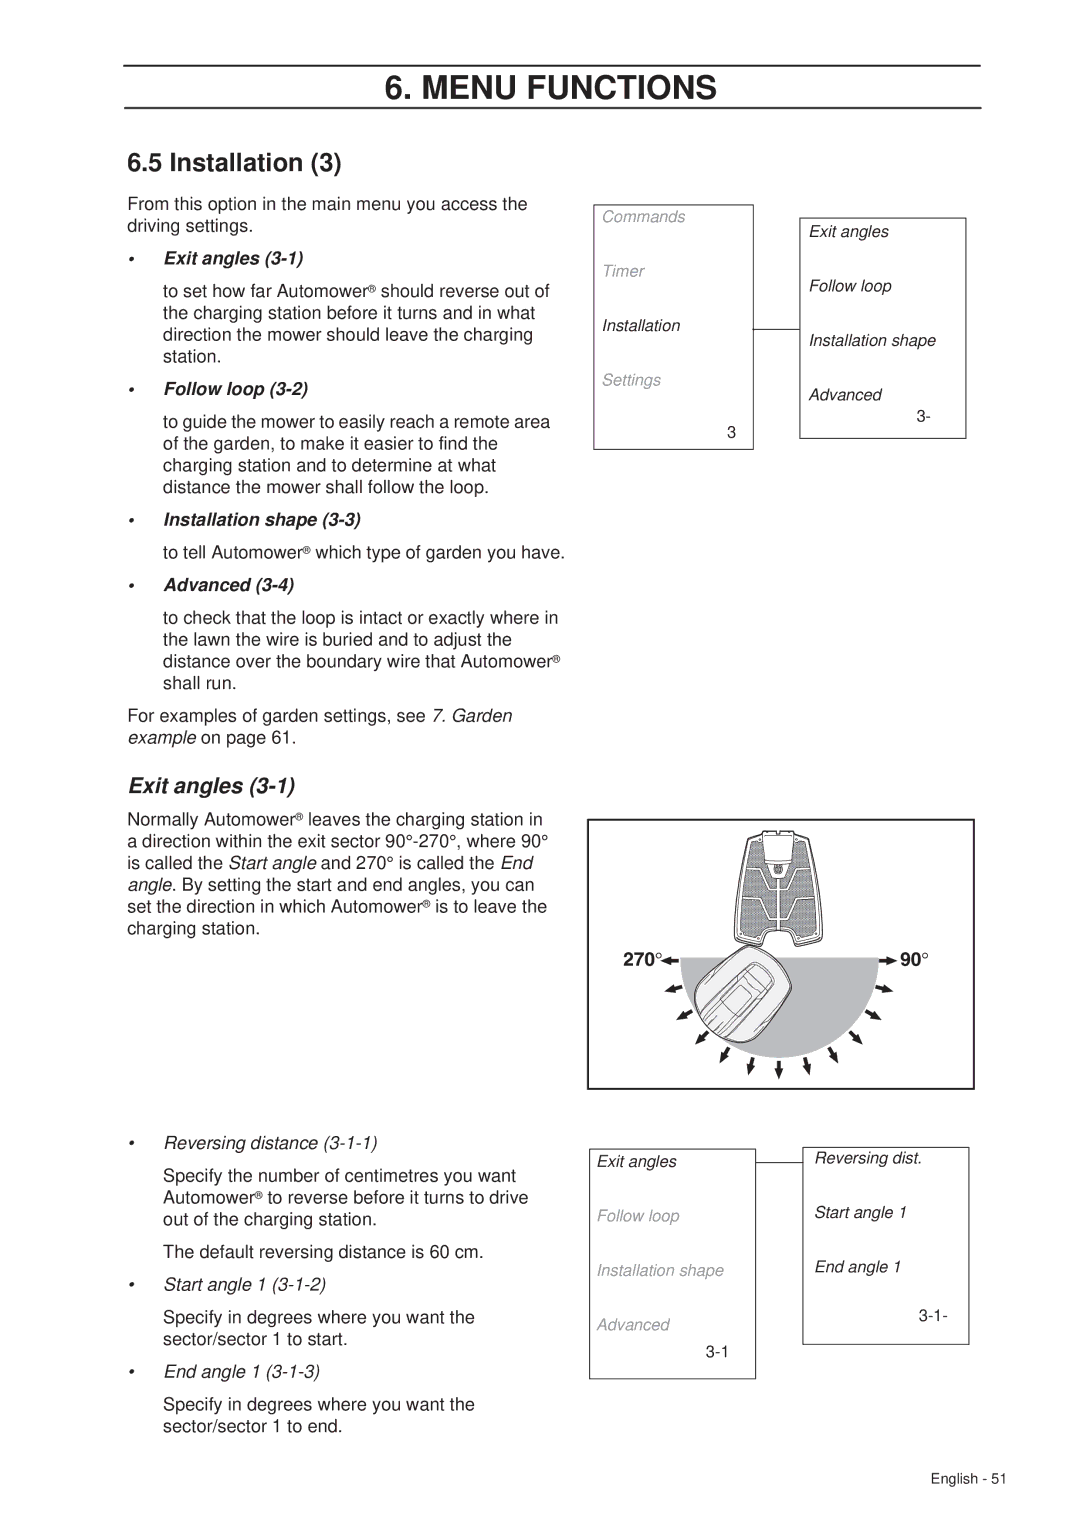
Exit angles (3-1)
Normally Automower® leaves the charging station in a direction within the exit sector
Commands
Timer
Installation
Settings
3
Exit angles
Follow loop
Installation shape
Advanced
3-
•Reversing distance (3-1-1)
Specify the number of centimetres you want Automower® to reverse before it turns to drive out of the charging station.
The default reversing distance is 60 cm.
•Start angle 1 (3-1-2)
Specify in degrees where you want the sector/sector 1 to start.
•End angle 1 (3-1-3)
Specify in degrees where you want the sector/sector 1 to end.
Exit angles
Follow loop
Installation shape
Advanced
Reversing dist.
Start angle 1
End angle 1
English - 51
