FRONT RIGGINGS | PROCEDURE 3 |
| DETAIL “A” |
|
Height Adjustment | Flat | Nut |
Bracket | Washer |
|
Caplug
Washer
Two (2) Large
Washers
Mounting |
|
|
Screw |
|
|
Caplug |
|
|
Cap |
|
|
Footboard |
| Support Tube |
Bracket |
| |
|
| |
DETAIL “B” |
|
|
Footboard Bracket | Flat | Nut |
|
| |
Washer | ||
|
| Mounting |
|
| Positions |
Height |
|
|
Adjustment |
|
|
Bracket |
|
|
Threaded |
|
|
Arm |
|
|
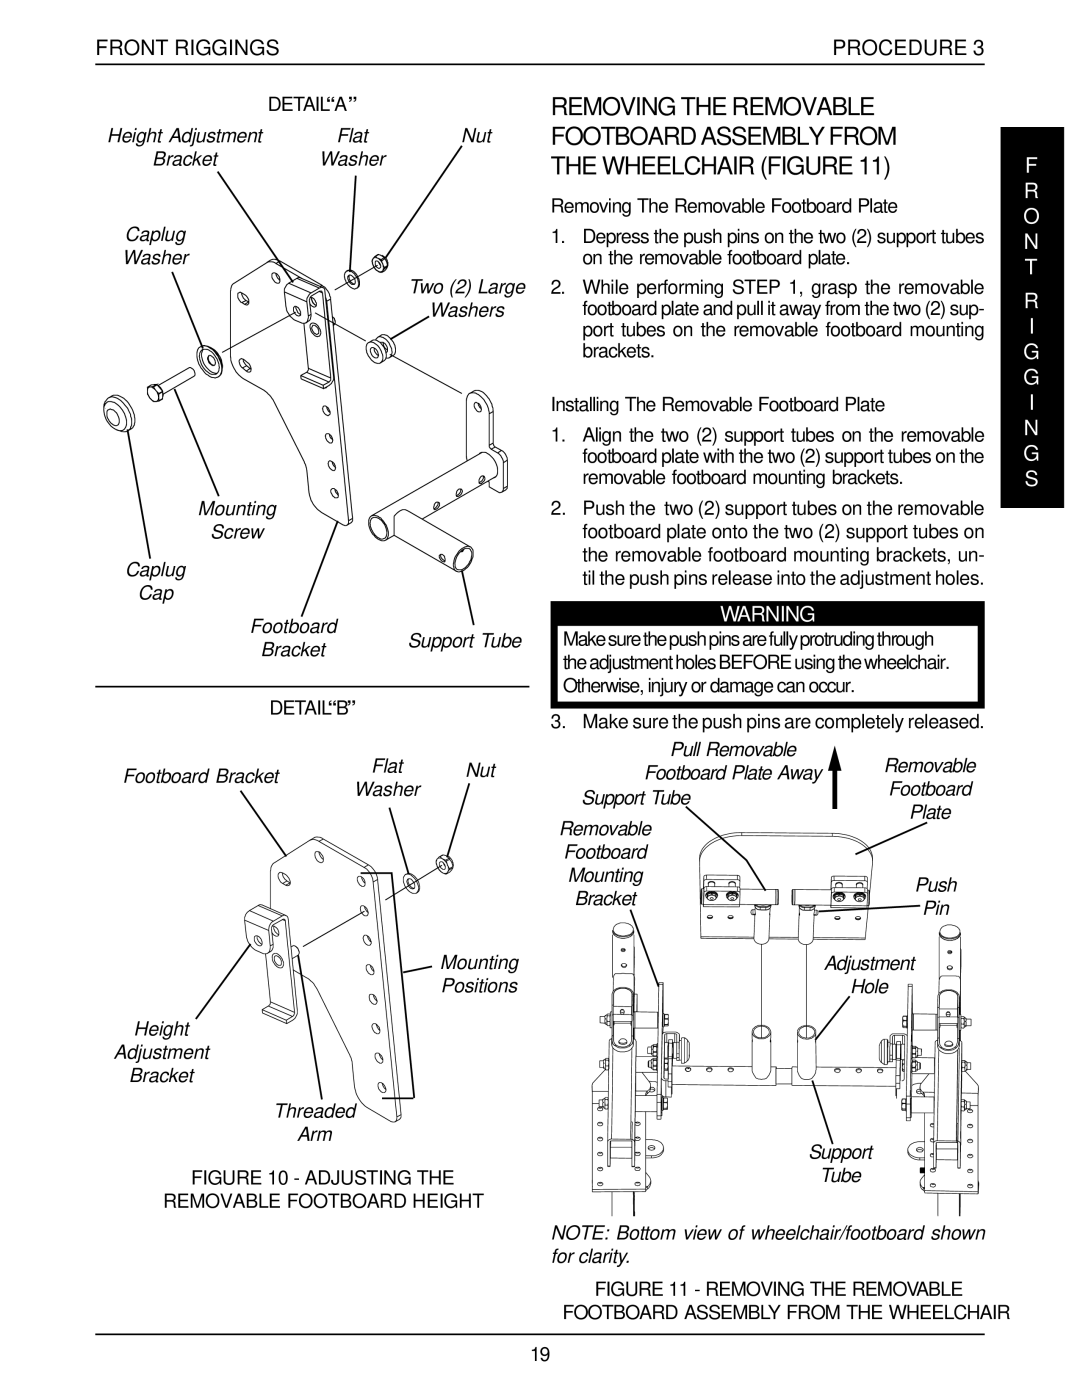
FIGURE 10 - ADJUSTING THE
REMOVABLE FOOTBOARD HEIGHT
REMOVING THE REMOVABLE FOOTBOARD ASSEMBLY FROM THE WHEELCHAIR (FIGURE 11)
Removing The Removable Footboard Plate
1.Depress the push pins on the two (2) support tubes on the removable footboard plate.
2.While performing STEP 1, grasp the removable footboard plate and pull it away from the two (2) sup- port tubes on the removable footboard mounting brackets.
Installing The Removable Footboard Plate
1.Align the two (2) support tubes on the removable footboard plate with the two (2) support tubes on the removable footboard mounting brackets.
2.Push the two (2) support tubes on the removable footboard plate onto the two (2) support tubes on the removable footboard mounting brackets, un- til the push pins release into the adjustment holes.
WARNING
Makesurethepushpinsarefullyprotrudingthrough theadjustmentholesBEFOREusingthewheelchair. Otherwise, injury or damage can occur.
3. Make sure the push pins are completely released.
Pull Removable
Footboard Plate Away | Removable | |
Footboard | ||
Support Tube | ||
Plate | ||
Removable | ||
| ||
Footboard |
| |
Mounting | Push | |
Bracket | ||
Pin | ||
| ||
| Adjustment | |
| Hole |
Support
Tube
NOTE: Bottom view of wheelchair/footboard shown for clarity.
FIGURE 11 - REMOVING THE REMOVABLE
FOOTBOARD ASSEMBLY FROM THE WHEELCHAIR
F R O N T
R
I
G G I N G S
19