FRONT RIGGINGS | PROCEDURE 3 |
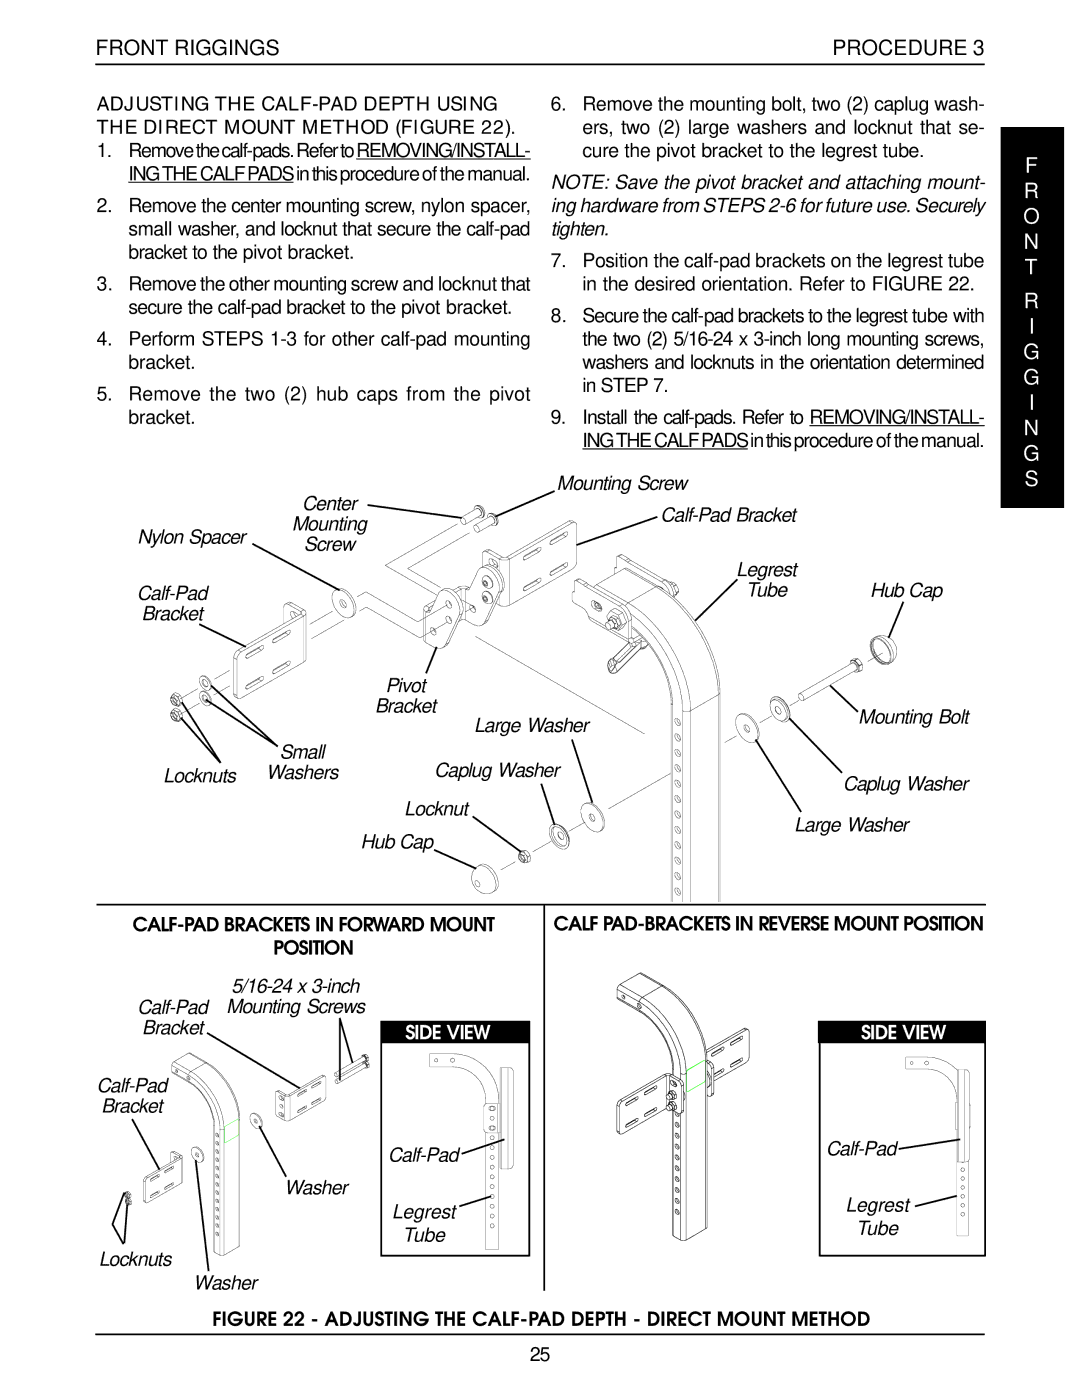
ADJUSTING THE
1.
2.Remove the center mounting screw, nylon spacer, small washer, and locknut that secure the
3.Remove the other mounting screw and locknut that secure the
4.Perform STEPS
5.Remove the two (2) hub caps from the pivot bracket.
6.Remove the mounting bolt, two (2) caplug wash- ers, two (2) large washers and locknut that se- cure the pivot bracket to the legrest tube.
NOTE: Save the pivot bracket and attaching mount- ing hardware from STEPS
7.Position the
8.Secure the
9.Install the
F R O N T
R
I
G G I N G
| Center | Mounting Screw | |
| |||
Nylon Spacer | Mounting | ||
| |||
Screw |
| ||
|
|
Legrest
Bracket
| Pivot |
|
| Bracket | Mounting Bolt |
| Large Washer | |
|
| |
Small | Caplug Washer |
|
Locknuts Washers | Caplug Washer | |
|
| |
| Locknut | Large Washer |
| Hub Cap | |
|
|
S
POSITION
CALF
Bracket
Washer
Locknuts
Washer
SIDE VIEW
Calf-Pad
Legrest
Tube
SIDE VIEW
Calf-Pad
Legrest
Tube
FIGURE 22 - ADJUSTING THE CALF-PAD DEPTH - DIRECT MOUNT METHOD
25
