FRONT RIGGINGS | PROCEDURE 3 |
Adjusting the Calf-Pad Depth
NOTE: The
1.The pivot bracket can be mounted in a FOR- WARD or REARWARD position. For further calf- pad depth adjustment, the pivot bracket can be removed. See Note 2A.
2.The
A.If the pivot bracket is removed, the
1.Perform one (1) of the following:
A.If pivot bracket method is desired, proceed to AD-
JUSTING THE
B.If direct mount method is desired, proceed to
ADJUSTING THE
ADJUSTING THE
1.
2.Remove the center mounting screw, nylon spacer, small washer, and locknut that secure the
3.Remove the other mounting screw, small washer and locknut that secure the
4.Repeat STEPS
5.Perform one (1) of the following:
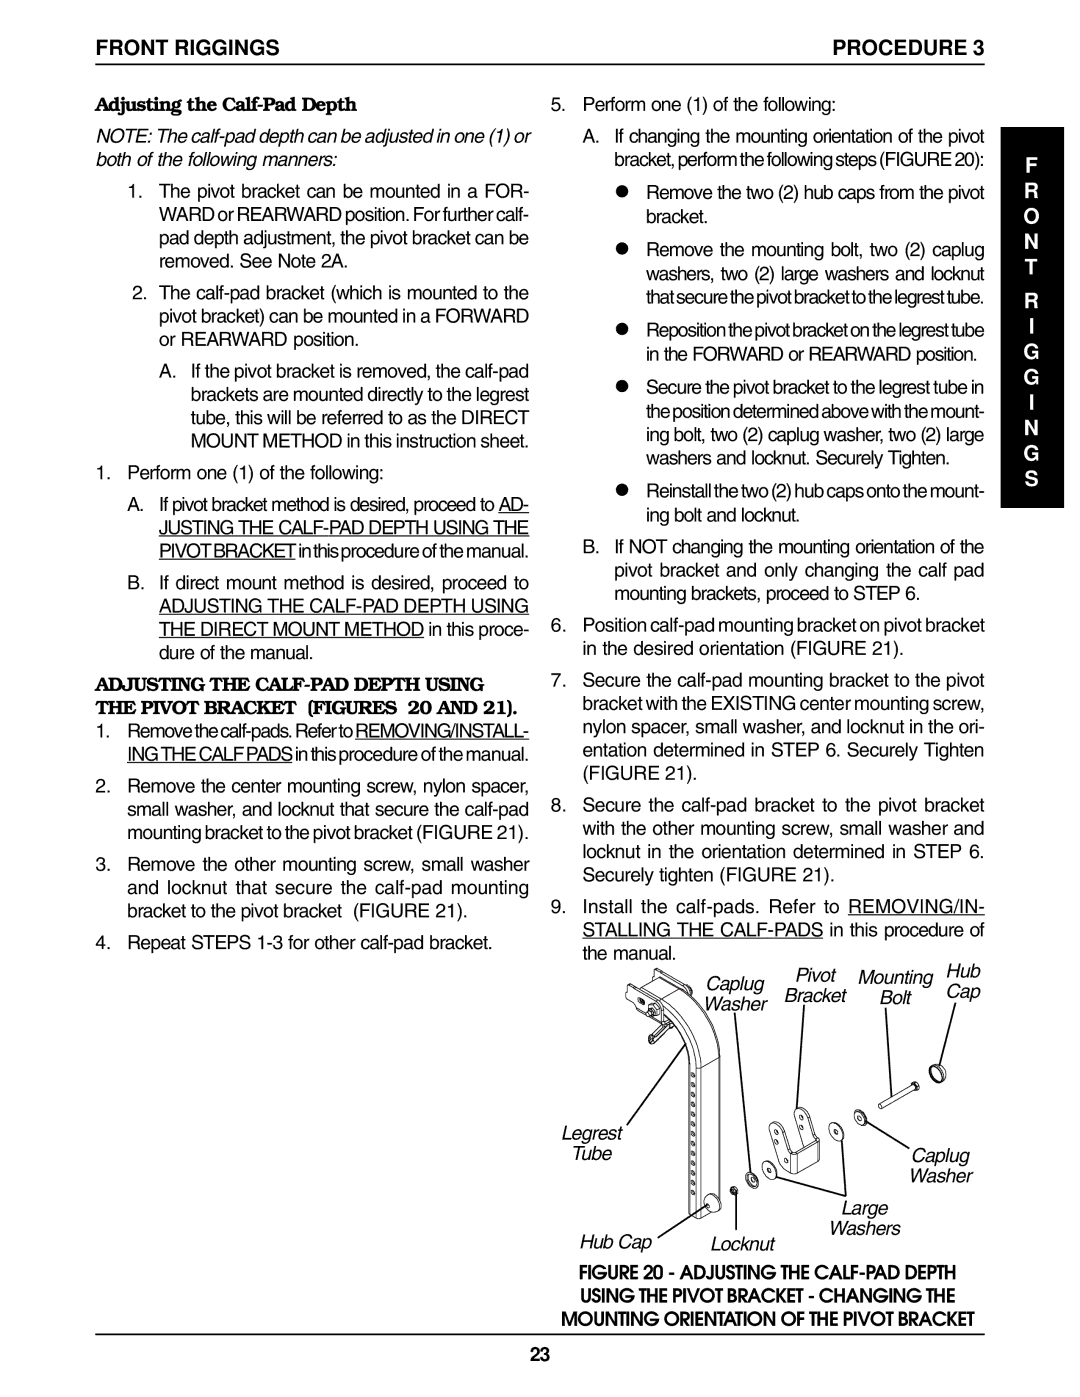
A.If changing the mounting orientation of the pivot bracket, perform the following steps (FIGURE 20):
l Remove the two (2) hub caps from the pivot bracket.
l Remove the mounting bolt, two (2) caplug washers, two (2) large washers and locknut thatsecurethepivotbrackettothelegresttube.
l Repositionthepivotbracketonthelegresttube in the FORWARD or REARWARD position.
l Secure the pivot bracket to the legrest tube in thepositiondeterminedabovewiththemount- ing bolt, two (2) caplug washer, two (2) large washers and locknut. Securely Tighten.
l Reinstall the two (2) hub caps onto the mount- ing bolt and locknut.
B.If NOT changing the mounting orientation of the pivot bracket and only changing the calf pad mounting brackets, proceed to STEP 6.
6.Position
7.Secure the
8.Secure the
9.Install the
Caplug Pivot Mounting Hub
Washer Bracket Bolt Cap
Legrest
TubeCaplug
Washer
| Large |
Hub Cap | Washers |
Locknut |
FIGURE 20 - ADJUSTING THE CALF-PAD DEPTH USING THE PIVOT BRACKET - CHANGING THE MOUNTING ORIENTATION OF THE PIVOT BRACKET
F R O N T
R
I
G G I N G S
23