F R O N T
R
I
G G I N G S
PROCEDURE 3 |
|
| FRONT RIGGINGS | |
| Mounting |
| CAUTION | |
Warning | Bolt | Hub Cap | DO NOT use outside mounting slots, otherwise | |
Label |
|
| damage to the | |
Large Washer |
|
| ||
Locknut |
| Caplug | ||
|
| |||
| Washer |
| ||
|
|
| ||
|
| Large | Phillips Head | |
|
| Washer | ||
Hub Cap |
| Screws and | ||
| Pivot Bracket | |||
| Washers | |||
|
| |||
|
|
| ||
Caplug |
|
| ||
Washer |
| Footboard | Bracket | |
|
|
| ||
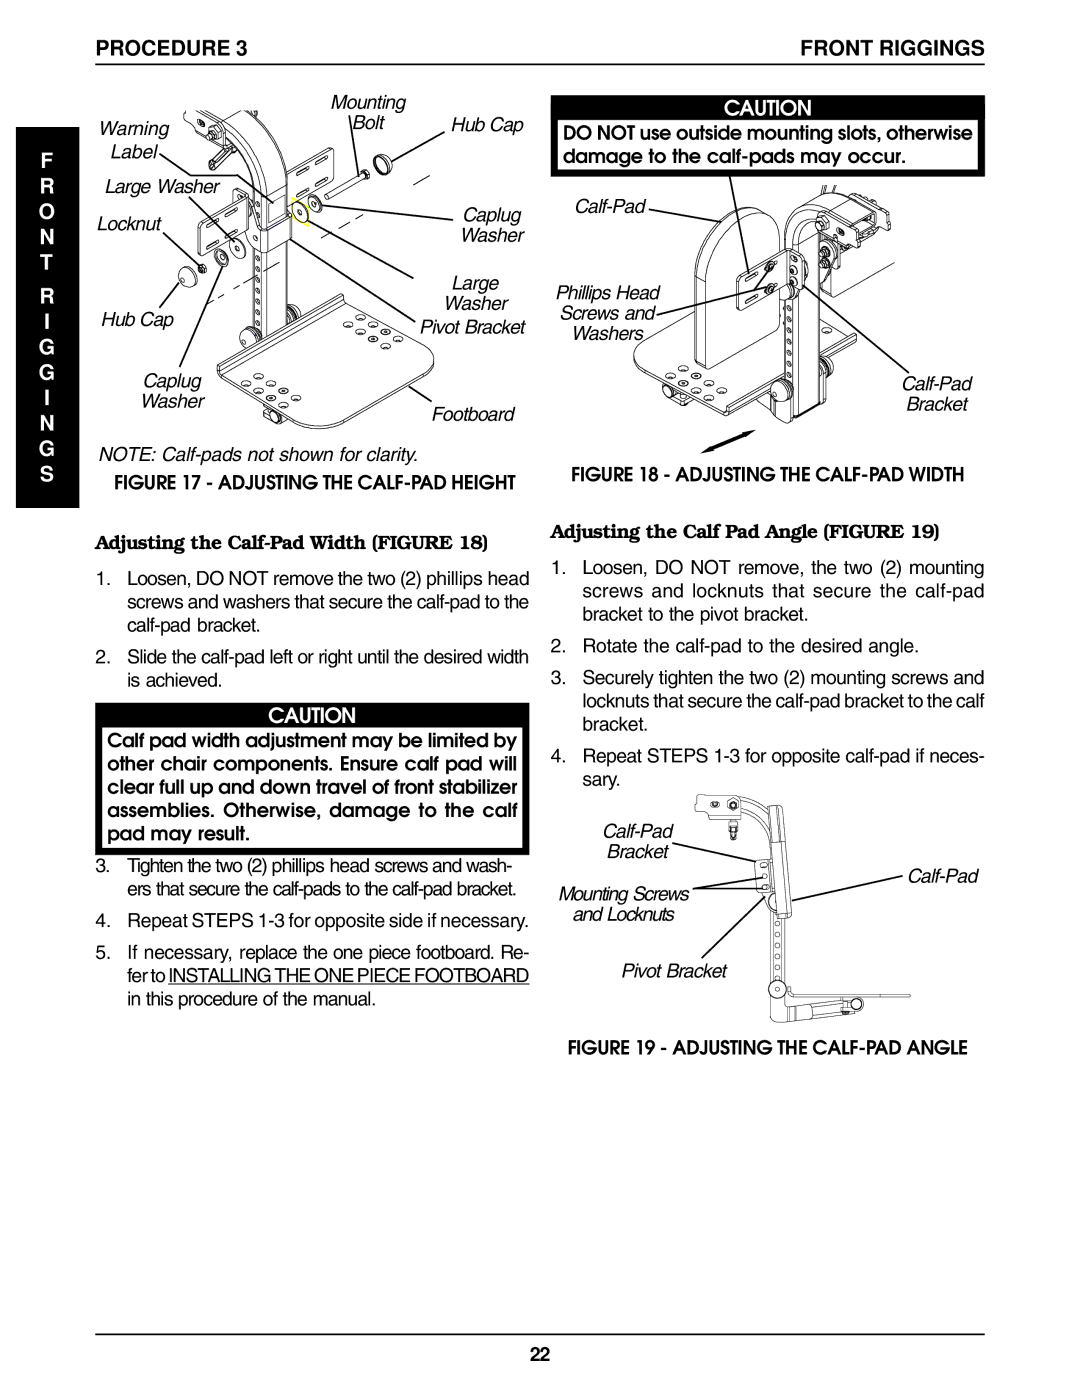
NOTE: |
| FIGURE 18 - ADJUSTING THE | ||
FIGURE 17 - ADJUSTING THE | ||||
| ||||
Adjusting the Calf-Pad Width (FIGURE 18)
1.Loosen, DO NOT remove the two (2) phillips head screws and washers that secure the
2.Slide the
CAUTION
Calf pad width adjustment may be limited by other chair components. Ensure calf pad will clear full up and down travel of front stabilizer assemblies. Otherwise, damage to the calf pad may result.
3.Tighten the two (2) phillips head screws and wash- ers that secure the
4.Repeat STEPS
5.If necessary, replace the one piece footboard. Re- fer to INSTALLING THE ONE PIECE FOOTBOARD in this procedure of the manual.
Adjusting the Calf Pad Angle (FIGURE 19)
1.Loosen, DO NOT remove, the two (2) mounting screws and locknuts that secure the
2.Rotate the
3.Securely tighten the two (2) mounting screws and locknuts that secure the
4.Repeat STEPS
Calf-Pad
Bracket
Mounting Screws
and Locknuts
Pivot Bracket
FIGURE 19 - ADJUSTING THE CALF-PAD ANGLE
22