RWD WHEELCHAIRS | PROCEDURE 11 |
1.Examine battery clamps and terminals for corrosion.
2.Verify that the plastic caps are in place over the bat- tery cell holes.
3.Clean the terminals and inside the battery clamps by using a battery cleaning tool, wire brush, or medium grade sand paper.
NOTE: When done, these areas should be shiny, not dull.
4. Carefully dust off all metal particles.
INSTALLING/REMOVING BATTERY BOXES (FIGURE 4)
WARNING
NEVER unplug the battery cables by pulling on the wires. Unplug the battery cables by pull- ing on the connector ONLY. Otherwise injury or damage may result.
NOTE: To remove the battery boxes from the wheelchair, reverse the following procedure.
1.Verify that the ON/OFF switch on the joystick is in the OFF position.
2.Position battery boxes onto battery tray. Make sure bat- tery cables on battery boxes are on the same side as the battery connectors on the wheelchair frame.
3.Connect the battery cables from the battery boxes to the battery connectors on the wheelchair frame.
4.Connect the battery box retaining strap clip together.
WARNING
The Battery Box Retaining Strap MUST be fastened securely and adjusted properly to hold battery boxes in place before using the wheelchair.
5.Connect the battery box retaining strap clip together and adjust if necessary.
Battery Boxes
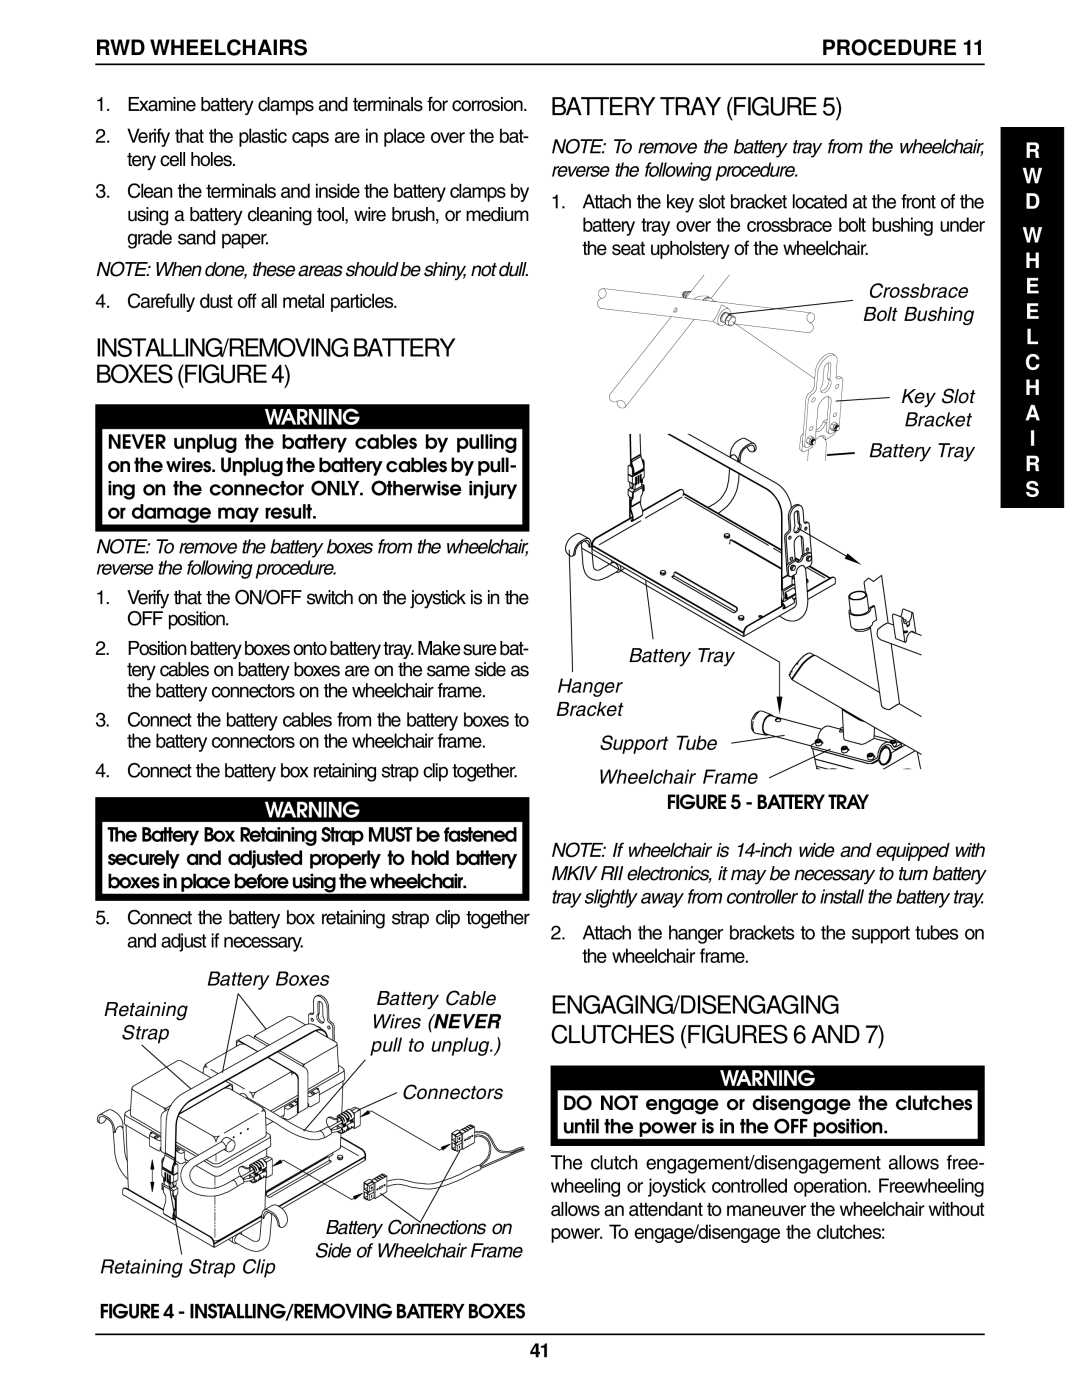
BATTERY TRAY (FIGURE 5)
NOTE: To remove the battery tray from the wheelchair, reverse the following procedure.
1.Attach the key slot bracket located at the front of the battery tray over the crossbrace bolt bushing under the seat upholstery of the wheelchair.
Crossbrace
Bolt Bushing
Key Slot
Bracket
Battery Tray
Battery Tray
Hanger
Bracket
Support Tube
Wheelchair Frame
FIGURE 5 - BATTERY TRAY
NOTE: If wheelchair is
2.Attach the hanger brackets to the support tubes on the wheelchair frame.
R W D
W H E E L C H A I R S
Retaining
Battery Cable
ENGAGING/DISENGAGING
Strap
Wires (NEVER
CLUTCHES (FIGURES 6 AND 7)
pull to unplug.)
Connectors
Battery Connections on
Side of Wheelchair Frame
Retaining Strap Clip
WARNING
DO NOT engage or disengage the clutches until the power is in the OFF position.
The clutch engagement/disengagement allows free- wheeling or joystick controlled operation. Freewheeling allows an attendant to maneuver the wheelchair without power. To engage/disengage the clutches:
FIGURE 4 - INSTALLING/REMOVING BATTERY BOXES
41