FWD WHEELCHAIRS | PROCEDURE 10 |
1.Lift up on the release handle and move the back to the desired position.
2.ChecktheangleofthebackRELATIVETOTHESEAT FRAME.
3.If necessary, have the limit switch adjusted. Contact an authorized Invacare dealer or qualified technician.
LUMBAR.
1.Rotate the knob on the side of the high back Captain's Seat COUNTERCLOCKWISE until the desired sup- port is obtained.
NOTE: The knob only rotates COUNTERCLOCKWISE.
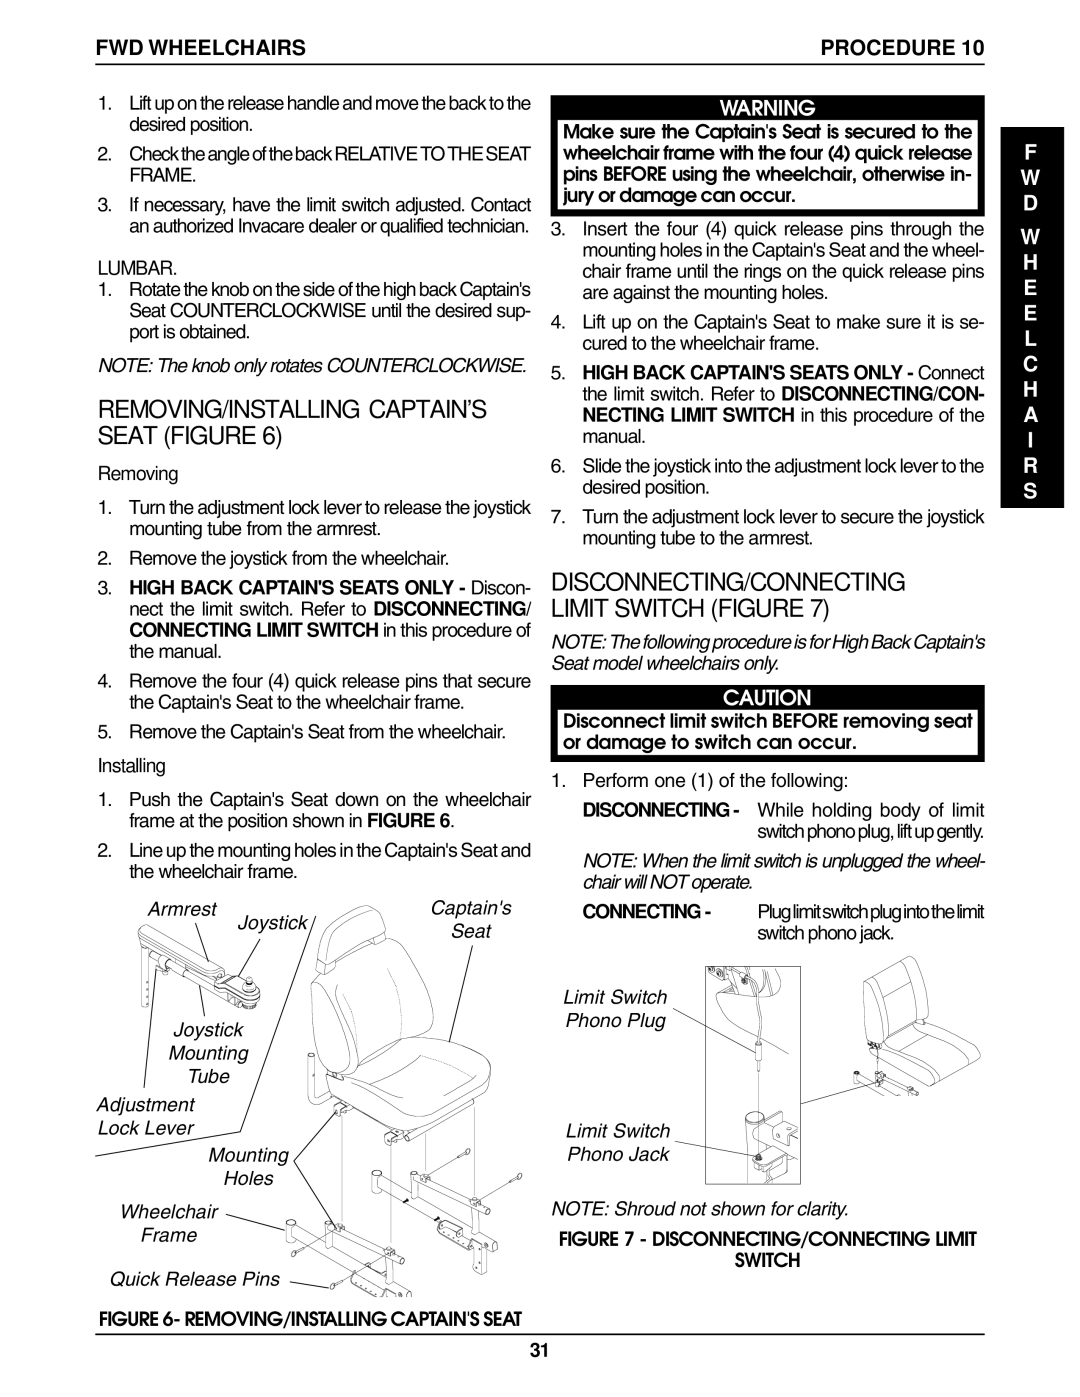
REMOVING/INSTALLING CAPTAIN'S SEAT (FIGURE 6)
Removing
1.Turn the adjustment lock lever to release the joystick mounting tube from the armrest.
2.Remove the joystick from the wheelchair.
WARNING
Make sure the Captain's Seat is secured to the wheelchair frame with the four (4) quick release pins BEFORE using the wheelchair, otherwise in- jury or damage can occur.
3.Insert the four (4) quick release pins through the mounting holes in the Captain's Seat and the wheel- chair frame until the rings on the quick release pins are against the mounting holes.
4.Lift up on the Captain's Seat to make sure it is se- cured to the wheelchair frame.
5.HIGH BACK CAPTAIN'S SEATS ONLY
6.Slide the joystick into the adjustment lock lever to the desired position.
7.Turn the adjustment lock lever to secure the joystick mounting tube to the armrest.
F
W D
W H E E L C H A I R S
3.HIGH BACK CAPTAIN'S SEATS ONLY
4.Remove the four (4) quick release pins that secure the Captain's Seat to the wheelchair frame.
5.Remove the Captain's Seat from the wheelchair.
Installing
1.Push the Captain's Seat down on the wheelchair frame at the position shown in FIGURE 6.
2.Line up the mounting holes in the Captain's Seat and the wheelchair frame.
Armrest | Captain's |
Joystick | Seat |
| |
Joystick |
|
Mounting |
|
Tube |
|
Adjustment
Lock Lever
Mounting
Holes
Wheelchair
Frame
Quick Release Pins
FIGURE 6- REMOVING/INSTALLING CAPTAIN'S SEAT
DISCONNECTING/CONNECTING LIMIT SWITCH (FIGURE 7)
NOTE: The following procedure is for High Back Captain's Seat model wheelchairs only.
CAUTION
Disconnect limit switch BEFORE removing seat or damage to switch can occur.
1.Perform one (1) of the following: DISCONNECTING - While holding body of limit
switch phono plug, lift up gently.
NOTE: When the limit switch is unplugged the wheel- chair will NOT operate.
CONNECTING - Pluglimitswitchplugintothelimit switch phono jack.
Limit Switch |
Phono Plug |
Limit Switch |
Phono Jack |
NOTE: Shroud not shown for clarity.
FIGURE 7 - DISCONNECTING/CONNECTING LIMIT
SWITCH
31