Installing the Blade Guard and Splitter
All models
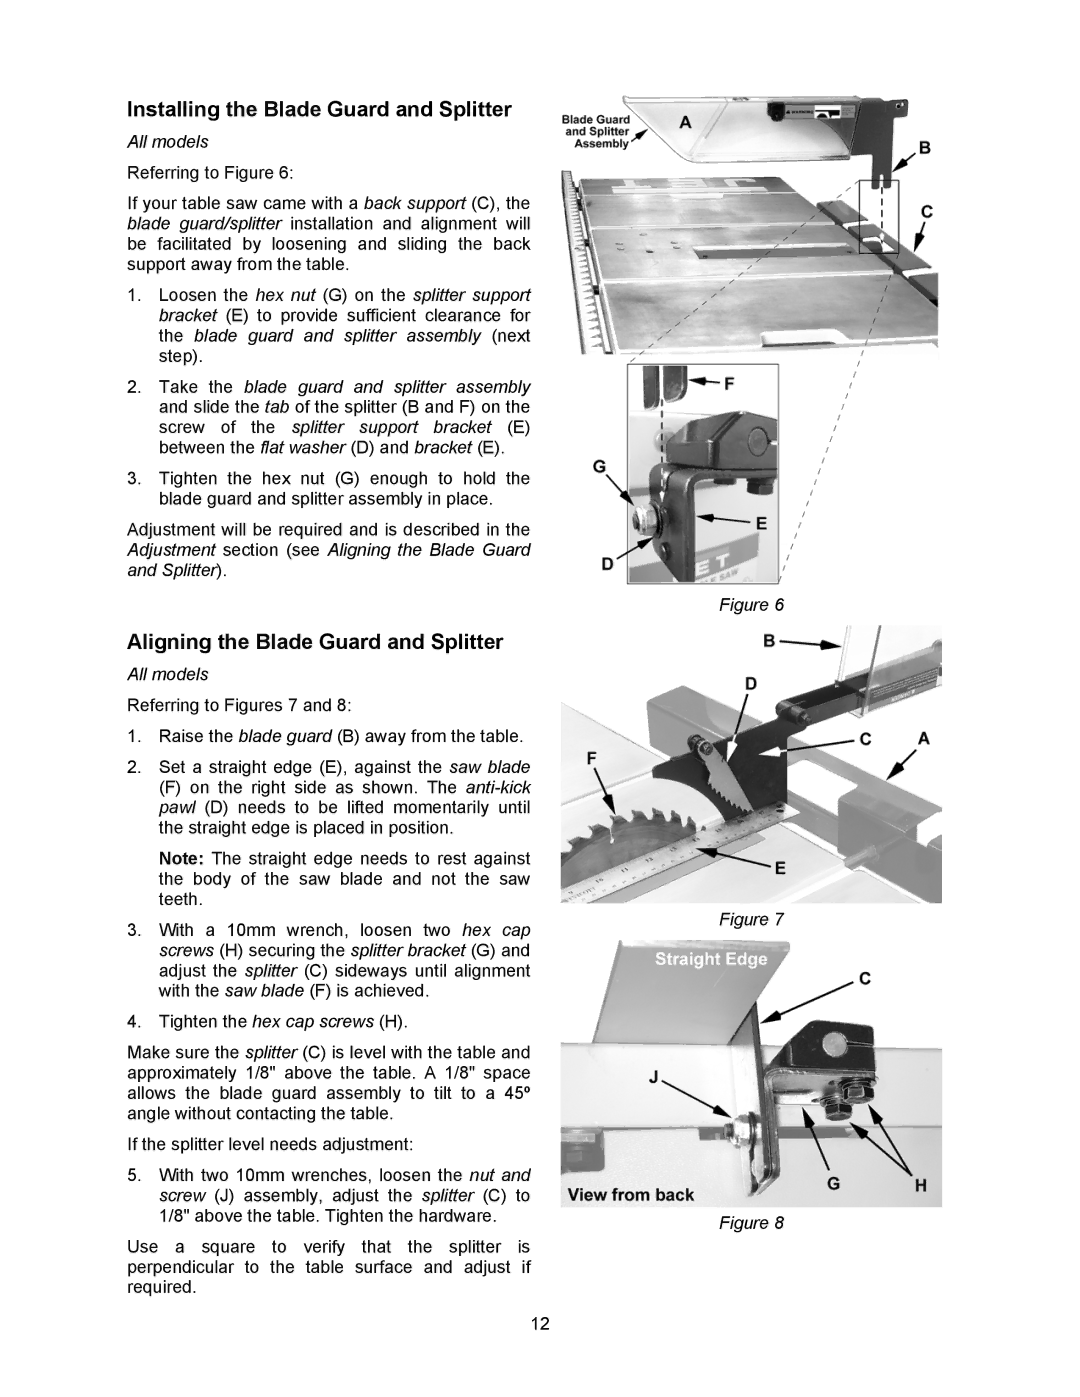
Referring to Figure 6:
If your table saw came with a back support (C), the blade guard/splitter installation and alignment will be facilitated by loosening and sliding the back support away from the table.
1.Loosen the hex nut (G) on the splitter support bracket (E) to provide sufficient clearance for the blade guard and splitter assembly (next step).
2.Take the blade guard and splitter assembly and slide the tab of the splitter (B and F) on the screw of the splitter support bracket (E) between the flat washer (D) and bracket (E).
3.Tighten the hex nut (G) enough to hold the blade guard and splitter assembly in place.
Adjustment will be required and is described in the Adjustment section (see Aligning the Blade Guard and Splitter).
Aligning the Blade Guard and Splitter
All models
Referring to Figures 7 and 8:
1.Raise the blade guard (B) away from the table.
2.Set a straight edge (E), against the saw blade
(F)on the right side as shown. The
Note: The straight edge needs to rest against the body of the saw blade and not the saw teeth.
3.With a 10mm wrench, loosen two hex cap screws (H) securing the splitter bracket (G) and adjust the splitter (C) sideways until alignment with the saw blade (F) is achieved.
4.Tighten the hex cap screws (H).
Make sure the splitter (C) is level with the table and approximately 1/8" above the table. A 1/8" space allows the blade guard assembly to tilt to a 45º angle without contacting the table.
If the splitter level needs adjustment:
5.With two 10mm wrenches, loosen the nut and screw (J) assembly, adjust the splitter (C) to 1/8" above the table. Tighten the hardware.
Use a square to verify that the splitter is perpendicular to the table surface and adjust if required.
Figure 6
Figure 7
Figure 8
12