Adjusting Blade Parallel to Miter Gauge Slots
![]() When working around the saw blade, always disconnect the saw from the power source! Failure to comply may cause serious injury!
When working around the saw blade, always disconnect the saw from the power source! Failure to comply may cause serious injury!
The saw blade was adjusted at the factory to be parallel to the miter gauge slots and should not need adjustment. However, if upon inspection it is determined that adjustment is required, follow the steps below.
1.Using the handwheel (A, Fig. 19), raise the saw blade as high as it will go.
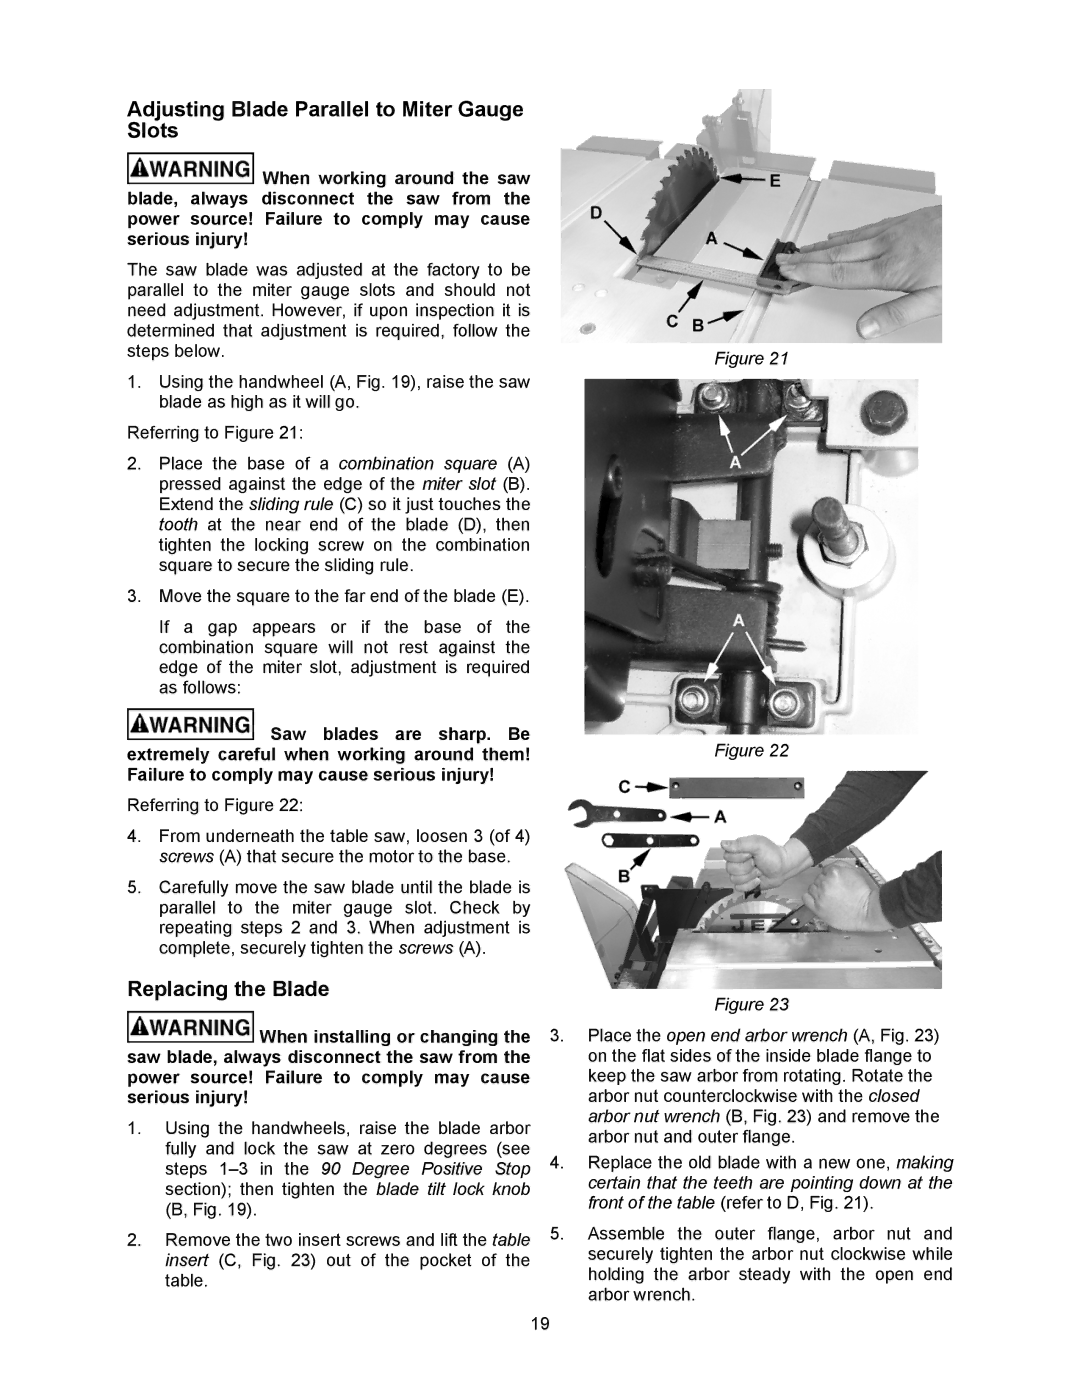
Referring to Figure 21:
2.Place the base of a combination square (A) pressed against the edge of the miter slot (B). Extend the sliding rule (C) so it just touches the tooth at the near end of the blade (D), then tighten the locking screw on the combination square to secure the sliding rule.
3.Move the square to the far end of the blade (E).
If a gap appears or if the base of the combination square will not rest against the edge of the miter slot, adjustment is required as follows:
![]() Saw blades are sharp. Be extremely careful when working around them! Failure to comply may cause serious injury!
Saw blades are sharp. Be extremely careful when working around them! Failure to comply may cause serious injury!
Referring to Figure 22:
4.From underneath the table saw, loosen 3 (of 4) screws (A) that secure the motor to the base.
5.Carefully move the saw blade until the blade is parallel to the miter gauge slot. Check by repeating steps 2 and 3. When adjustment is complete, securely tighten the screws (A).
Replacing the Blade
![]() When installing or changing the saw blade, always disconnect the saw from the power source! Failure to comply may cause serious injury!
When installing or changing the saw blade, always disconnect the saw from the power source! Failure to comply may cause serious injury!
1.Using the handwheels, raise the blade arbor fully and lock the saw at zero degrees (see steps
2.Remove the two insert screws and lift the table insert (C, Fig. 23) out of the pocket of the table.
Figure 21
Figure 22
Figure 23
3.Place the open end arbor wrench (A, Fig. 23) on the flat sides of the inside blade flange to keep the saw arbor from rotating. Rotate the arbor nut counterclockwise with the closed arbor nut wrench (B, Fig. 23) and remove the arbor nut and outer flange.
4.Replace the old blade with a new one, making certain that the teeth are pointing down at the front of the table (refer to D, Fig. 21).
5.Assemble the outer flange, arbor nut and securely tighten the arbor nut clockwise while holding the arbor steady with the open end arbor wrench.
19