OPTION # 4
Simpson
Degree Elbow #945
Simpson
14” Snorkel #982
12” (300 mm) and 6” (150 mm) Max. Horizontal Run
into a 14” Snorkel
Both Draft Restrictors Required
OPTION # 5 |
| Simpson |
| Horizontal Termination | |
|
| |
| 6” (150 mm) | Cap #984 or #985 |
|
| |
| Simpson | |
| #908B |
|
|
| 18” Max. |
|
| 460 mm |
|
| Two 90 Degree |
|
| Elbows |
Figure 12-4. Maximum horizontal run with single elbow to a snorkel termination.
OPTION # 5
| Simpson Dura- |
Two Simpson | Vent Horizontal |
Square | |
Termination | |
Degree Elbows | #984 |
#990B |
|
| Simpson |
| Thimble Cover #940 |
Figure 12-5. Horizontal vent with two elbows.
21/2”
12 ” 64mm
305 3” mm 76mm
Figure | Figure 13. Termination clearances to exterior overhangs. |
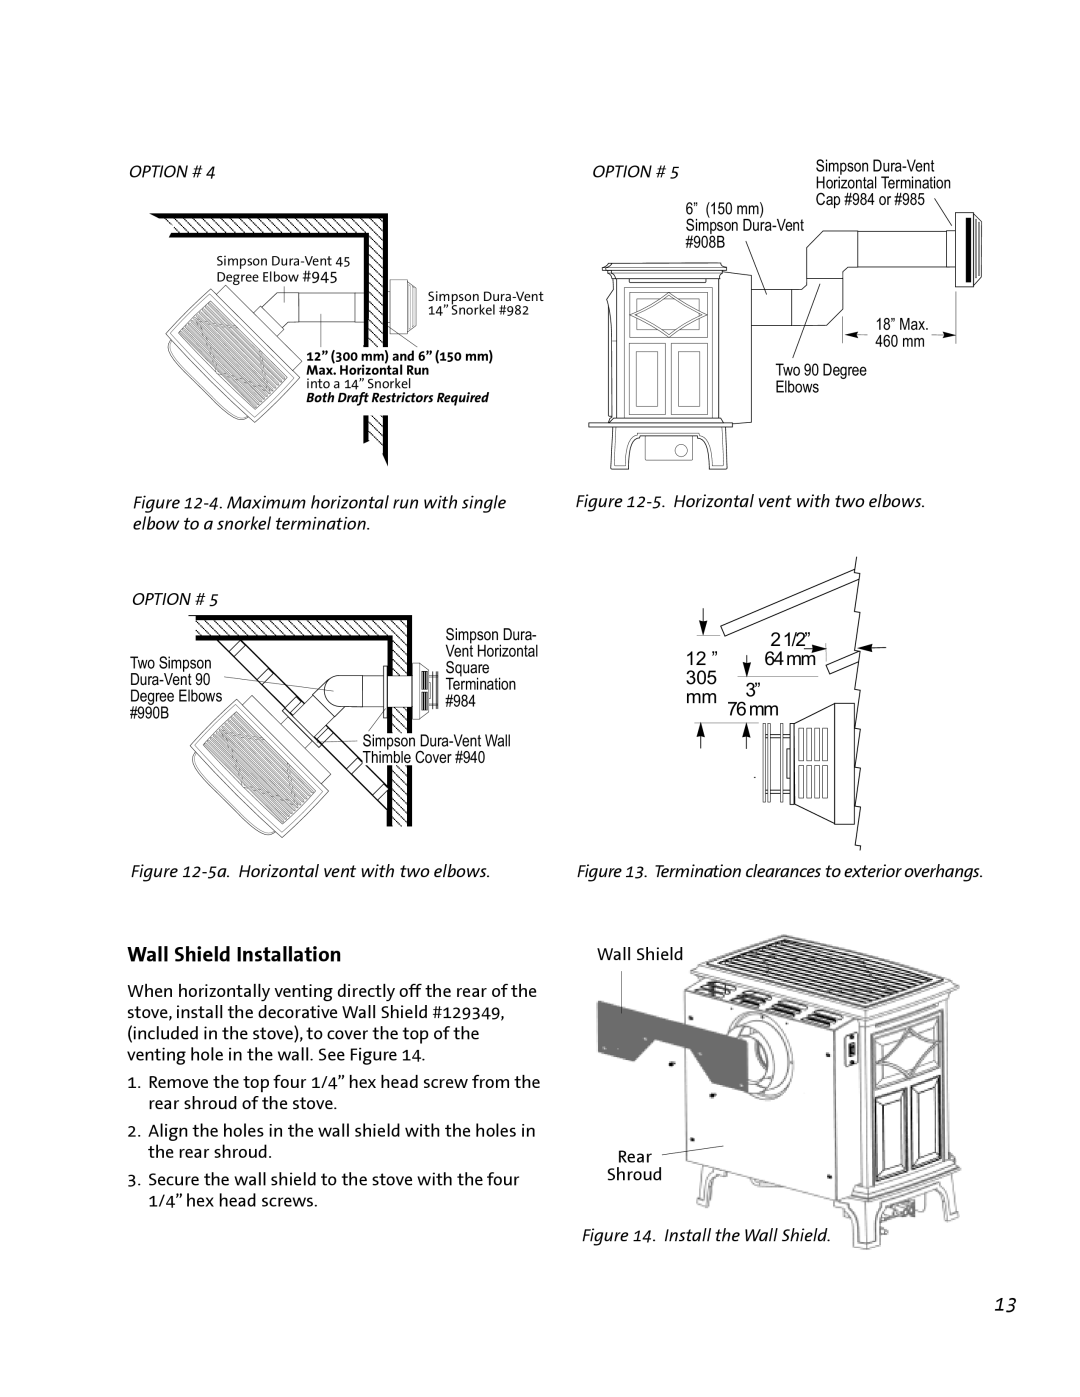
Wall Shield Installation
When horizontally venting directly off the rear of the stove, install the decorative Wall Shield #129349, (included in the stove), to cover the top of the venting hole in the wall. See Figure 14.
1.Remove the top four 1/4” hex head screw from the rear shroud of the stove.
2.Align the holes in the wall shield with the holes in the rear shroud.
3.Secure the wall shield to the stove with the four 1/4” hex head screws.
Wall Shield
Rear
Shroud
Figure 14. Install the Wall Shield.
13