Timer Operations (see pages 36 to 37)
Setting the Timer:
•If you do not specify the preset station or track number correctly while setting a timer, the currently selected station or the first track will be played when timer is activated.
•When you unplug the AC power cord or if a power failure occurs, the timer will be canceled. You need to set the clock first, then the timer again.
•Without stopping the recording, you cannot change the source while Recording Timer is recording.
•Daily Timer will not work correctly for some DVDs.
Setup Menu Operations (see pages 38 to 39)
General:
•If the upper and lower parts of the menu are cut off, adjust the picture size control of the TV.
LANGUAGE menu:
•When the language you have selected for MENU LANGUAGE, AUDIO LANGUAGE, or SUBTITLE is not recorded on a disc, the original language is used as the initial language.
PICTURE menu—MONITOR TYPE:
•Even if “4:3 PS/4:3 MULTI PS” is selected, the screen size may become 4:3 letter box with some disc. This depends on how they are recorded.
•When you select “16:9 NORMAL/16:9 MULTI NORMAL” or “16:9 AUTO/16:9 MULTI AUTO” for a picture whose aspect ratio is 4:3, the picture slightly changes due to the process for converting the picture width.
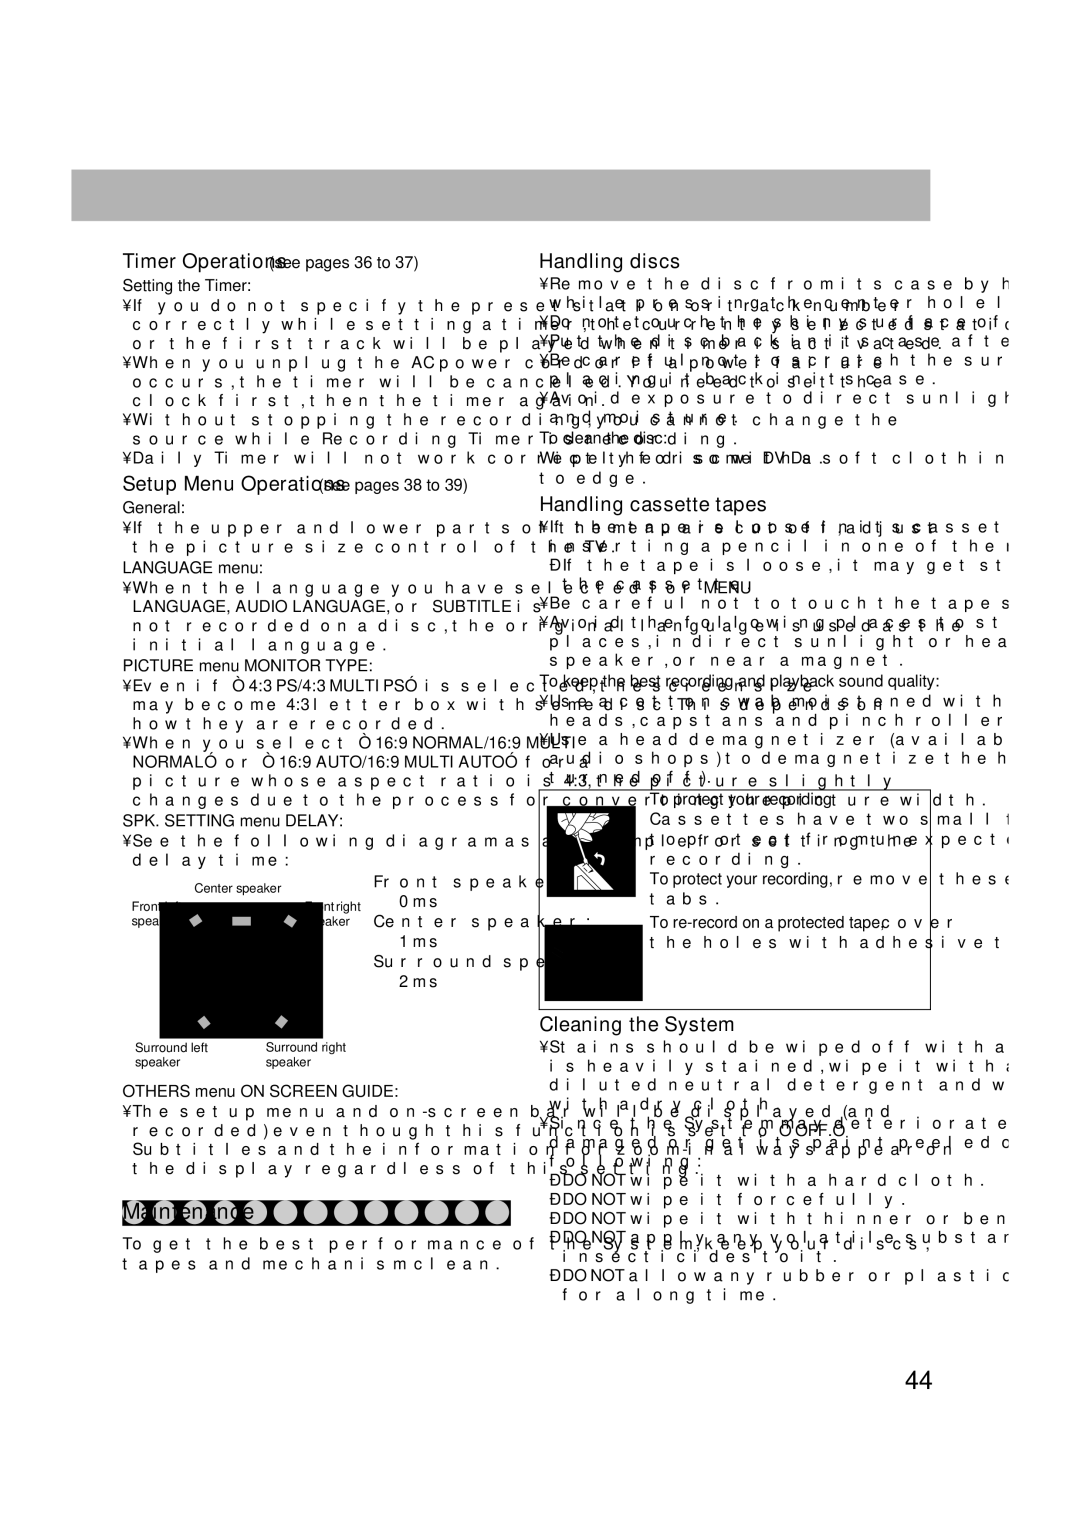
SPK. SETTING menu—DELAY:
•See the following diagram as an example for setting the delay time:
Center speaker | Front speakers: | ||
0 ms | |||
Front left | Front right | ||
speaker | speaker | Center speaker: | |
|
| 1 ms | |
|
| Surround speakers: | |
|
| 2 ms | |
Surround left | Surround right |
| |
speaker | speaker |
| |
OTHERS menu—ON SCREEN GUIDE:
•The setup menu and
Maintenance 


To get the best performance of the System, keep your discs, tapes and mechanism clean.
Handling discs
•Remove the disc from its case by holding it at the edge while pressing the center hole lightly.
•Do not touch the shiny surface of the disc, or bend the disc.
•Put the disc back in its case after use to prevent warping.
•Be careful not to scratch the surface of the disc when placing it back in its case.
•Avoid exposure to direct sunlight, extreme temperatures, and moisture.
To clean the disc:
Wipe the disc with a soft cloth in a straight line from center to edge.
Handling cassette tapes
•If the tape is loose in its cassette, take up the slack by inserting a pencil in one of the reels and rotate it.
–If the tape is loose, it may get stretched, cut, or caught in the cassette.
•Be careful not to touch the tape surface.
•Avoid the following places to store the
To keep the best recording and playback sound quality:
•Use a cotton swab moistened with alcohol to clean the heads, capstans and pinch rollers.
•Use a head demagnetizer (available at electronics and audio shops) to demagnetize the heads (when the System is turned off).
To protect your recording
Cassettes have two small tabs on the back to protect from unexpected erasure or re- recording.
To protect your recording, remove these
tabs.
To
Cleaning the System
•Stains should be wiped off with a soft cloth. If the System is heavily stained, wipe it with a cloth soaked in water- diluted neutral detergent and wrung well, then wipe clean with a dry cloth.
•Since the System may deteriorate in quality, become damaged or get its paint peeled off, be careful about the following:
–DO NOT wipe it with a hard cloth.
–DO NOT wipe it forcefully.
–DO NOT wipe it with thinner or benzine.
–DO NOT apply any volatile substance such as insecticides to it.
–DO NOT allow any rubber or plastic to remain in contact for a long time.
44