![]()
![]()
![]()
![]()
![]()
![]()
![]()
![]()
![]()
![]()
![]()
![]()
![]()
![]()
![]()
![]()
![]()
![]()
![]()
![]()
![]()
![]()
![]()
![]()
![]()
![]()
![]()
![]()
![]()
![]()
![]()
![]()
![]()
![]()
![]()
![]()
![]()
![]()
![]()
![]()
![]()
![]()
![]()
![]()
![]()
![]()
![]()
![]()
![]()
![]()
![]()
![]()
![]()
![]()
![]()
![]()
![]()
![]()
![]()
![]()
![]()
![]()
![]() EN
EN![]() 33
33![]()
Flash Shooting
There are four flash modes:
Auto | : This setting automatically flashes when shooting under dark conditions. |
Forced on | : Select this setting to force the flash. |
: Select this setting to minimize the | |
| flash. The flash is forced to light. |
Off | : Select this setting to disable the flash even when shooting under dark conditions. |
| Note that in order to prevent blurry photos a tripod should be used with this |
| setting, since the shutter speed is slower. |
2 3,4
1
SET
4![]()
OFF
M
V
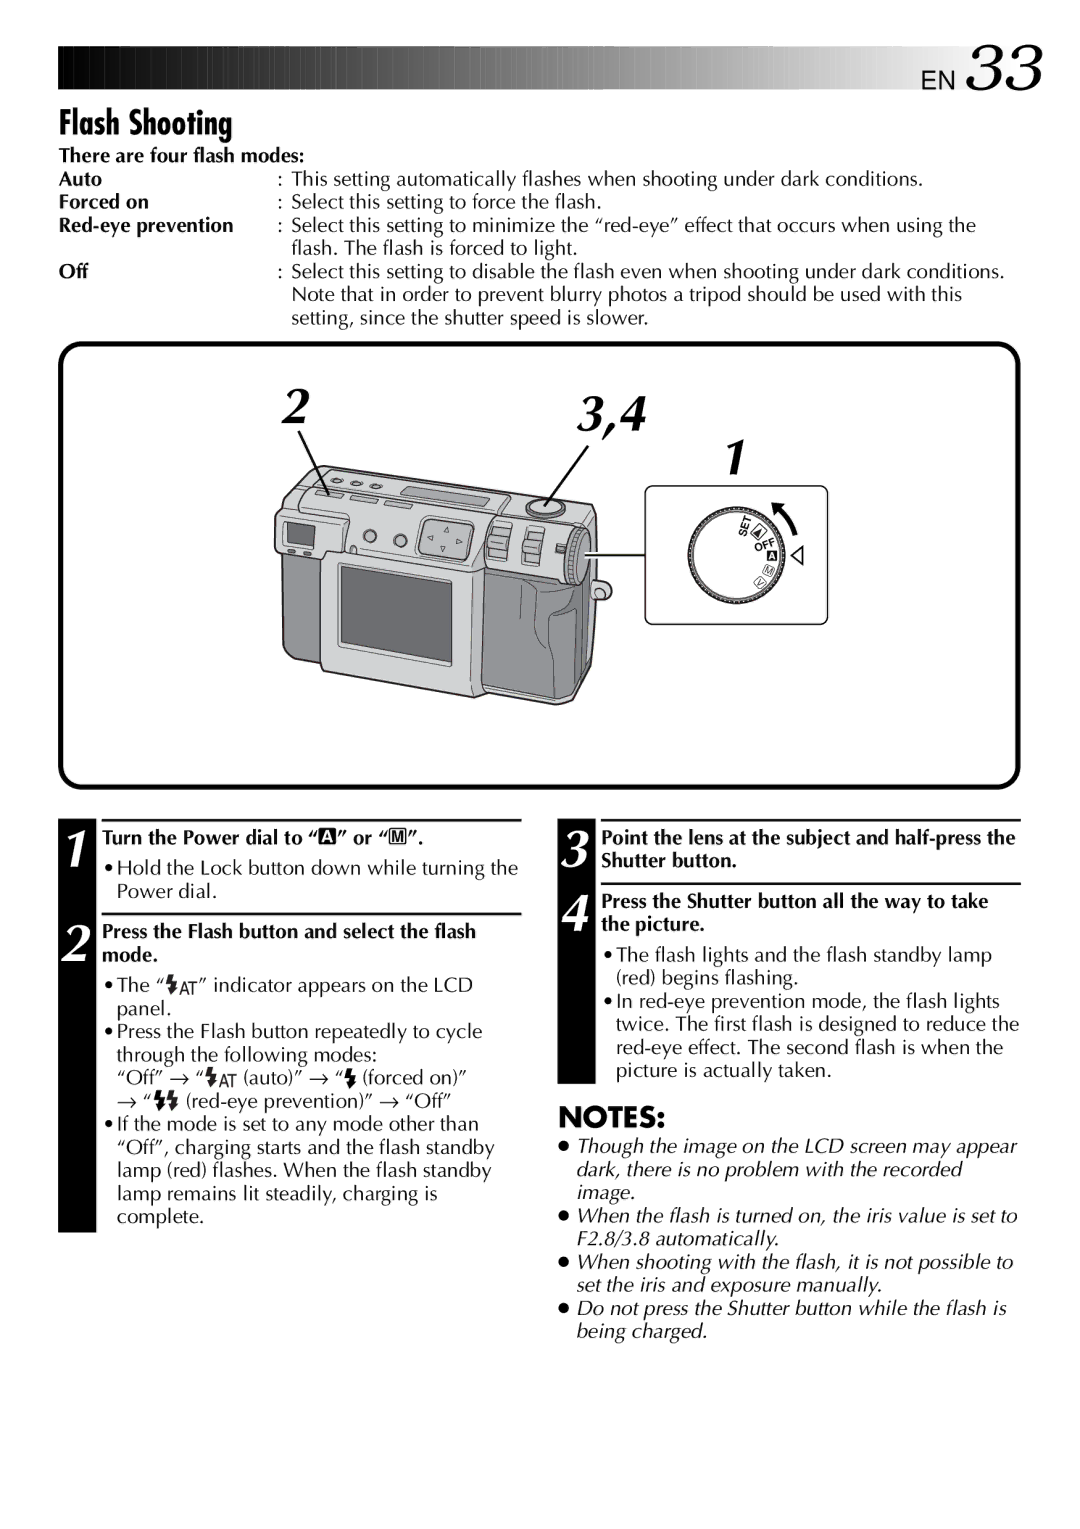
1 Turn the Power dial to “A” or “M”.
2 Press the Flash button and select the flash mode.
•The “![]()
![]() ” indicator appears on the LCD panel.
” indicator appears on the LCD panel.
•Press the Flash button repeatedly to cycle through the following modes:
“Off” → “ | (auto)” → “ (forced on)” |
→“![]()
“Off”, charging starts and the flash standby lamp (red) flashes. When the flash standby lamp remains lit steadily, charging is complete.
3 Point the lens at the subject and
4 Press the Shutter button all the way to take the picture.
•The flash lights and the flash standby lamp (red) begins flashing.
•In
NOTES:
●Though the image on the LCD screen may appear dark, there is no problem with the recorded image.
●When the flash is turned on, the iris value is set to F2.8/3.8 automatically.
●When shooting with the flash, it is not possible to set the iris and exposure manually.
●Do not press the Shutter button while the flash is being charged.