Copying
Installing the Provided Software (Built-in)
You can display the recorded images in calendar format and perform simple editing using the provided software.
Preparations
Connect this unit to a computer with a USB cable.
1Open the LCD monitor.
Installation Procedure
oWindows Vista/Windows 7
0Refer to the operating instructions found in the animation on the Detailed User Guide.
oWindows XP
0Refer to the operating instructions found in the animation on the Detailed User Guide.
.
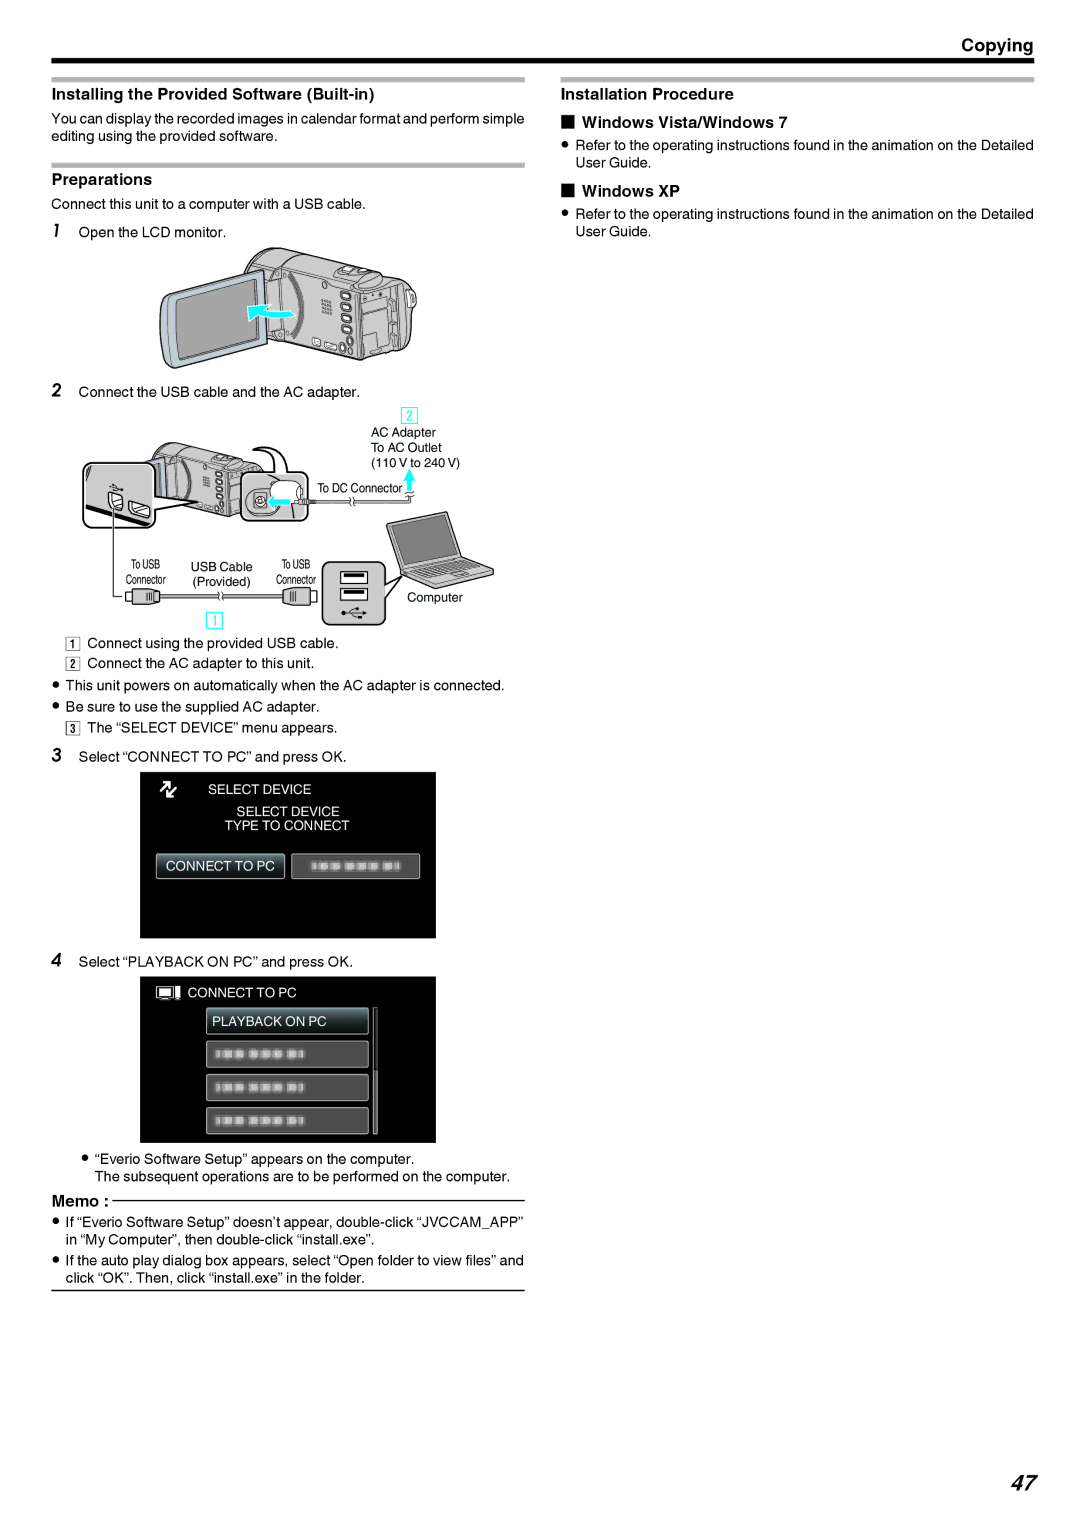
2Connect the USB cable and the AC adapter.
AC Adapter
To AC Outlet (110 V to 240 V)
To DC Connector![]()
To USB | USB Cable | To USB |
Connector | (Provided) | Connector |
Computer
.
AConnect using the provided USB cable. B Connect the AC adapter to this unit.
0This unit powers on automatically when the AC adapter is connected.
0Be sure to use the supplied AC adapter. C The “SELECT DEVICE” menu appears.
3Select “CONNECT TO PC” and press OK.
SELECT DEVICE
SELECT DEVICE
TYPE TO CONNECT
CONNECT TO PC
.
4Select “PLAYBACK ON PC” and press OK.
![]() CONNECT TO PC PLAYBACK ON PC
CONNECT TO PC PLAYBACK ON PC
.
0“Everio Software Setup” appears on the computer.
The subsequent operations are to be performed on the computer.
Memo :
0If “Everio Software Setup” doesn’t appear,
0If the auto play dialog box appears, select “Open folder to view files” and click “OK”. Then, click “install.exe” in the folder.
47