Recording
Manual Recording
You can adjust settings, such as brightness, by using the manual mode.
Memo :
To select/move cursor towards up/left or down/right, press the button UP/< or DOWN/>.
.
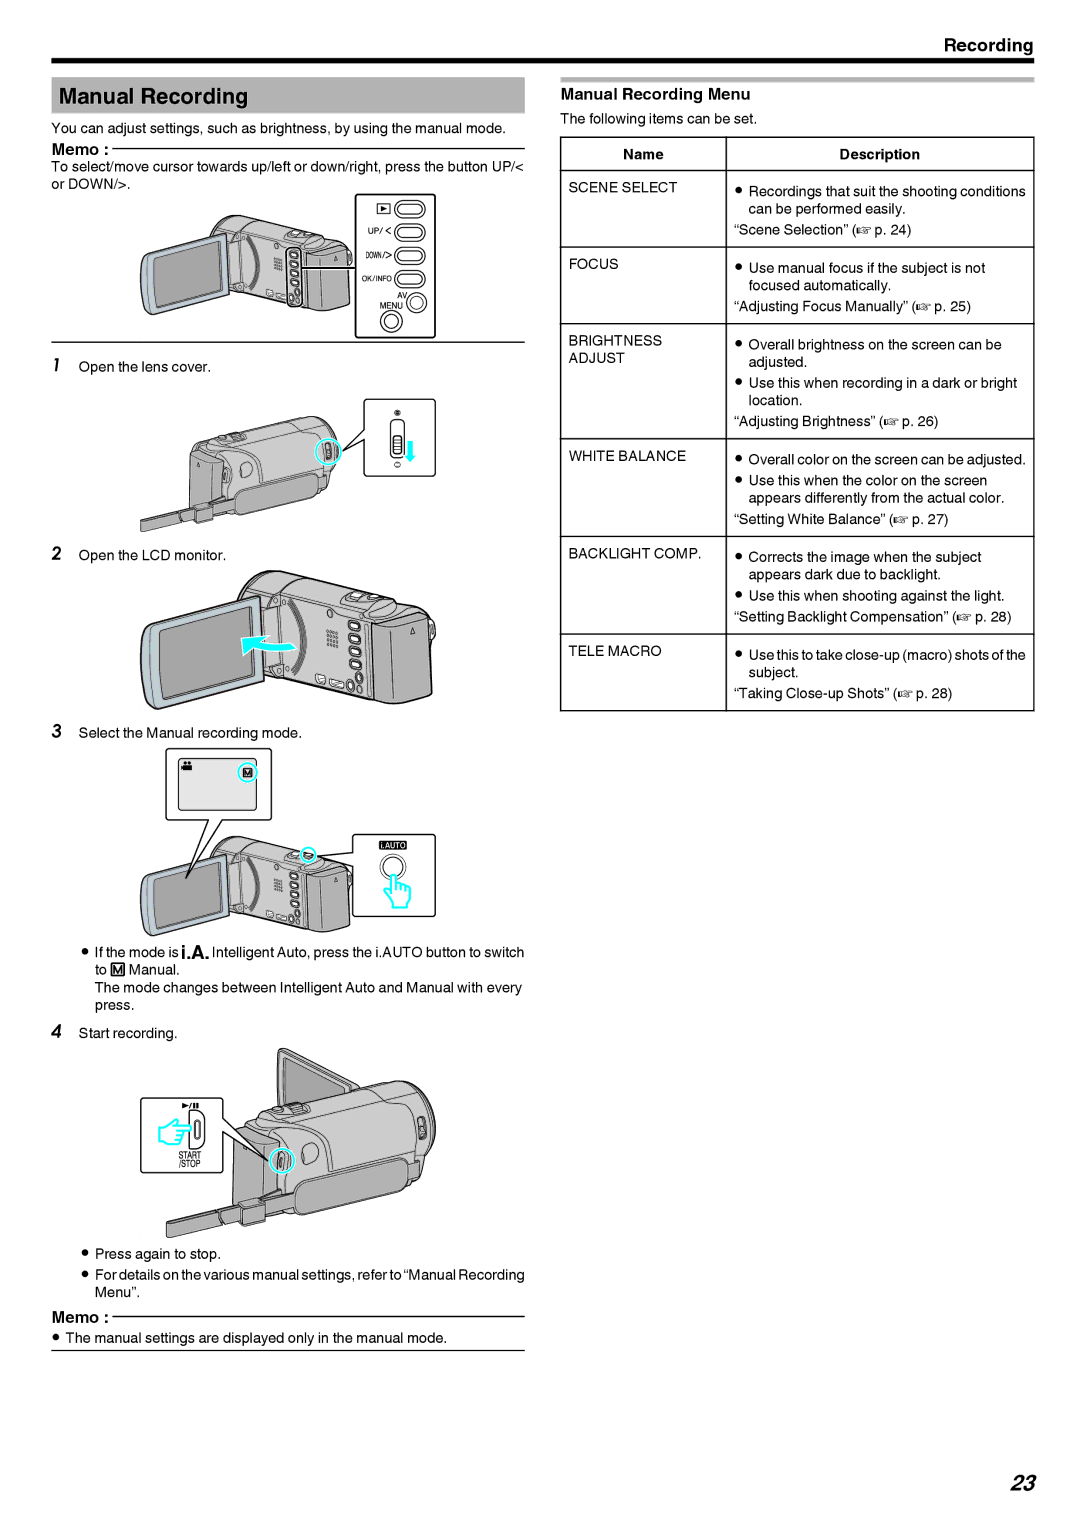
1Open the lens cover.
.
2Open the LCD monitor.
. 
3Select the Manual recording mode.
.
0If the mode is P Intelligent Auto, press the i.AUTO button to switch to H Manual.
The mode changes between Intelligent Auto and Manual with every press.
4Start recording.
.
0Press again to stop.
0For details on the various manual settings, refer to “Manual Recording Menu”.
Memo :
0The manual settings are displayed only in the manual mode.
Manual Recording Menu
The following items can be set.
Name |
| Description |
SCENE SELECT | 0 | Recordings that suit the shooting conditions |
|
| can be performed easily. |
| “Scene Selection” (A p. 24) | |
FOCUS | 0 | Use manual focus if the subject is not |
|
| focused automatically. |
| “Adjusting Focus Manually” (A p. 25) | |
BRIGHTNESS | 0 | Overall brightness on the screen can be |
ADJUST |
| adjusted. |
| 0 | Use this when recording in a dark or bright |
|
| location. |
| “Adjusting Brightness” (A p. 26) | |
WHITE BALANCE | 0 | Overall color on the screen can be adjusted. |
| 0 | Use this when the color on the screen |
|
| appears differently from the actual color. |
| “Setting White Balance” (A p. 27) | |
BACKLIGHT COMP. | 0 | Corrects the image when the subject |
|
| appears dark due to backlight. |
| 0 | Use this when shooting against the light. |
| “Setting Backlight Compensation” (A p. 28) | |
TELE MACRO | 0 | Use this to take |
|
| subject. |
| “Taking | |
23