![]() INITIAL
INITIAL![]()
![]()
![]() SETTINGS
SETTINGS![]()
![]()
![]()
![]()
![]()
![]()
![]()
![]()
![]()
![]()
![]()
![]()
![]()
![]()
![]()
![]()
![]()
![]()
![]()
![]()
![]()
![]()
![]()
![]()
![]()
![]()
![]()
![]()
![]()
![]()
![]()
![]()
![]()
![]()
![]()
![]()
![]()
![]()
![]()
![]()
![]()
![]()
![]()
![]()
![]()
![]()
![]()
![]()
![]()
![]()
![]()
![]()
![]()
![]()
![]()
![]()
![]()
![]()
![]()
![]()
![]()
![]()
![]()
![]()
![]()
![]()
![]()
![]()
![]()
![]()
![]() EN
EN![]()
![]() 9
9
Plug & Play
Auto Clock Set/Auto Tuner Set
ATTENTION
If you use a cable box, Plug & Play will not function; set the clock and tuner channels manually. (☞ pg.10 – 13)
The Plug & Play function sets the clock and tuner channels automatically when power is first connected to the recorder. The antenna cable must be connected for the Plug & Play function.
The time and date can be set automatically from clock setting data that is transmitted by one of the regular TV broadcast channels. We call this TV channel the “Host Channel” and it is a PBS channel in your area.
PLUG & PLAY SETUP
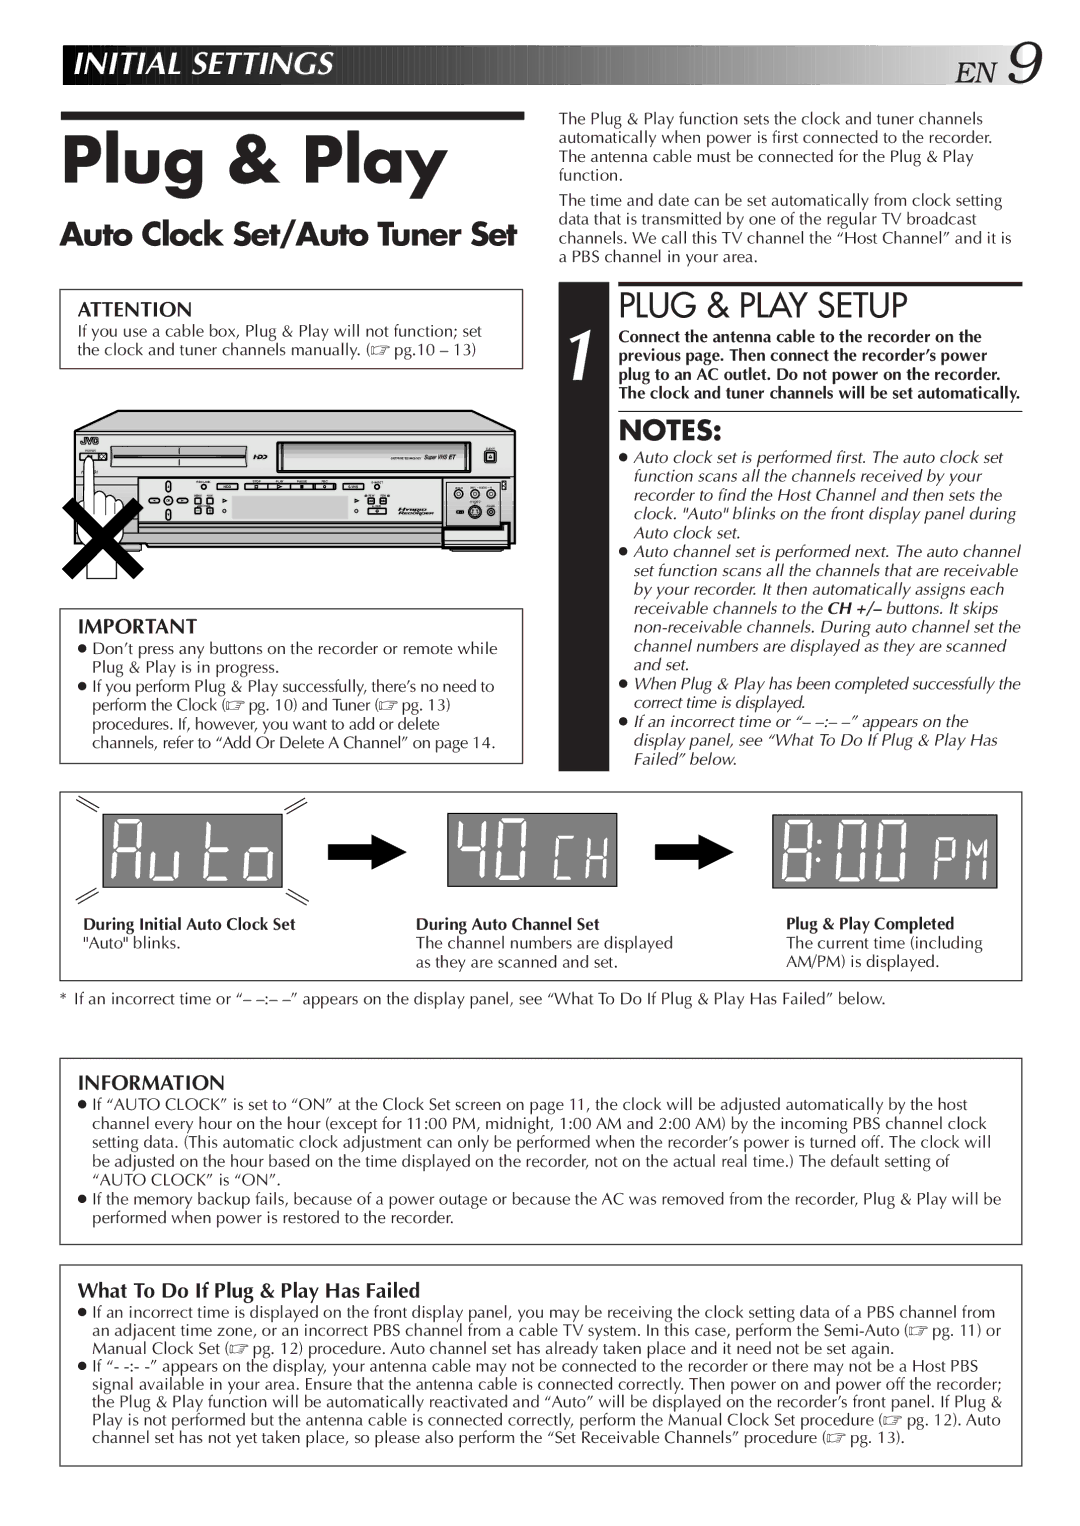
1 Connect the antenna cable to the recorder on the previous page. Then connect the recorder’s power plug to an AC outlet. Do not power on the recorder. The clock and tuner channels will be set automatically.
NOTES:
POWER
EJECT
● Auto clock set is performed first. The auto clock set |
DIGITPURE TECHNOLOGY
HM-HDS1
REC LINK | STOP | PLAY | PAUSE | REC |
|
| |
| HDD |
|
|
| VIDEO | (M) L – AUDIO – R |
MENU | NAVI | REW | FEW |
|
OK |
|
|
| |
| CH | A. DUB | PAUSE | |
|
|
|
| F - 1 |
IMPORTANT
●Don’t press any buttons on the recorder or remote while Plug & Play is in progress.
●If you perform Plug & Play successfully, there’s no need to perform the Clock (☞ pg. 10) and Tuner (☞ pg. 13) procedures. If, however, you want to add or delete channels, refer to “Add Or Delete A Channel” on page 14.
function scans all the channels received by your |
recorder to find the Host Channel and then sets the |
clock. "Auto" blinks on the front display panel during |
Auto clock set. |
● Auto channel set is performed next. The auto channel |
set function scans all the channels that are receivable |
by your recorder. It then automatically assigns each |
receivable channels to the CH +/– buttons. It skips |
channel numbers are displayed as they are scanned |
and set. |
● When Plug & Play has been completed successfully the |
correct time is displayed. |
● If an incorrect time or “– |
display panel, see “What To Do If Plug & Play Has |
Failed” below. |
During Initial Auto Clock Set | During Auto Channel Set | Plug & Play Completed |
"Auto" blinks. | The channel numbers are displayed | The current time (including |
| as they are scanned and set. | AM/PM) is displayed. |
* If an incorrect time or “–
INFORMATION
●If “AUTO CLOCK” is set to “ON” at the Clock Set screen on page 11, the clock will be adjusted automatically by the host channel every hour on the hour (except for 11:00 PM, midnight, 1:00 AM and 2:00 AM) by the incoming PBS channel clock setting data. (This automatic clock adjustment can only be performed when the recorder’s power is turned off. The clock will be adjusted on the hour based on the time displayed on the recorder, not on the actual real time.) The default setting of “AUTO CLOCK” is “ON”.
●If the memory backup fails, because of a power outage or because the AC was removed from the recorder, Plug & Play will be performed when power is restored to the recorder.
What To Do If Plug & Play Has Failed
●If an incorrect time is displayed on the front display panel, you may be receiving the clock setting data of a PBS channel from an adjacent time zone, or an incorrect PBS channel from a cable TV system. In this case, perform the
●If “-
the Plug & Play function will be automatically reactivated and “Auto” will be displayed on the recorder’s front panel. If Plug & Play is not performed but the antenna cable is connected correctly, perform the Manual Clock Set procedure (☞ pg. 12). Auto channel set has not yet taken place, so please also perform the “Set Receivable Channels” procedure (☞ pg. 13).