40![]()
![]()
![]() EN
EN![]()
![]()
![]()
![]()
![]()
![]()
![]()
![]()
![]()
![]()
![]()
![]()
![]()
![]()
![]()
![]()
![]()
![]()
![]()
![]()
![]()
![]()
![]()
![]()
![]()
![]()
![]()
![]()
![]()
![]()
![]()
![]()
![]()
![]()
![]()
![]()
![]()
![]()
![]()
![]()
![]()
![]()
![]()
![]()
![]()
![]()
![]()
![]()
![]()
![]()
![]()
![]()
![]()
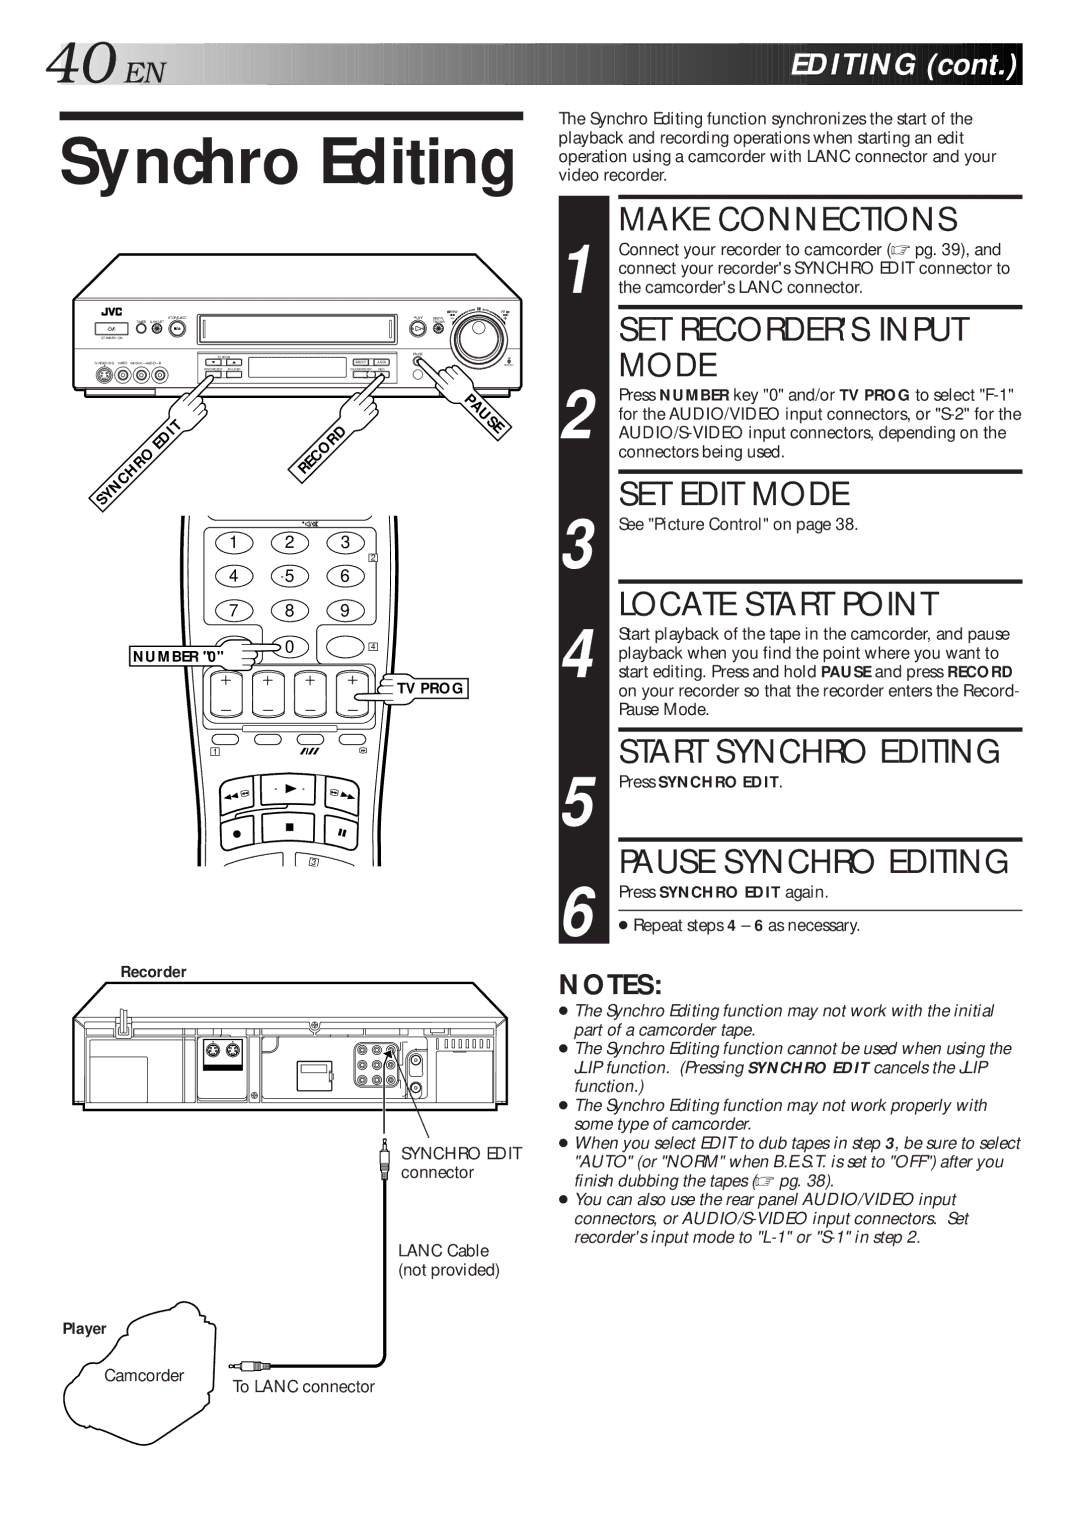
Synchro Editing
|
|
| REW | FF |
STOP/EJECT |
| PLAY | DIGITAL |
|
TIMER |
|
| TBC/NR |
|
STANDBY/ ON |
|
|
|
|
|
| PAUSE |
|
|
TV PROG |
|
|
| JOG |
INSERT | A.DUB |
|
| |
|
|
| SHUTTLE | |
SYNCHRO EDIT SP/LP/EP | COLOUR SYSTEM | REC |
|
|
| EDIT | PAUSE | |
SYNCHRO | RECORD | ||
| |||
|
|
![]()
![]()
![]()
![]()
![]()
![]()
![]()
![]()
![]()
![]()
![]()
![]()
![]()
![]()
![]()
![]()
![]()
![]() EDITING
EDITING![]()
![]() (cont.)
(cont.)![]()
![]()
![]()
The Synchro Editing function synchronizes the start of the playback and recording operations when starting an edit operation using a camcorder with LANC connector and your video recorder.
| MAKE CONNECTIONS |
| Connect your recorder to camcorder (☞ pg. 39), and |
| connect your recorder's SYNCHRO EDIT connector to |
1 the camcorder's LANC connector. | |
| SET RECORDER'S INPUT |
2 | MODE |
Press NUMBER key "0" and/or TV PROG to select | |
for the AUDIO/VIDEO input connectors, or | |
| connectors being used. |
| SET EDIT MODE |
| See "Picture Control" on page 38. |
1 | 2 | 3 |
4 | 5 | 6 |
7 | 8 | 9 |
NUMBER "0" | 0 |
|
|
|
2
4
![]() TV PROG
TV PROG
3 |
LOCATE START POINT |
Start playback of the tape in the camcorder, and pause |
playback when you find the point where you want to |
4 start editing. Press and hold PAUSE and press RECORD |
on your recorder so that the recorder enters the Record- |
Pause Mode. |
START SYNCHRO EDITING |
1
3
Recorder
5 | Press SYNCHRO EDIT. |
6 | PAUSE SYNCHRO EDITING |
Press SYNCHRO EDIT again. | |
| |
● Repeat steps 4 – 6 as necessary. | |
|
NOTES:
Player
Camcorder
SYNCHRO EDIT connector
LANC Cable (not provided)
To LANC connector
●The Synchro Editing function may not work with the initial part of a camcorder tape.
●The Synchro Editing function cannot be used when using the JLIP function. (Pressing SYNCHRO EDIT cancels the JLIP function.)
●The Synchro Editing function may not work properly with some type of camcorder.
●When you select EDIT to dub tapes in step 3, be sure to select "AUTO" (or "NORM" when B.E.S.T. is set to "OFF") after you finish dubbing the tapes (☞ pg. 38).
●You can also use the rear panel AUDIO/VIDEO input connectors, or