Scan Mode Set (DVD deck only)
This unit supports the progressive scan system as well as the conventional interlaced scan system. If your TV equipped with component video connectors supports the progressive video input, you can enjoy a high quality picture by setting the progressive scan mode to active.
•Refer also to the instruction manuals supplied with your TV.
•If your TV equipped with component video connectors does not support the progressive video input, do not change the scan mode to the “PROGRESSIVE.”
•Turn on the TV and select the VCR channel (or AV mode).
•Slide the TV/VCR/DVD switch on the Remote to right.
~Select the DVD deck.
Press VCR/DVD on the unit so that the DVD indicator lights up on the front display panel.
ŸSwitch the mode.
1Press and hold PROGRESSIVE SCAN on the
unit for more than 3 seconds.
The current scan mode blinks on the front display panel.
2While the current scan mode blinks, press @ #
to select “![]()
![]()
![]()
![]()
![]() (ProGr)” (for the progressive
(ProGr)” (for the progressive
scan mode) or “ ![]()
![]()
![]()
![]() (IntEr)” (for the interlaced scan mode), then press ENTER.
(IntEr)” (for the interlaced scan mode), then press ENTER.
•If the current scan mode stops blinking before you make the setting, start from step 1 again.
NOTE:
When the progressive scan mode is selected, the Progressive mode indicator (![]() ) lights up on the front display panel.
) lights up on the front display panel.
Initial Settings
Plug&Play Set
This unit sets the clock and tuner channels automatically when the AC power cord is connected to an AC outlet for the first time.
The time and date can be set automatically by the clock setting data transmitted from one of the regular TV broadcast channels. (We call this TV channel the “host channel” and it is a PBS channel in your area.)
•The antenna cable must be connected for Plug&Play set. (☞ pg. 9 and 10)
NOTES
•If you use a cable box, Plug&Play will not function; set the clock and tuner channels separately. (☞ pg. 14 and 15)
•Depending on areas or reception conditions, the unit may not receive the Auto clock setting data from the PBS channel. If this function is taking a considerable amount of time, it may be necessary to perform the Semiauto or Manual Clock Set procedure. (☞ pg. 14)
~Perform Plug&Play set.
Connect the AC power cord to an AC outlet. Do not turn on the unit. The clock and tuner channels will be set automatically.
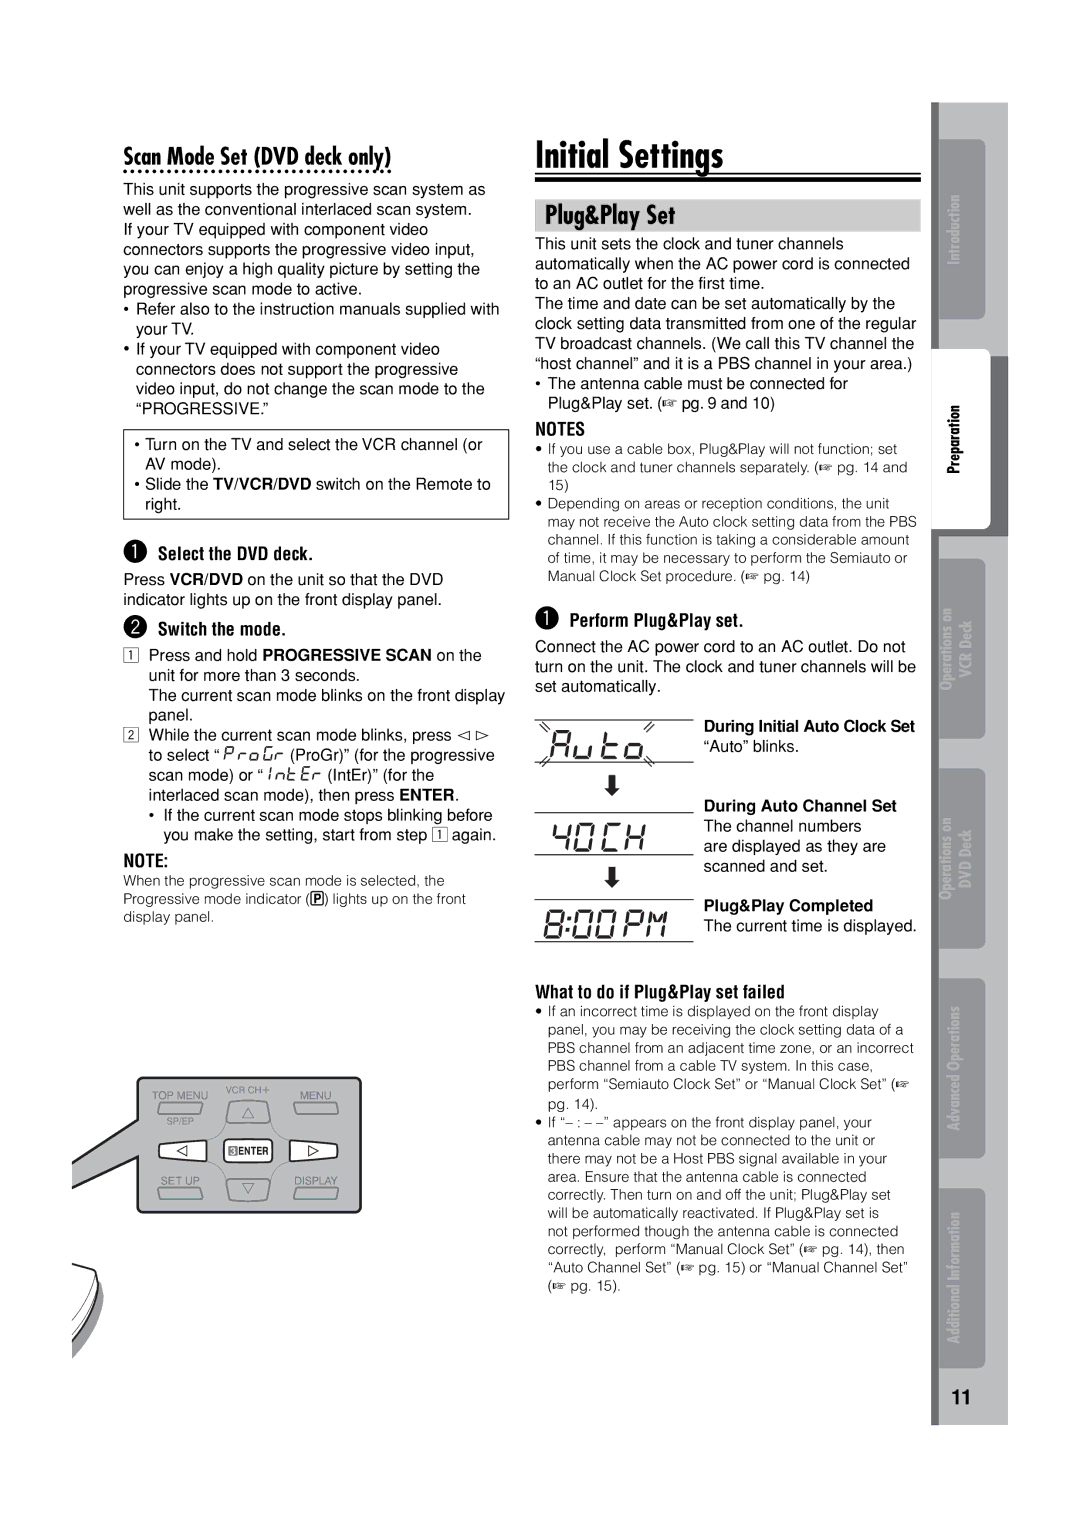
During Initial Auto Clock Set
“Auto” blinks.
During Auto Channel Set
The channel numbers are displayed as they are scanned and set.
Plug&Play Completed
The current time is displayed.
What to do if Plug&Play set failed
•If an incorrect time is displayed on the front display panel, you may be receiving the clock setting data of a PBS channel from an adjacent time zone, or an incorrect PBS channel from a cable TV system. In this case, perform “Semiauto Clock Set” or “Manual Clock Set” (☞ pg. 14).
•If
Introduction
Preparation
Operations on VCR Deck
Operations on DVD Deck
Advanced Operations
Additional Information
11