4.4Adjustment method for jitter
After replacing the pickup, set the unit in the service mode to display a jitter value on the LCD.
Confirm that the jitter value measured with a jitter meter is within 12% of the jitter value displayed on the LCD. If it is within 12%, then adjustment is not necessary.
If the measured jitter value is outside the 12% tolerance range, perform the following adjustments.
4.4.1 Adjustment procedure
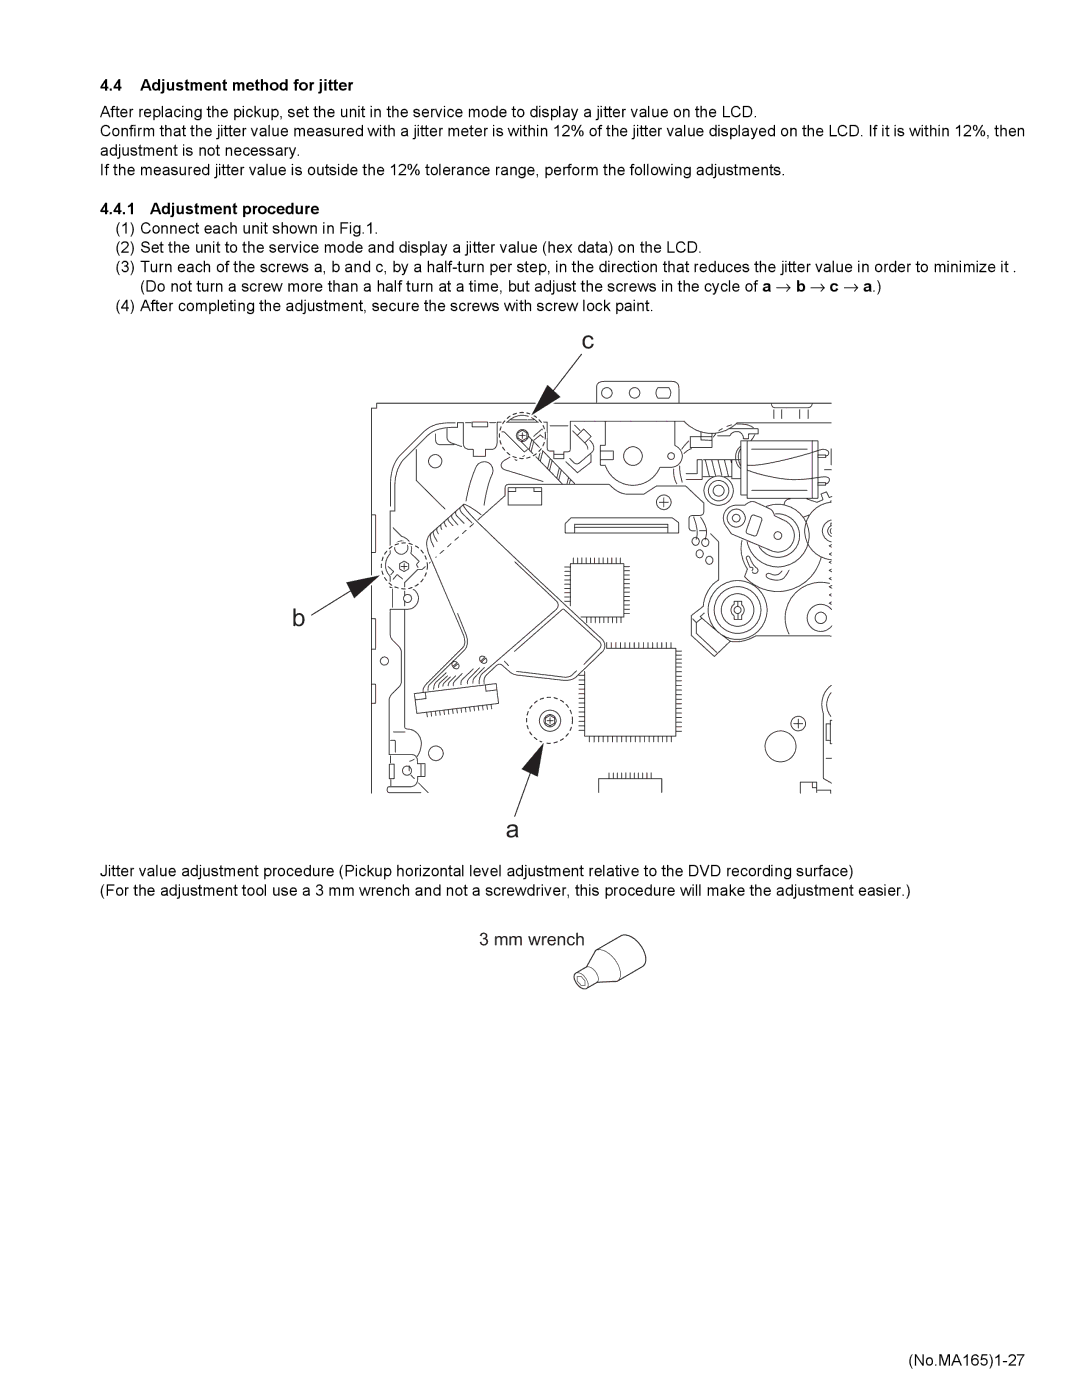
(1)Connect each unit shown in Fig.1.
(2)Set the unit to the service mode and display a jitter value (hex data) on the LCD.
(3)Turn each of the screws a, b and c, by a
(Do not turn a screw more than a half turn at a time, but adjust the screws in the cycle of a → b → c → a.)
(4) After completing the adjustment, secure the screws with screw lock paint.
c
b
a
Jitter value adjustment procedure (Pickup horizontal level adjustment relative to the DVD recording surface)
(For the adjustment tool use a 3 mm wrench and not a screwdriver, this procedure will make the adjustment easier.)