Recording

Continued

IMPORTANT:

It should be noted that it may be unlawful to re-record pre-recorded tapes, records, or discs without the consent of the owner of copyright in the sound or video recording, broadcast or cable programme and in any literary, dramatic, musical, or artistic embodied therein.

The recording level is automatically set correctly, so it is not affected by the VOLUME control, the SOUND MODE control, and the SUBWOOFER LEVEL control. Thus, during recording you can adjust the sound you are actually listening to without affecting the recording level.

If recordings you have made have excessive noise or static, the unit may be too close to a TV. Place the unit away from the TV.

You can use type I tape for recording.

To protect your recording

Cassettes have two small tabs on the back to protect unexpected erasure or re-

recording. To protect your recording, remove these tabs.

To re-record on a protected

tape, cover the holes with adhesive tape.

To keep the best recording and playback sound quality

If the heads, capstans, and pinch rollers of the cassette decks become dirty, the following will occur:

Impaired sound quality

Discontinuous sound

Fading

Incomplete erasure

Difficulty in recording

To clean the heads, capstans, and pinch rollers

Use a cotton swab moistened with alcohol.

Pinch rollers

Capstans

Heads

To demagnetize the heads

Turn off the unit, and use a head demagnetizer (available at electronics and audio shops).

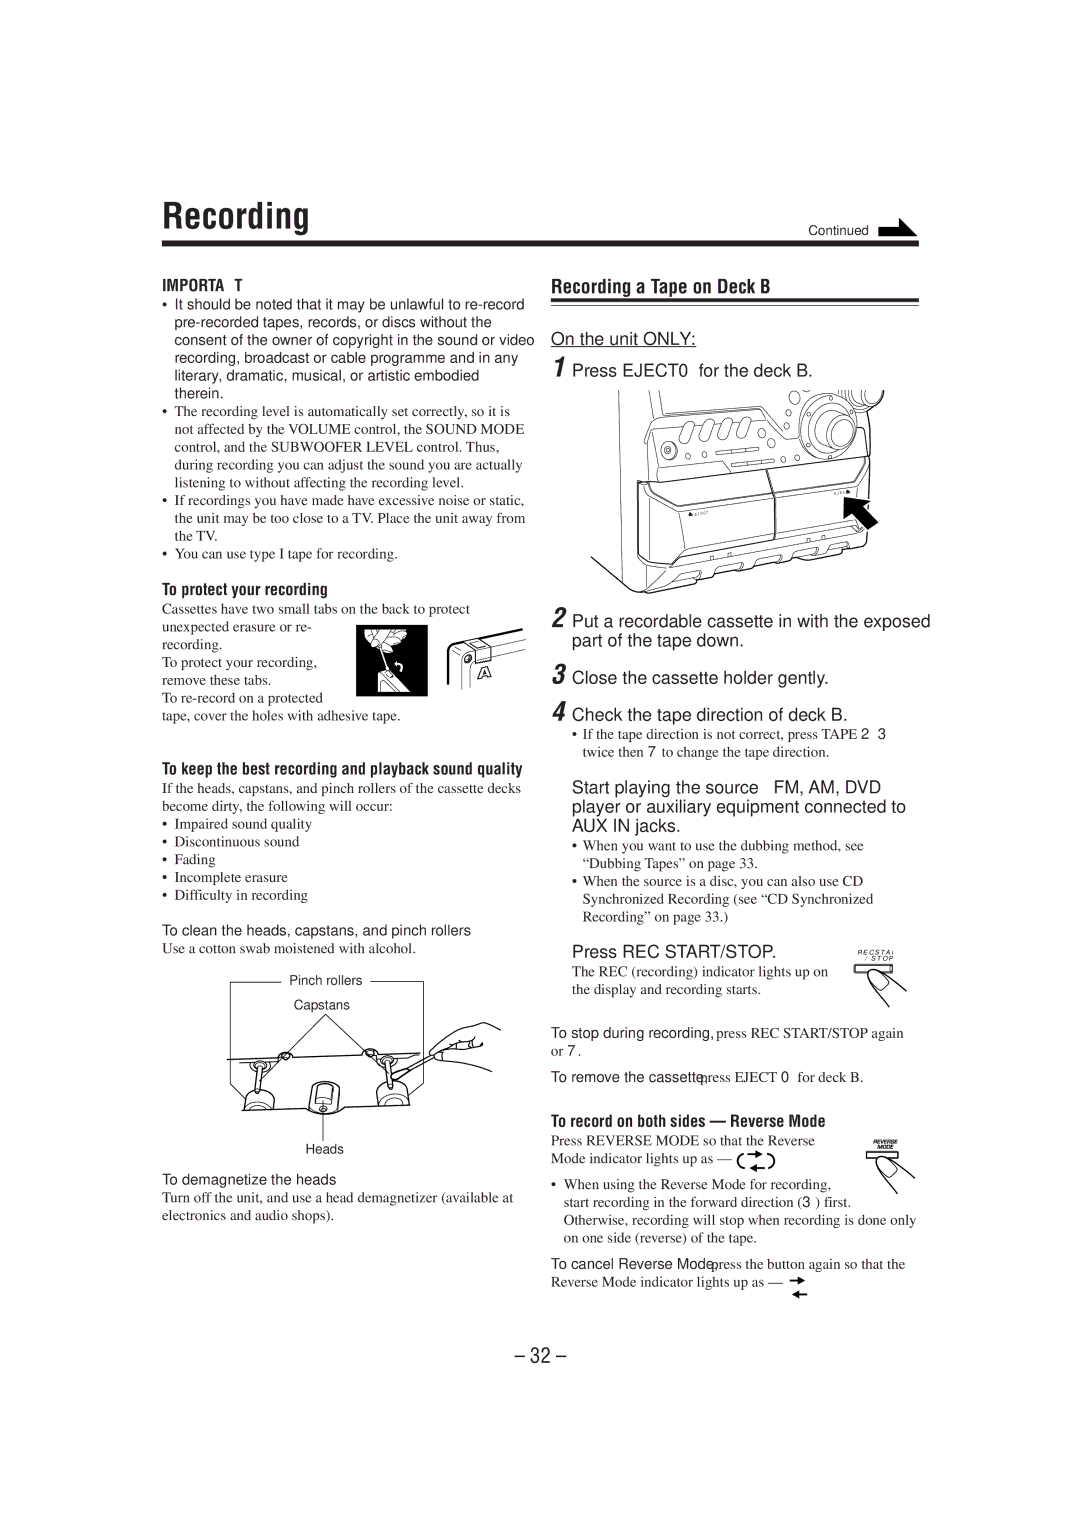
Recording a Tape on Deck B

On the unit ONLY:

1 Press EJECT 0 for the deck B.

2 Put a recordable cassette in with the exposed part of the tape down.

3 Close the cassette holder gently.

4 Check the tape direction of deck B.

If the tape direction is not correct, press TAPE 2 3 twice then 7to change the tape direction.

5 Start playing the source — FM, AM, DVD player or auxiliary equipment connected to AUX IN jacks.

When you want to use the dubbing method, see “Dubbing Tapes” on page 33.

When the source is a disc, you can also use CD Synchronized Recording (see “CD Synchronized Recording” on page 33.)

6 Press REC START/STOP.

/STOP REC


REC START CD

The REC (recording) indicator lights up on the display and recording starts.

To stop during recording, press REC START/STOP again or 7.

To remove the cassette, press EJECT 0for deck B.

To record on both sides — Reverse Mode

Press REVERSE MODE so that the Reverse

Mode indicator lights up as —

When using the Reverse Mode for recording, start recording in the forward direction (3) first. Otherwise, recording will stop when recording is done only on one side (reverse) of the tape.

To cancel Reverse Mode, press the button again so that the Reverse Mode indicator lights up as —

– 32 –

Page 35
Image 35
JVC MX-DVA5 manual Recording a Tape on Deck B, To protect your recording, To record on both sides Reverse Mode

MX-DVA5 specifications

The JVC MX-DVA5 is a compact, high-performance mini system designed to deliver a powerful audio experience while maintaining a modern aesthetic. This system is a versatile solution for music enthusiasts who appreciate both style and functionality. Its primary features set it apart from other models in the market, making it a popular choice for home use and small gatherings.

One of the standout characteristics of the JVC MX-DVA5 is its robust sound quality. Equipped with dual stereo speakers, the system can produce a rich, dynamic sound that fills any space. The integrated amplifier ensures that the audio clarity is maintained at various volume levels, preventing distortion and enhancing overall listening pleasure.

The JVC MX-DVA5 boasts a variety of playback options to accommodate different user preferences. It features a CD player, allowing users to enjoy their favorite CDs with ease. In addition to traditional media, the system includes USB and AUX inputs, enabling users to connect their smartphones, tablets, or other devices for direct playback. This versatility ensures compatibility with modern digital formats while still honoring classic media.

Technologically, the JVC MX-DVA5 incorporates Bluetooth connectivity, allowing for seamless wireless streaming from smartphones or other Bluetooth-enabled devices. This feature is particularly beneficial for users who prefer to create playlists from their mobile devices without the need for cumbersome cables.

The system also includes FM radio capabilities, offering users access to a variety of radio stations for news, music, and entertainment. The built-in tuner allows for easy station navigation and preset options, making it convenient to access favorite channels.

Further enhancing user experience, the JVC MX-DVA5 is designed with an intuitive remote control, allowing for easy operation from a distance. The compact design does not compromise on power, making it an attractive addition to any room without taking up excessive space.

Overall, the JVC MX-DVA5 is a well-rounded mini audio system that combines modern technology with high-quality audio performance. Its main features, including robust sound output, versatile playback options, Bluetooth connectivity, and an appealing design, make it an attractive choice for anyone looking to elevate their audio experience in a compact form factor. Whether for casual listening or lively gatherings, the JVC MX-DVA5 delivers a satisfying audio solution.