Installation and Connection
Setting the switches
Remove the dome cover, followed by setting the video image switches.
1. Removing the dome cover
Remove the dome cover by unfastening the 3 fastening screws using the wrench supplied.
Memo:
●The dome cover and base are connected with fall prevention wire.
Wrench (Supplied)
Fall Prevention ![]()
Wire
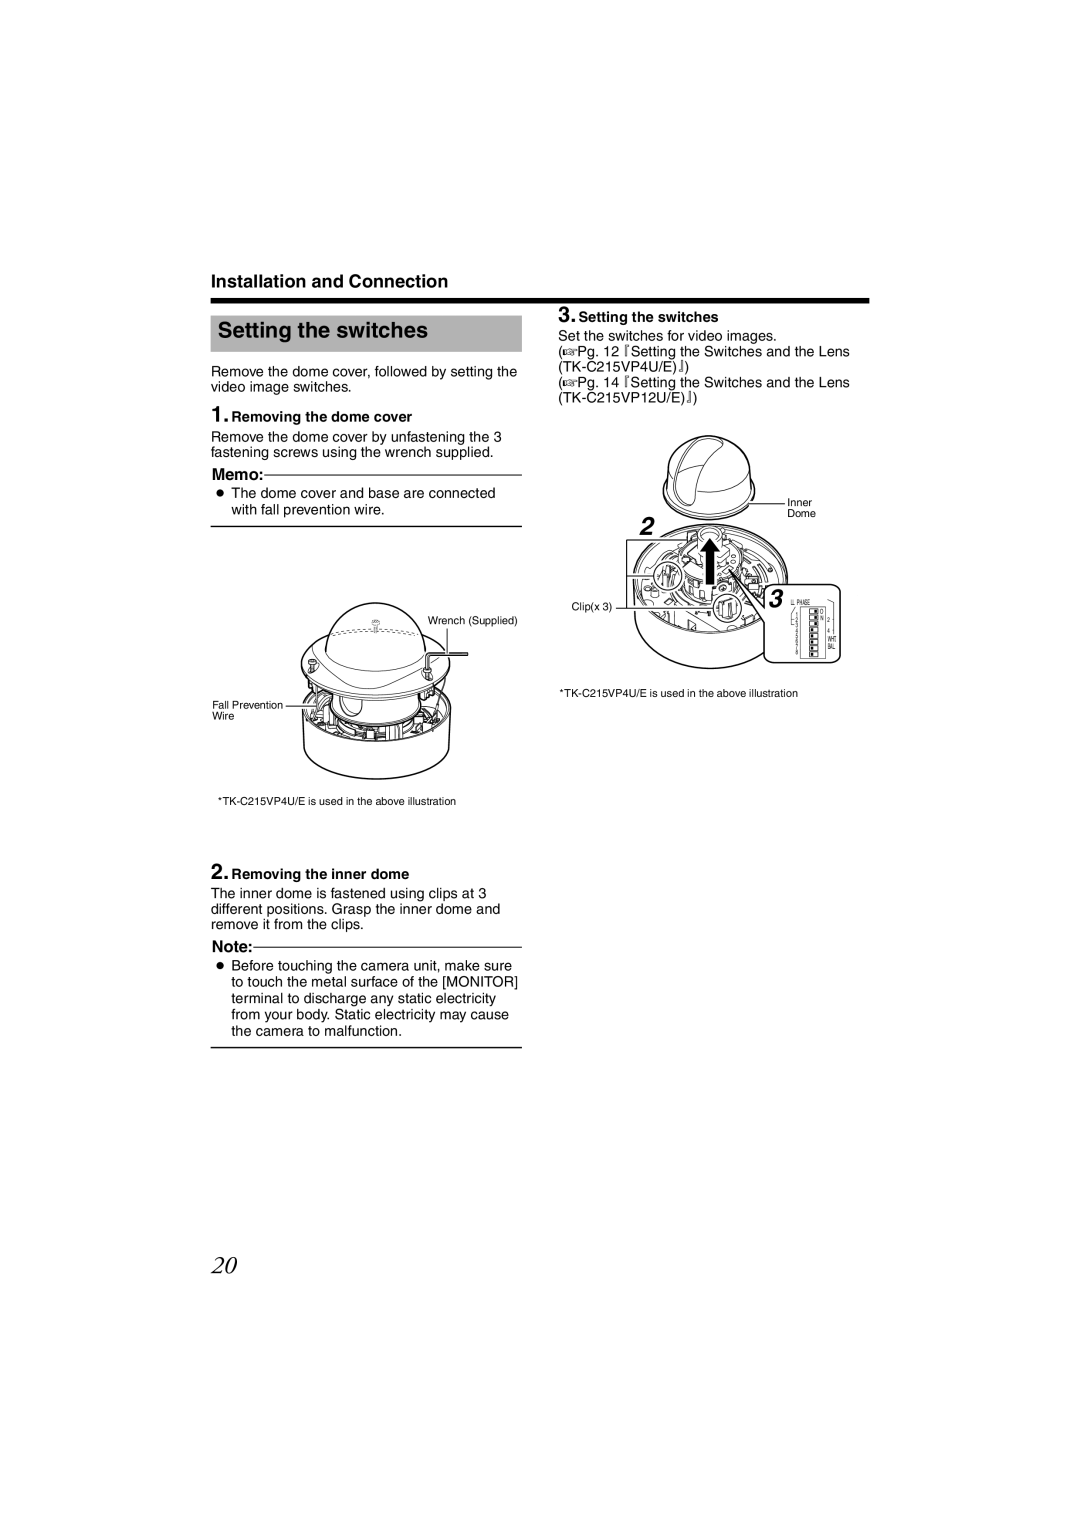
2. Removing the inner dome
The inner dome is fastened using clips at 3 different positions. Grasp the inner dome and remove it from the clips.
Note:
●Before touching the camera unit, make sure to touch the metal surface of the [MONITOR] terminal to discharge any static electricity from your body. Static electricity may cause the camera to malfunction.
3. Setting the switches
Set the switches for video images.
(APg. 12 eSetting the Switches and the Lens
(APg. 14 eSetting the Switches and the Lens
|
|
| Inner |
|
| 2 |
| Dome |
|
|
|
|
| |
Clip(x 3) |
| 3 | LL PHASE |
|
| 1 | O | ||
|
|
| N 2 | |
|
|
| 2 | |
|
|
| 3 | 4 |
|
|
| 4 | |
|
|
| 5 | WHT. |
|
|
| 6 | |
|
|
| 7 | BAL. |
|
|
| 8 |
|
20