Introduction
Setting the Switches and the Lens (TK-C215VP12U/E)
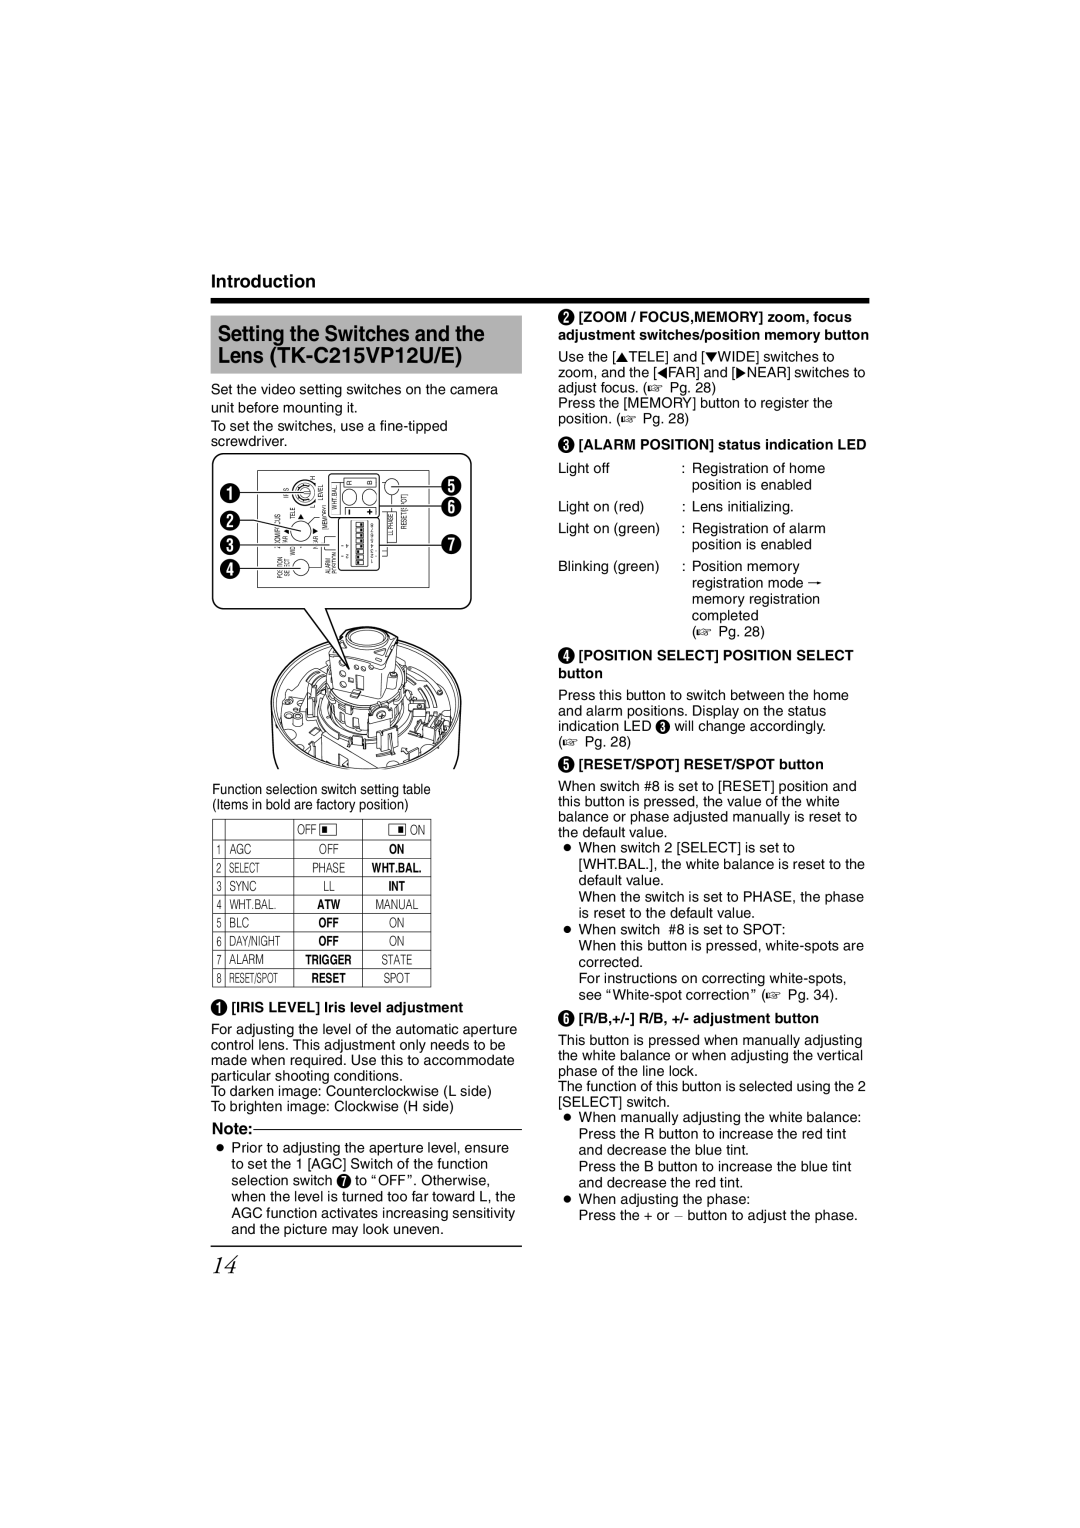
Set the video setting switches on the camera unit before mounting it.
To set the switches, use a
B [ZOOM / FOCUS,MEMORY] zoom, focus adjustment switches/position memory button
Use the [JTELE] and [KWIDE] switches to zoom, and the [HFAR] and [INEAR] switches to adjust focus. (A Pg. 28)
Press the [MEMORY] button to register the position. (A Pg. 28)
C [ALARM POSITION] status indication LED
A |
| |
B | ZOOM/FOCUS | |
C | ||
| ||
D | POSITION |
|
| H |
|
|
IRIS |
| LEVEL | WHT.BAL. | |
TELE | L | [MEMORY] | ||
FAR | WIDE | NEAR |
|
|
SELECT | ALARM | POSITION | ||
R | B |
| 8 |
| 7 |
| 6 |
| 5 |
4![]()
![]()
![]() 4
4
![]() 3
3
2![]()
![]()
![]() 2 1
2 1
PHASE | RESET/[SPOT] |
LL |
|
E F
G
Light off | : Registration of home |
| position is enabled |
Light on (red) | : Lens initializing. |
Light on (green) | : Registration of alarm |
| position is enabled |
Blinking (green) | : Position memory |
| registration mode N |
| memory registration |
| completed |
| (A Pg. 28) |
D [POSITION SELECT] POSITION SELECT button
Press this button to switch between the home and alarm positions. Display on the status indication LED C will change accordingly. (A Pg. 28)
E [RESET/SPOT] RESET/SPOT button
Function selection switch setting table (Items in bold are factory position)
|
| OFF | ON |
|
|
|
|
1 | AGC | OFF | ON |
2 | SELECT | PHASE | WHT.BAL. |
3 | SYNC | LL | INT |
4 | WHT.BAL. | ATW | MANUAL |
5 | BLC | OFF | ON |
6 | DAY/NIGHT | OFF | ON |
7 | ALARM | TRIGGER | STATE |
8 | RESET/SPOT | RESET | SPOT |
A [IRIS LEVEL] Iris level adjustment
For adjusting the level of the automatic aperture control lens. This adjustment only needs to be made when required. Use this to accommodate particular shooting conditions.
To darken image: Counterclockwise (L side)
To brighten image: Clockwise (H side)
Note:
●Prior to adjusting the aperture level, ensure
to set the 1 [AGC] Switch of the function selection switch G to AOFFB. Otherwise, when the level is turned too far toward L, the AGC function activates increasing sensitivity and the picture may look uneven.
When switch #8 is set to [RESET] position and this button is pressed, the value of the white balance or phase adjusted manually is reset to the default value.
●When switch 2 [SELECT] is set to [WHT.BAL.], the white balance is reset to the default value.
When the switch is set to PHASE, the phase is reset to the default value.
●When switch #8 is set to SPOT:
When this button is pressed,
For instructions on correcting
F[R/B,+/-] R/B, +/- adjustment button
This button is pressed when manually adjusting the white balance or when adjusting the vertical phase of the line lock.
The function of this button is selected using the 2 [SELECT] switch.
●When manually adjusting the white balance: Press the R button to increase the red tint and decrease the blue tint.
Press the B button to increase the blue tint and decrease the red tint.
●When adjusting the phase:
Press the + or - button to adjust the phase.
14