INSTALLATION
Ceiling Installation (Continued)
4.
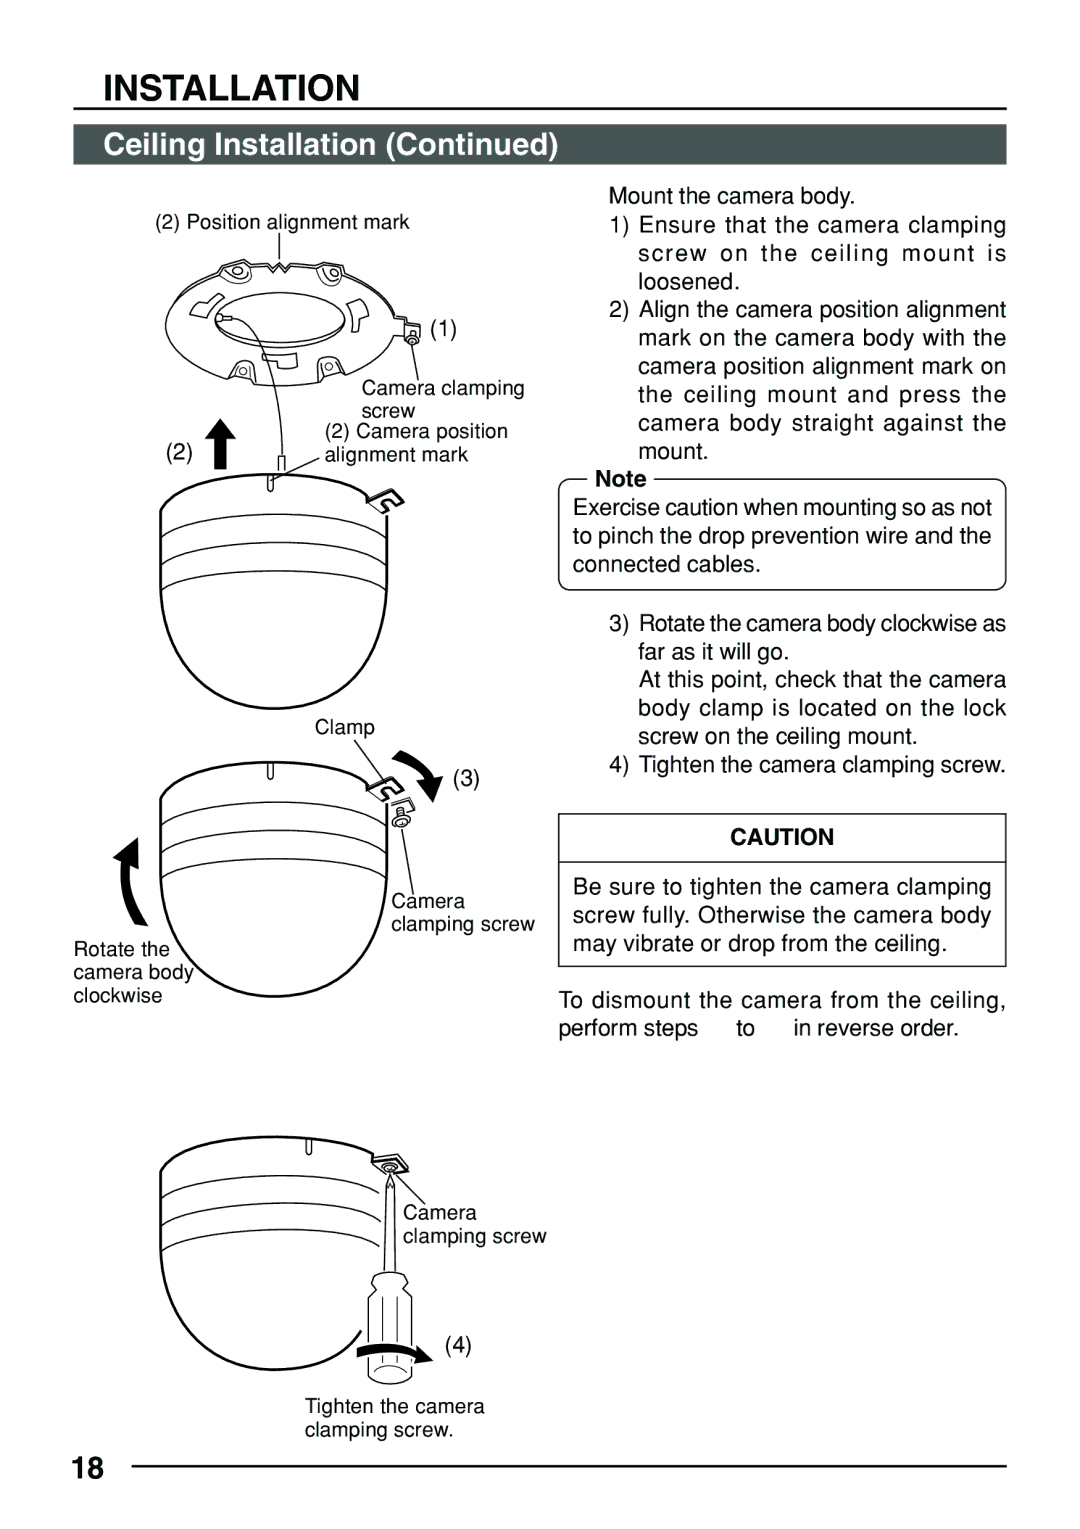
(2) Position alignment mark
(1)
Camera clamping screw
(2) Camera position
(2)alignment mark
Clamp
![]() (3)
(3)
Camera clamping screw
Rotate the camera body clockwise
4. Mount the camera body.
1)Ensure that the camera clamping screw on the ceiling mount is loosened.
2)Align the camera position alignment mark on the camera body with the camera position alignment mark on the ceiling mount and press the camera body straight against the
mount.
Note
Exercise caution when mounting so as not to pinch the drop prevention wire and the connected cables.
3)Rotate the camera body clockwise as far as it will go.
At this point, check that the camera body clamp is located on the lock screw on the ceiling mount.
4)Tighten the camera clamping screw.
CAUTION
Be sure to tighten the camera clamping screw fully. Otherwise the camera body may vibrate or drop from the ceiling.
To dismount the camera from the ceiling, perform steps 2. to 4. in reverse order.
Camera clamping screw
![]() (4)
(4)
Tighten the camera clamping screw.
18