To add track marks manually
1In the procedure above, set the automatic track setting to “AUTO TR OFF”.
2During recording, press the SET button to apply a track mark.
Notes
•Even if automatic track marking is turned off, automatic track marking will be performed during synchronized
•Tracks must be at least four seconds in length. Pressing the SET button less than four seconds after the previous track mark cre- ates a new track mark once 4 seconds of recording has been per- fomed.
Synchronized Recording of 3- CD Changer Playback
Performing synchronized one-button recording of a full CD
1 | 2 |
|
XL - R5000 CD/CDR MULTIPLE COMPACT DISC RECORDER | REC LEVEL | |
| MIN | MAX |
| MIX BALANCE | PHONES LEVEL |
|
| MULTI JOG |
STANDBY |
|
|
POWER | – | + |
|
| |
1 | 3 |
|
One button synchronized recording of CDs loaded in the
1 Select and stop the CD to be recorded.
Example: When recording CD1
• Only the selected CD is recorded.
2 Load a recordable
3 Press the CD REC button to start recording.
•After “DISC DUBBING” is displayed, CD play and CDR/CD- RW recording start simultaneously. This is called synchro recording. Recording starts from the first track of the CD.
Remaining play time of | Remaining recording time on | |||||||||||||||
track being recorded |
| |||||||||||||||
|
|
|
|
|
|
|
|
|
|
|
|
|
|
|
|
|
|
|
|
|
|
|
|
|
|
|
|
|
|
|
|
|
|
CD PLAYER 1 | 2 | 3 | 4 | 5 |
|
| SYNCHRO | |||||||||
6 | 7 | 8 | 9 | 10 | DIGITAL | REC HIGH SPEED AUTO TRACK | ||||||||||
CD REC 1CD |
|
|
|
| 44.1kHz | |||||||||||
|
|
|
| L– |
|
| 40 |
| 30 |
| 20 | 15 10 6 3 0 dB | ||||
|
|
|
|
|
|
| R |
|
|
|
|
|
|
|
|
|
|
|
|
|
|
|
|
|
|
|
| ||||||
•When a CD is recorded, its digital signals are recorded in their original form. A track mark is automatically placed where one track changes to the next, and the track number also changes.
When recording is complete
After “STOP DUBBING” is displayed, operation stops automati- cally. It also stops automatically when CD play finishes.
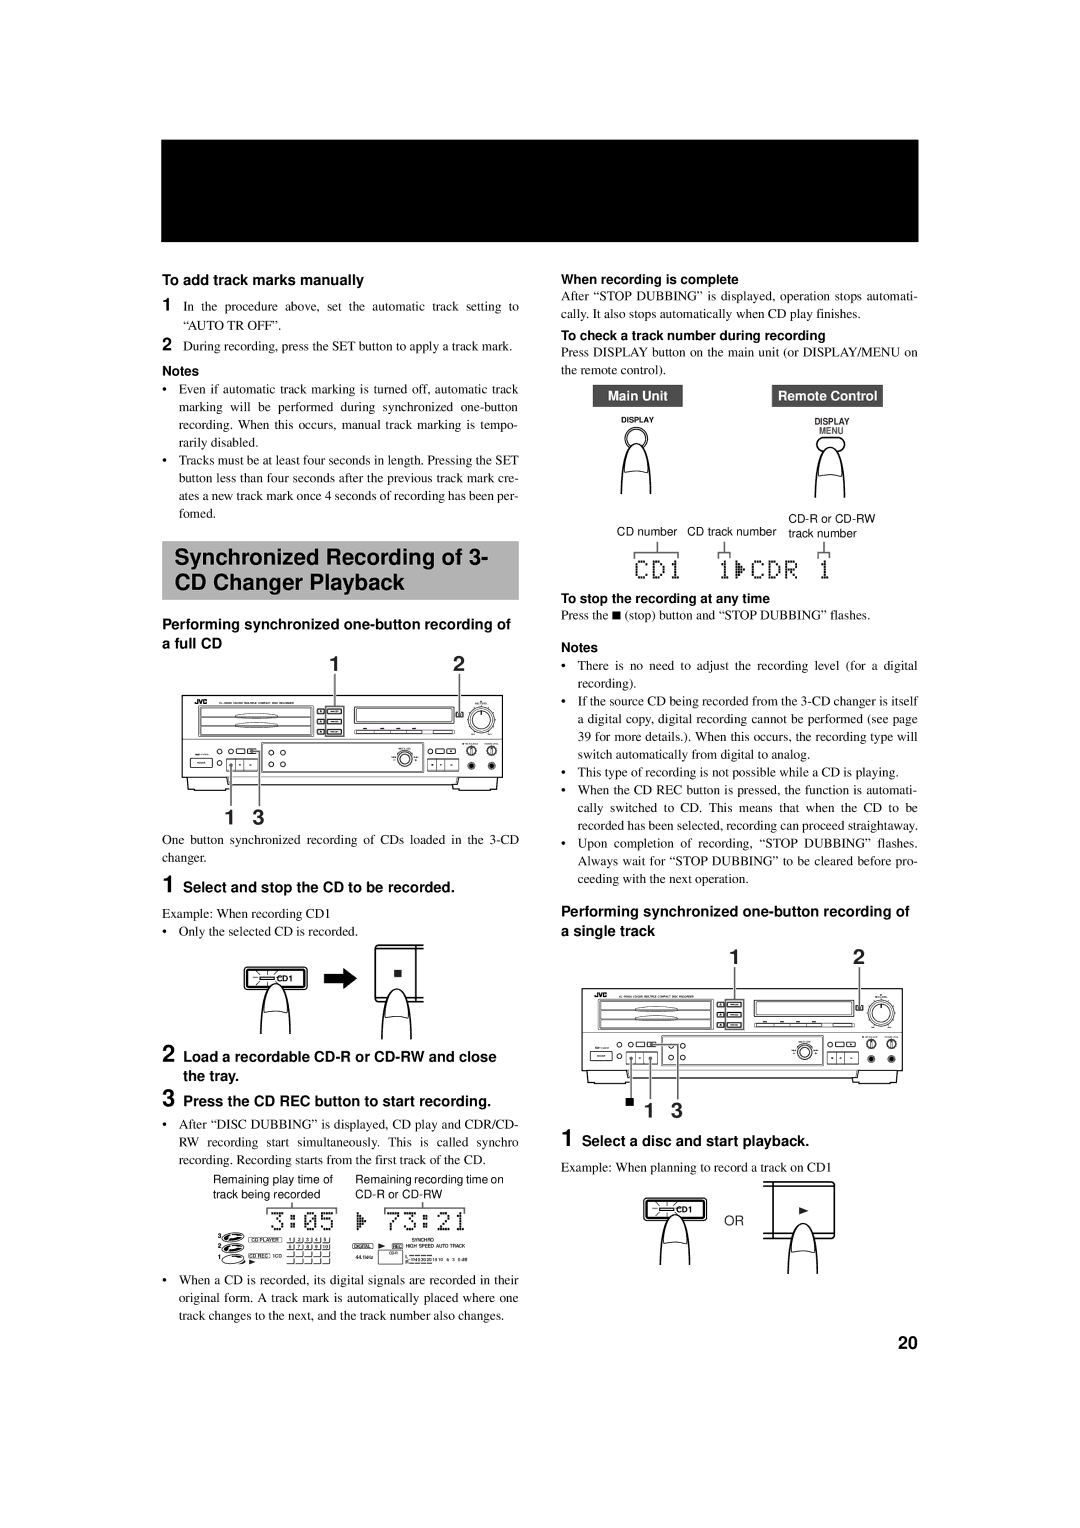
To check a track number during recording
Press DISPLAY button on the main unit (or DISPLAY/MENU on the remote control).
Main Unit |
| Remote Control |
DISPLAY | DISPLAY | |
|
| MENU |
CD number CD track number track number
To stop the recording at any time
Press the 7 (stop) button and “STOP DUBBING” flashes.
Notes
•There is no need to adjust the recording level (for a digital recording).
•If the source CD being recorded from the
•This type of recording is not possible while a CD is playing.
•When the CD REC button is pressed, the function is automati- cally switched to CD. This means that when the CD to be recorded has been selected, recording can proceed straightaway.
•Upon completion of recording, “STOP DUBBING” flashes. Always wait for “STOP DUBBING” to be cleared before pro- ceeding with the next operation.
Performing synchronized
1 | 2 |
|
XL - R5000 CD/CDR MULTIPLE COMPACT DISC RECORDER | REC LEVEL | |
| MIN | MAX |
| MIX BALANCE | PHONES LEVEL |
|
| MULTI JOG |
STANDBY |
|
|
POWER | – | + |
|
| |
7 1 | 3 |
|
1 Select a disc and start playback.
Example: When planning to record a track on CD1
OR
20