Moving a track (MOVE)
A track can be moved to the desired position by selecting its track number and the destination track number.
EDIT
OR
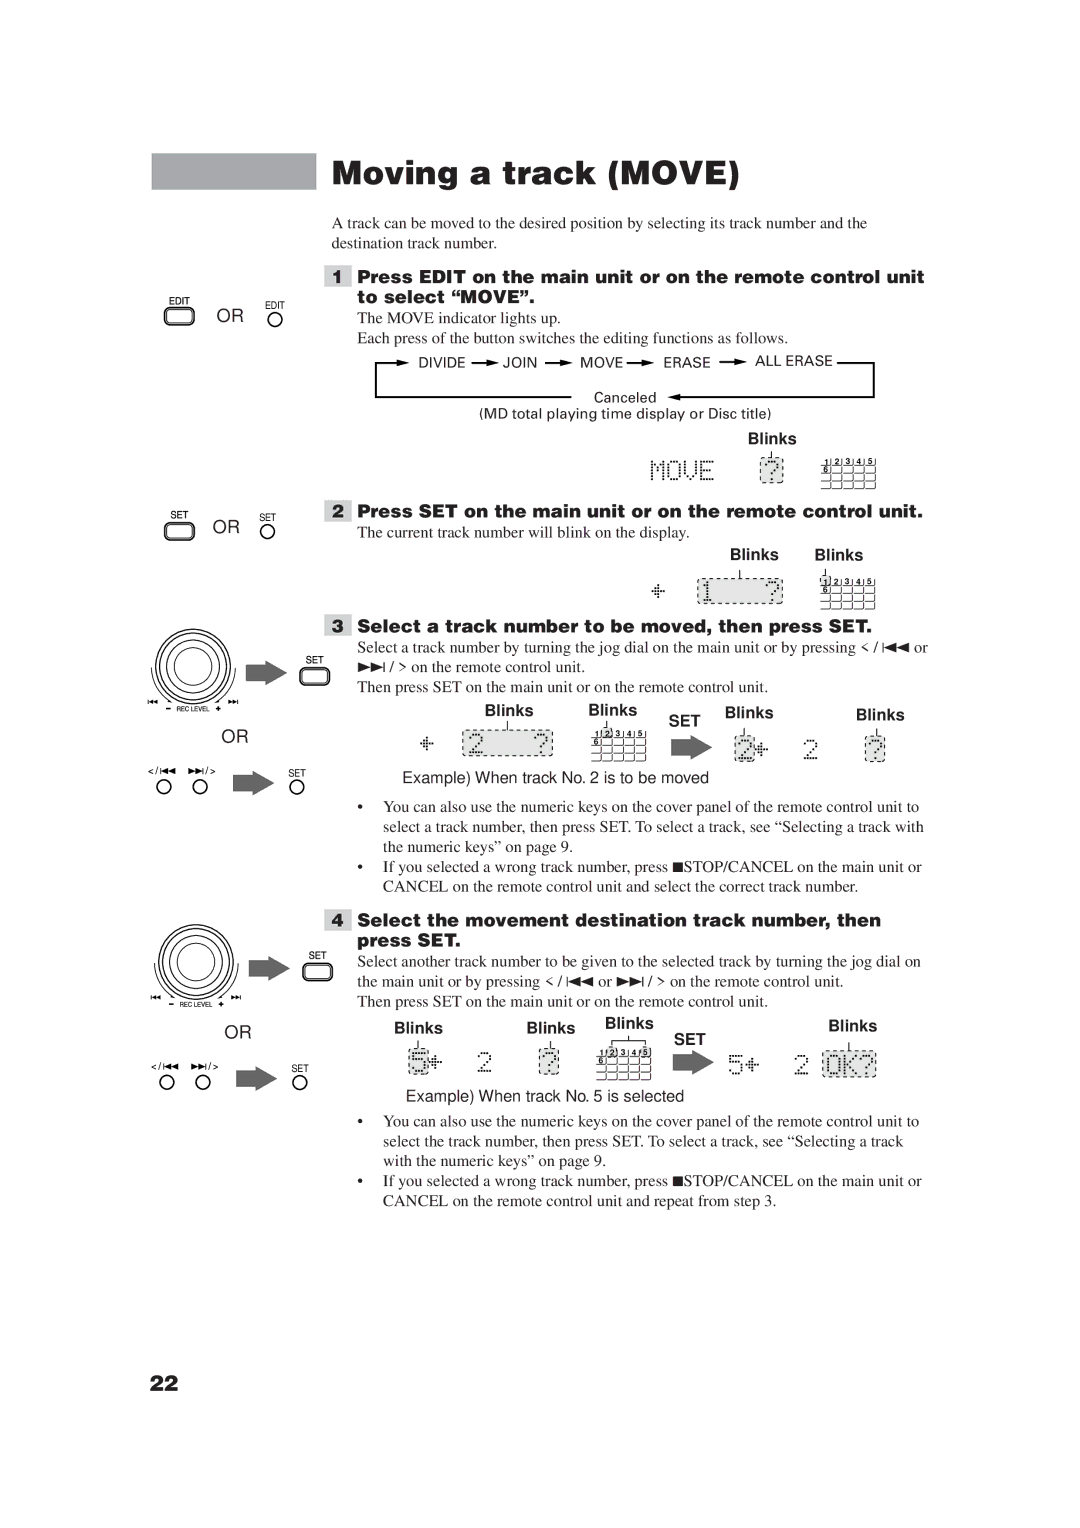
1Press EDIT on the main unit or on the remote control unit to select “MOVE”.
The MOVE indicator lights up.
Each press of the button switches the editing functions as follows.
![]() DIVIDE
DIVIDE ![]() JOIN
JOIN ![]() MOVE
MOVE ![]() ERASE
ERASE ![]() ALL ERASE
ALL ERASE
Canceled
(MD total playing time display or Disc title)
Blinks
1 2 3 4 5
6
OR
SET
2Press SET on the main unit or on the remote control unit.
The current track number will blink on the display.
Blinks Blinks
1 2 3 4 5
6
3Select a track number to be moved, then press SET.
Select a track number by turning the jog dial on the main unit or by pressing < / 4or ¢/ > on the remote control unit.
Then press SET on the main unit or on the remote control unit.
Blinks | Blinks | SET | Blinks | Blinks | |||
OR |
|
|
|
|
|
| |
1 | 2 | 3 | 4 | 5 |
|
| |
6 |
|
|
|
|
|
| |
SET
Example) When track No. 2 is to be moved
•You can also use the numeric keys on the cover panel of the remote control unit to select a track number, then press SET. To select a track, see “Selecting a track with the numeric keys” on page 9.
•If you selected a wrong track number, press 7STOP/CANCEL on the main unit or CANCEL on the remote control unit and select the correct track number.
4Select the movement destination track number, then press SET.
Select another track number to be given to the selected track by turning the jog dial on the main unit or by pressing < / 4 or ¢/ > on the remote control unit.
Then press SET on the main unit or on the remote control unit.
OR | Blinks | Blinks | Blinks | Blinks | |||
|
| 1 | 2 | 3 | 4 | 5 | SET |
|
|
| |||||
| SET | 6 |
|
|
|
|
|
|
|
|
|
|
|
| |
Example) When track No. 5 is selected
•You can also use the numeric keys on the cover panel of the remote control unit to select the track number, then press SET. To select a track, see “Selecting a track with the numeric keys” on page 9.
•If you selected a wrong track number, press 7STOP/CANCEL on the main unit or CANCEL on the remote control unit and repeat from step 3.
22