Connection to CD player or CD changer
Without connecting the receiver (or amplifier) equipped with the TEXT COMPU LINK remote control system, this connection enables you to record the track title information of the CD Text onto an MD in its original form, when recording from the CD player.
To use this control system, connect the units as follows:
1.If the CD player (or CD changer) and this unit have already been plugged into the AC outlets, disconnect their AC power cords.
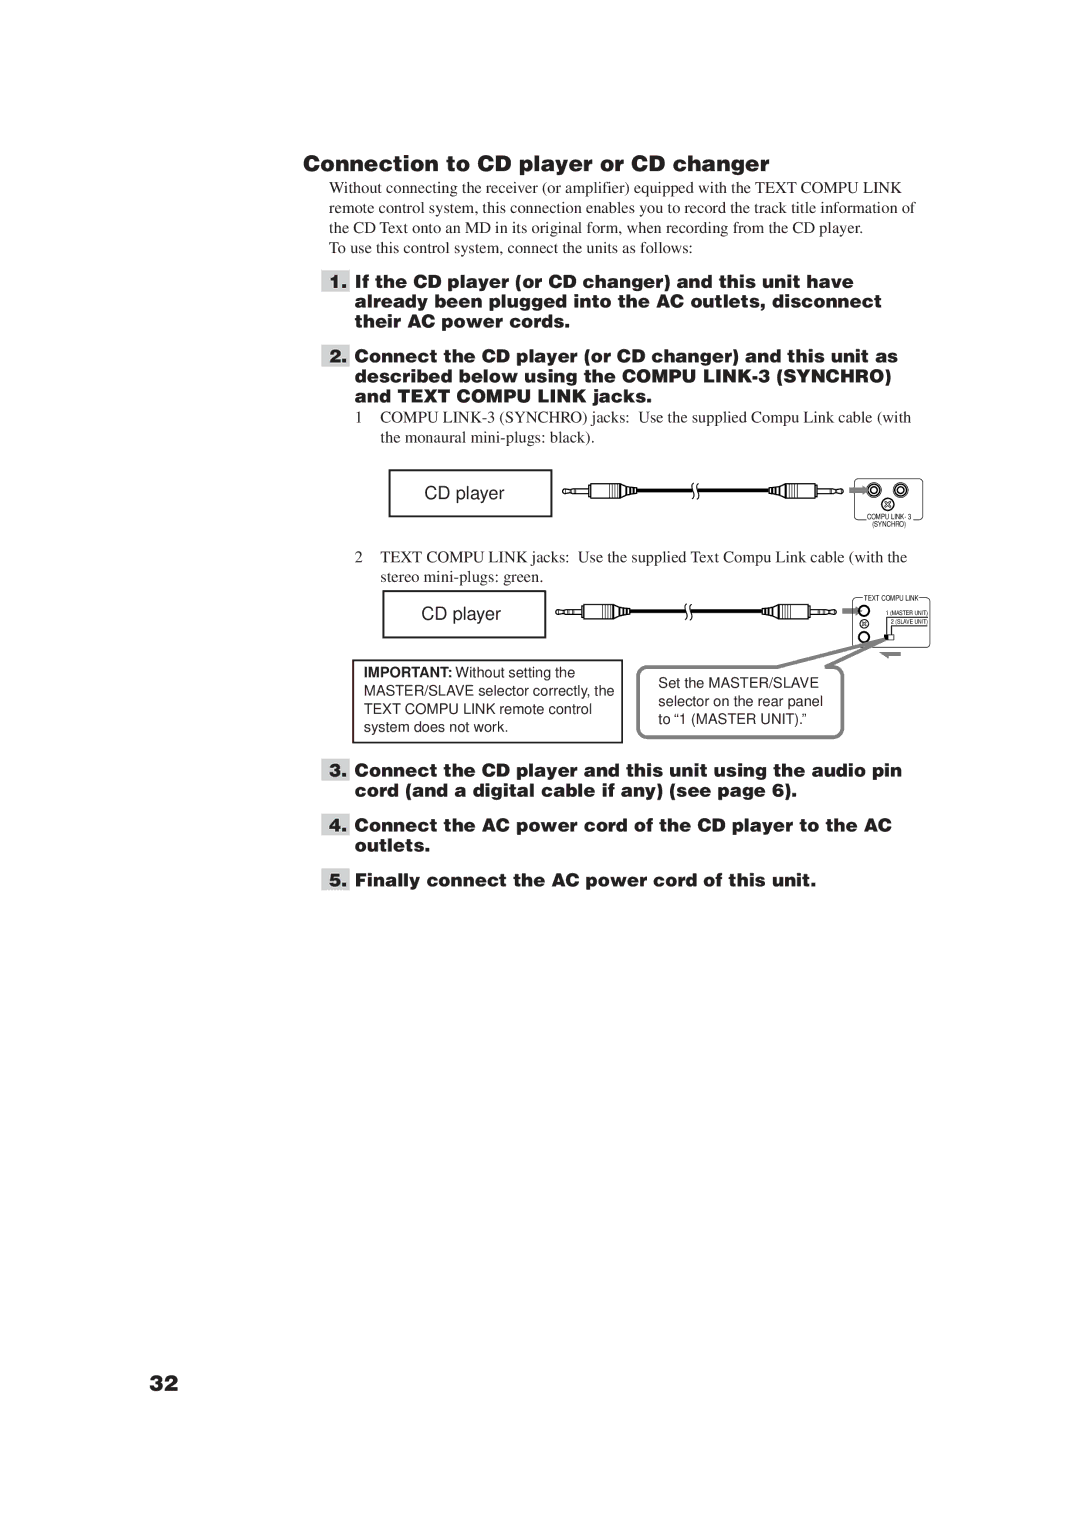
2.Connect the CD player (or CD changer) and this unit as described below using the COMPU
1COMPU
the monaural
CD player
COMPU LINK- 3
(SYNCHRO)
2TEXT COMPU LINK jacks: Use the supplied Text Compu Link cable (with the
stereo
CD player
TEXT COMPU LINK
1 (MASTER UNIT)
2 (SLAVE UNIT)
IMPORTANT: Without setting the
MASTER/SLAVE selector correctly, the
TEXT COMPU LINK remote control system does not work.
Set the MASTER/SLAVE
selector on the rear panel
to “1 (MASTER UNIT).”
3.Connect the CD player and this unit using the audio pin cord (and a digital cable if any) (see page 6).
4.Connect the AC power cord of the CD player to the AC outlets.
5.Finally connect the AC power cord of this unit.
32
